Yorkshire Puddings: The Ultimate Guide to a Great British Tradition
From its thrifty northern origins to a Sunday Roast staple, this is the definitive guide to making perfect, golden Yorkshire puddings every single time.
This post may contain affiliate links. If you make a purchase through these links, we may earn a commission at no additional cost to you.
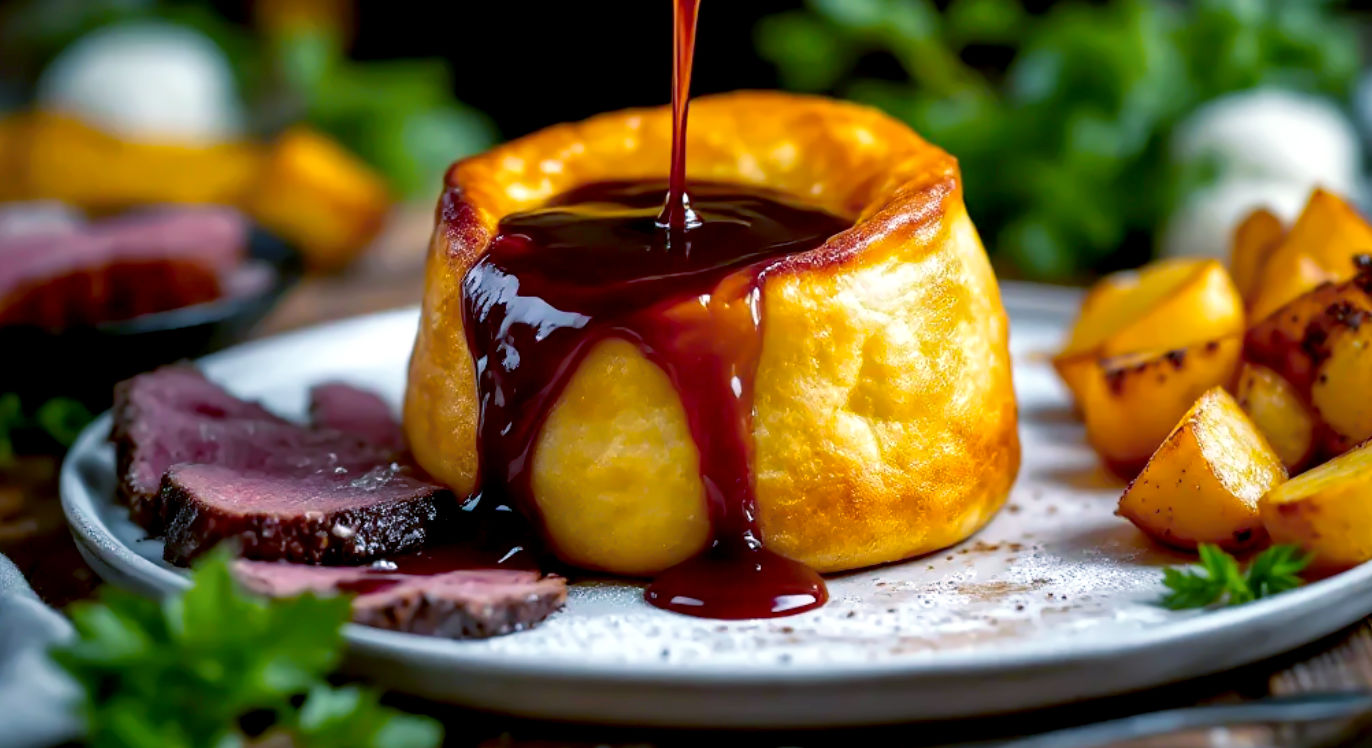
It’s the crown jewel of a Sunday roast. A golden, crisp, cloud-like marvel, sitting proudly next to the roast beef and crispy potatoes. For many in Britain, a Sunday lunch simply isn’t complete without it. We’re talking, of course, about the magnificent Yorkshire pudding.
But this isn’t just a simple side dish. It’s a piece of culinary history, a marvel of kitchen science, and a symbol of British comfort and tradition. It’s a food that sparks fierce debate: should it be served as a starter with gravy, or alongside the main course? Is it acceptable with a chicken roast? (The answer is yes, but some traditionalists might argue).
Getting it right is a badge of honour for any home cook. A perfectly risen, crisp-on-the-outside, soft-on-the-inside pudding is a thing of beauty. A flat, dense, or greasy failure can bring shame upon the entire Sunday meal.
So, let’s pull up a chair and dive into the wonderful world of the Yorkshire pudding. We’ll uncover its thrifty origins, understand the simple science that makes it rise, master a foolproof recipe, and settle a few debates along the way. This is the ultimate guide to one of Britain’s most beloved foods.
What Exactly Is a Yorkshire Pudding?
Before we get into the how-to, let’s cover the what. A Yorkshire pudding is made from a simple batter of three core ingredients: plain flour, eggs, and milk (or a mix of milk and water). That’s it. There’s no yeast or baking powder. All the magic comes from the cooking method.
The batter is poured into scorching hot fat (traditionally beef dripping) and baked at a very high temperature. This process creates a puff-pastry-like effect, where the batter rises dramatically, forming a hollow, cup-like shape with a crispy exterior and a soft, slightly custardy interior.
Not a Pudding, Not Just for Yorkshire
First things first, let’s clear up the name. In Britain, the word ‘pudding’ doesn’t just mean a sweet dessert like a sticky toffee pudding or a chocolate sponge. Historically, it referred to a range of dishes, both sweet and savoury, that were often boiled, steamed, or baked. Think of steak and kidney pudding or black pudding. These were originally savoury dishes, and the Yorkshire pudding falls firmly into that category.
And what about the ‘Yorkshire’ part? The dish does indeed come from the North of England, specifically Yorkshire. It was born out of the need to be resourceful and make food go further, a trait historically associated with the hardy folk of the region. While its fame has spread across the entire country and beyond, its name is a proud nod to its northern roots.
The Holy Trinity: Flour, Eggs, and Milk
The beauty of the Yorkshire pudding lies in its simplicity. You don’t need any fancy ingredients.
- Plain Flour: This is key. Self-raising flour is a definite no-no, as it will interfere with the unique way the pudding rises. Plain flour provides the starch and protein (gluten) needed to create the structure.
- Eggs: These are crucial for the rise and the structure. The protein in the eggs helps trap the steam that makes the pudding puff up, and the fat in the yolk adds richness and flavour.
- Milk & Water: Milk adds flavour and helps the pudding brown nicely. Some purists swear by using a mix of half milk and half water, claiming it creates a lighter, crispier result. The liquid turns to steam in the oven, and it’s this steam that is the pudding’s secret weapon.
A Bite of History: From Dripping Pans to Dinner Plates
The Yorkshire pudding wasn’t invented in a fancy restaurant by a celebrity chef. It was born in the humble kitchens of 18th-century Britain out of pure, simple necessity.
The Thrifty Genius of the North
Imagine a time before modern ovens. A family would cook its joint of beef on a spit over an open fire. As the meat roasted, its precious, flavourful fat would drip down into a pan below. To waste this liquid gold was unthinkable.
So, cooks in the north came up with a brilliant idea. They would whip up a simple batter of flour, eggs, and water and pour it into the dripping pan underneath the roasting meat. As it cooked, the batter would soak up all those wonderful meaty juices and puff up into a large, savoury pancake.
This ‘dripping pudding’ served a very important purpose. Meat was expensive, and families were often large and hungry. The pudding was served before the main meal, as a starter, usually with a good splash of gravy. The idea was to fill everyone up on the cheap-and-cheerful pudding, so they would eat less of the expensive meat that followed. It was a clever, delicious, and frugal solution.
Hannah Glasse Gives it a Name
The first recorded recipe for this dish appeared in a 1737 book called The Whole Duty of a Woman. But it was a cookbook author named Hannah Glasse who really put it on the map. In her hugely popular 1747 book, The Art of Cookery Made Plain and Easy, she included a recipe for ‘A Dripping Pudding’. In a later edition, she renamed it the ‘Yorkshire Pudding’, and the name stuck.
Her recipe is remarkably similar to the one we use today, showing just how timeless this dish is. She instructed cooks to place a pan of batter under a shoulder of mutton to catch the drippings, highlighting its role as a partner to roasted meat from the very beginning.
From Starter to Staple
Over time, as ovens became common household items and food became less scarce, the role of the Yorkshire pudding began to change. People started making individual puddings in smaller tins rather than one large one in a dripping pan.
It also moved on the plate. Instead of being a starter, it became a key part of the main event: the Sunday Roast. The tradition of a large family meal on a Sunday became a cornerstone of British culture in the 19th century, and the Yorkshire pudding earned its rightful place alongside the roast beef, crispy potatoes, vegetables, and rich gravy. It was no longer just a filler; it was an essential and much-loved part of the feast.
The Magic and Science of the Rise
Ever wondered how a flat, liquid batter transforms into a magnificent, puffy creation without any raising agents? It’s not magic; it’s a brilliant bit of kitchen science. Understanding it is the key to getting perfect puddings every time.
Think of it as a three-stage mission. Each stage is just as important as the last.
Stage 1: The Batter – Building a Stretchy Net
When you mix flour with liquid and whisk it, you develop gluten. Gluten is a protein that’s super stretchy. For your puddings to rise, you need to create a strong, stretchy gluten network in your batter.
- Simplified Explanation: Imagine you’re making a net out of elastic bands. The better you weave it, the stronger it will be. Whisking the batter develops this gluten ‘net’. When you let the batter rest, it allows the flour to fully absorb all the liquid, making the net even stronger and more flexible. This net is what will trap the steam later on.
Stage 2: The Hot Fat – The Shock and Awe Tactic
This is probably the most important step of all. The fat in your pudding tin has to be screaming hot. We’re talking about putting it in the oven for a good 10-15 minutes until it’s shimmering and almost smoking.
- Simplified Explanation: When you pour the cool batter into the sizzling hot fat, it’s a shock tactic. The intense heat immediately starts cooking the outside of the batter, creating a solid case. It also gives the batter a powerful, instant blast of heat from below, which is vital for the next stage.
Stage 3: The Oven’s Roar – Steam Power!
Now for the grand finale. Once in the blisteringly hot oven, the liquid (milk and water) in the batter quickly turns into steam. This is where the magic happens.
- Simplified Explanation: The steam needs to escape. But it’s trapped inside the cooked outer case and by that stretchy gluten net you made earlier. The steam pushes and pushes from the inside, forcing the gluten net to stretch upwards like a balloon. The batter puffs up higher and higher until the heat of the oven cooks the stretched walls solid. The result? A beautifully risen, hollow Yorkshire pudding.
The Science Bit: A Closer Look
For those who want a bit more detail, here’s what’s going on. The process is a form of steam leavening. The high heat causes the water in the batter to rapidly convert to steam, which expands to over 1,000 times its original volume. This expansion provides the lifting power. The egg proteins and flour starches set around these steam bubbles, creating the pudding’s structure. The hot fat helps by conducting heat quickly to the batter, jump-starting the steam production and crisping up the base and sides through the Maillard reaction, which is what gives the pudding its delicious brown colour and roasted flavour.
Crafting the Perfect Yorkshire Pudding: A Foolproof Guide
Forget complicated recipes and fancy techniques. The best Yorkshire puddings come from a simple recipe, followed with care.
The Golden Ratio: The Only Recipe You’ll Ever Need
The easiest way to remember the recipe is by volume, not weight. It’s a simple 1:1:1 ratio.
Use a mug, a cup, or a jug. It doesn’t matter what you use, as long as you use the same measure for all three ingredients.
- 1 measure of Plain Flour
- 1 measure of Eggs
- 1 measure of Milk (or half milk, half water for a crispier finish)
- A pinch of salt
This recipe is scalable. If you need more puddings, use a bigger mug. If you need fewer, use a smaller one. It’s that simple.
Your Toolkit: What You’ll Need
- A measuring jug or mug
- A mixing bowl
- A whisk (a hand whisk is perfectly fine)
- A 4-hole Yorkshire pudding tin or a 12-hole muffin tin
- Fat for cooking: Beef dripping is the traditional choice and gives the best flavour. Lard or a neutral vegetable oil (like sunflower or rapeseed oil) also work very well. Don’t use olive oil or butter, as they can’t get hot enough without burning.
Step-by-Step Instructions
- Make the Batter (and let it rest):
- Put the flour and a pinch of salt into the bowl. Make a well in the centre.
- Crack the eggs into the well. Start whisking the eggs, gradually pulling the flour in from the sides until you have a very thick, smooth paste. This helps prevent lumps.
- Now, slowly add the milk a little at a time, whisking constantly until you have a smooth batter with the consistency of single cream.
- Crucially, let the batter rest. Cover it and leave it on the kitchen counter for at least 30 minutes, or up to a few hours. You can even make it in the morning and leave it in the fridge until you need it (just let it come back to room temperature before using).
- Preheat Everything:
- About 20 minutes before you’re ready to cook, turn your oven up high – 220°C (200°C Fan).
- Put about half a centimetre of your chosen fat into each hole of your pudding tin.
- Place the tin in the oven on a high shelf and let the fat get seriously hot. This will take about 15 minutes. It needs to be shimmering.
- The Big Moment:
- Give your rested batter one last quick whisk.
- Carefully take the hot tin out of the oven. Be quick and confident.
- Working swiftly, pour the batter evenly into the hot fat in each hole. It should sizzle and bubble as soon as it hits the pan.
- Immediately put the tin back into the oven.
- Bake and Don’t Peek!
- Bake for 15-20 minutes for a muffin-tin size, or 20-25 minutes for larger puddings.
- Do not open the oven door for at least the first 15 minutes. Opening the door lets cold air in, which will make your puddings deflate.
- They are ready when they are tall, golden brown, and crisp. Serve them immediately while they’re still puffy and proud.
The Yorkshire Pudding Hall of Shame: Troubleshooting
Sometimes, things go wrong. Don’t worry, it happens to the best of us. Here’s a guide to diagnosing your pudding problems.
The Disaster: They Didn’t Rise (or they look like flat pancakes)
This is the most common and heartbreaking failure. The likely culprits are:
- The fat wasn’t hot enough. This is the number one reason for failure. Your fat needs to be sizzling.
- The oven wasn’t hot enough. A hot oven is essential for that blast of heat that creates the steam.
- You opened the oven door too early. This is the cardinal sin of Yorkshire pudding making. Let them be!
- Your batter was too thick. It should be the consistency of single cream. If it’s too thick, add a splash more milk or water.
The Problem: They’re Stodgy and Dense
This usually means the batter didn’t get a chance to cook through properly and the rise was weak.
- You didn’t rest the batter. Resting allows the gluten to relax and the starch to swell, leading to a lighter texture.
- Cold batter in hot fat. Some people swear by using fridge-cold batter, but room temperature batter is more reliable. The shock between the cool batter and hot fat is what matters most.
- Too much batter in the tin. Don’t overfill the holes. Halfway up is plenty.
The Issue: They’re Burnt on Top but Raw Inside
This is a classic oven problem.
- Your oven temperature is too high, or the tin is too close to the top. Every oven has its quirks. Your oven might be running hotter than the dial says. Try moving the tin to a middle shelf or turning the temperature down by 10 degrees for the last 5-10 minutes of cooking.
More Than Just a Side Dish: The Pudding’s Many Faces
While its most famous role is as a sidekick to roast beef, the Yorkshire pudding is a surprisingly versatile character.
The Main Event: The Giant Yorkshire Pudding
A popular pub classic across Britain is the giant Yorkshire pudding, served as a main course. A large, plate-sized pudding is baked and then filled with delicious things like sausage and mash, steak and ale stew, or chilli con carne. It’s the ultimate comfort food bowl.
A British Classic: Toad in the Hole
This brilliantly named dish is another British institution. It’s essentially a large Yorkshire pudding with sausages baked into it. The batter puffs up around the sausages, creating a hearty, satisfying, and budget-friendly meal, usually served with onion gravy and greens. Its name is a bit of a mystery, but some say the sausages peeking out of the batter look a bit like toads poking their heads out of a hole.
A Sweet Surprise? Yorkshires for Afters
It might sound odd, but think about it: the batter is the same as for pancakes or crêpes. In many parts of Yorkshire and the North, it’s not uncommon to eat leftover puddings as a dessert, sprinkled with sugar, or served with jam or golden syrup. Don’t knock it until you’ve tried it!
The Great Debate: How and When to Eat Them
Ask a group of Brits how Yorkshire puddings should be served, and you’re likely to start a lively discussion.
With Gravy, Before the Meal? The Traditionalist’s View
As we learned from its history, the original way to eat Yorkshire pudding was as a separate starter, drowned in gravy. This is how many people in Yorkshire and other parts of the North still enjoy it. They argue it’s the proper, historical way, and it prepares the palate for the meat to come.
Alongside the Roast? The Modern Standard
For most of the country, however, the pudding belongs on the main plate, right alongside everything else. It’s perfect for soaking up gravy and combining with a bit of beef and a roast potato in one perfect bite. This has become the standard way it’s served in homes, pubs, and restaurants across the UK.
There is no right or wrong answer, of course. The best way to eat it is whichever way you enjoy it most.
Yorkshire Puddings in Modern Britain
In our fast-paced world, does this old-fashioned dish still have a place? The answer is a resounding yes.
The Aunt Bessie’s Effect: Convenience vs. Homemade
Walk down the freezer aisle of any British supermarket, and you’ll see bags and bags of frozen Yorkshire puddings, with the brand Aunt Bessie’s leading the way. They are incredibly popular, offering a quick and convenient way to have Yorkshires on the table in just four minutes.
While some food purists might scoff, the popularity of frozen puddings shows just how much the nation loves them. For many busy families, they are a godsend. But there’s no denying that nothing can truly beat the flavour, texture, and satisfaction of a homemade Yorkshire pudding, fresh from the oven.
The Future of a Classic
The Yorkshire pudding continues to evolve. Chefs create gourmet versions with herbs or mustard in the batter. Food bloggers come up with new and interesting fillings for giant Yorkshires. But at its heart, the classic, simple pudding remains unchanged.
It has survived for nearly 300 years because it is simple, delicious, and deeply comforting. It represents the best of British cooking: taking a few basic, humble ingredients and, with a bit of know-how, turning them into something truly special.
Conclusion: More Than Just Batter
The Yorkshire pudding is so much more than the sum of its parts. It’s a taste of history, a lesson in kitchen science, and a link to generations of family meals. It’s the crunch of the crispy edges, the soft, steamy centre, and the perfect vessel for a flood of rich, meaty gravy.
Whether you’re a seasoned pro or a nervous first-timer, making your own is one of the most rewarding things you can do in the kitchen. So next Sunday, get your fat sizzling, whisk up that simple batter, and raise a glass (of gravy) to the glorious, the triumphant, the one-and-only Yorkshire Pudding.