The Guide to Raised Bed Gardening in the UK: Small Space, Big Rewards
Your complete guide to raised bed gardening in Britain. Learn how to build, what soil to use, the best plants for the UK climate, and how to get big rewards from a small space.

This post may contain affiliate links. If you make a purchase through these links, we may earn a commission at no additional cost to you.
Right then, let’s talk about gardening. For so many of us in Britain, the dream is a sprawling country garden, a perfect lawn, and borders bursting with prize-winning roses. The reality? A postage-stamp-sized patch behind a terraced house, a concrete-heavy new-build garden, or a balcony with a bit of afternoon sun. Often, the soil we’re blessed with is either heavy, sticky clay that’s a nightmare to dig, or thin, stony stuff that struggles to grow anything but weeds.
It’s enough to make you want to hang up your trowel and stick to shop-bought salads. But what if there was a better way? A way to create a perfect, productive, and beautiful growing space, no matter the size of your garden or the quality of your soil?
Enter the raised bed.


You’ve probably seen them about: smart-looking timber boxes, brimming with lush lettuces and healthy-looking tomato plants, often in gardens that otherwise look quite challenging. They’re not just a passing trend; they’re a brilliantly simple solution to some of the biggest headaches in British gardening. They put you, the gardener, back in control.
This isn’t just a guide on how to knock a few planks together. This is the ultimate resource for understanding, planning, building, and succeeding with raised bed gardening in the UK. We’ll cover everything from the soil science that makes them tick to the best slug-busting tactics for our damp climate. Whether you’re a complete beginner who doesn’t know a dibber from a trowel or a seasoned gardener looking to make life a bit easier, you’re in the right place.
So, is it really possible to get big rewards from a small space? Let’s dig in and find out.
What Exactly Is a Raised Bed? The Bottomless Box of Dreams
Before we get carried away, let’s get the definition sorted. At its heart, a raised bed is simply a garden bed that sits on top of your existing ground, contained within a frame. Think of it as a large, bottomless box that you fill with the perfect soil mix for growing plants.
The frame can be made from all sorts of things—timber, recycled plastic, corrugated metal, or even bricks. The key thing is that it has no base. The roots of your plants can still travel down into the ground below if they want to, and important creatures like earthworms can travel up into your lovely new soil.
This is different from a container or a planter, which has a solid bottom. While containers are brilliant for patios and balconies, a raised bed is a proper, permanent part of the garden. It combines the neatness and control of a container with the freedom of planting in the ground. It’s the best of both worlds.
The Big Question: Why Bother with a Raised Bed?
Building a structure and filling it with soil sounds like a bit of a faff, doesn’t it? Why not just dig a patch in the ground? Well, the benefits of making that extra effort are huge, especially for us here in the UK.

1. You’re the Boss of the Soil
This is the number one reason to get on board. Most garden soil is a lottery. You might have heavy clay that holds water like a sponge, chalky soil that drains in a flash, or acidic soil where only certain plants will thrive. With a raised bed, you bypass your garden’s native soil entirely. You get to create the perfect growing medium from scratch—a light, fluffy, nutrient-rich mix that your plants will absolutely love. This means you can grow carrots in clay soil areas or blueberries in an alkaline garden. It’s a complete game-changer.
2. Superb Drainage for Our Drizzly Climate
If there’s one thing British gardens have in abundance, it’s rain. In a normal garden bed, heavy rain can lead to waterlogged soil, which suffocates plant roots and encourages rot. Because a raised bed is elevated, excess water drains away much more quickly. This prevents your plants from getting “wet feet” and is particularly brilliant for growing root vegetables like carrots and parsnips, which hate sitting in soggy soil.
3. Warmer Soil for a Head Start
The soil in a raised bed is not only better drained, but it also warms up faster in the spring. Because it’s lifted off the cold ground, the sun can warm it from the sides as well as the top. This means you can often start planting a couple of weeks earlier than your neighbours who are gardening in the ground. In our short and unpredictable growing season, that’s a massive advantage.
4. Fewer Weeds (Yes, Really!)
Because you’re filling the bed with fresh, clean soil and compost, you start with a virtually weed-free environment. And because the growing area is contained, it’s much harder for grass and weeds from surrounding paths to creep in. The few that do appear are easy to spot and pull out from the loose, friable soil. You’ll spend far less time on your hands and knees weeding and more time harvesting.
5. A Back-Friendly Way to Garden
Gardening can be tough on the body. All that bending, kneeling, and digging can take its toll on your back and knees. A raised bed, especially a taller one (say, 40-50cm high), brings the garden up to you. It drastically reduces the amount of bending required, making it a fantastic option for older gardeners, those with mobility issues, or anyone who’d rather not spend their Sunday evening nursing an aching back.
6. It Just Looks Tidy
Let’s be honest, raised beds look smart. They bring a sense of structure and order to a garden, especially a small one. They create clear, defined edges between your growing areas and your paths. This can turn a messy, unloved corner into a productive and attractive kitchen garden. You can design them in shapes and sizes that perfectly fit your space, creating a garden that is both functional and beautiful.
Planning Your Perfect Patch: Measure Twice, Build Once
Before you rush off to the timber merchant, a bit of careful planning will save you a world of trouble later on. Getting the basics right now is the key to a successful raised bed.
Step 1: Location, Location, Location
This is the most critical decision you’ll make. Most vegetables and fruit need a lot of sunlight to thrive—ideally, at least six hours of direct sun a day during the growing season.
- Action: Spend a day watching your garden. Note which spots get the morning sun, which are sunny at midday, and which catch the evening rays. Look out for shadows cast by trees, fences, or your house. The sunniest, most open spot is your prime real-estate.
- UK Tip: Don’t underestimate the power of a south-facing spot. It will get the most sun and warmth throughout the day, which is a huge bonus in our often-cloudy climate.
Step 2: Getting the Size Right
Bigger isn’t always better. The golden rule of raised bed design is this: you should be able to reach the middle of the bed comfortably from the side without stepping on the soil.
- Width: The ideal maximum width is about 1.2 metres (4 feet). This allows you to reach the centre from either side. If the bed is against a wall or fence, make it no wider than 60-75cm (2 to 2.5 feet).
- Length: The length can be whatever you want it to be. Make it fit your space. 2.4 metres (8 feet) is a common and manageable length.
- Height (Depth): This depends on what you want to grow and how much you want to bend.
- 15-20cm (6-8 inches): Fine for shallow-rooted crops like lettuce, spinach, and radishes.
- 30cm (12 inches): A great all-purpose depth. It’s deep enough for most vegetables, including root veg like carrots and potatoes.
- 40cm+ (16+ inches): Ideal for deep-rooted plants and brilliant for accessibility. A taller bed means less bending.
Step 3: Choosing Your Materials
The frame is what holds it all together. You’ve got a few options, each with its pros and cons.
Timber: The Classic Choice
Wood is the most popular material for a reason. It’s natural, relatively inexpensive, and easy to work with.
- Pros: Looks great, insulates the soil well, versatile.
- Cons: It will eventually rot. The lifespan depends on the type of wood.
- Best Bets for the UK:
- Untreated Larch or Oak: These are naturally rot-resistant hardwoods. They’re more expensive but will last for a decade or more.
- Treated Softwood (Pine/Spruce): The most common and affordable option. Look for wood that has been pressure-treated (often called ‘tanalised’). Modern treatments are certified safe for organic growing, but check the label to be sure. It should last a good 5-8 years.
- Avoid: Old railway sleepers. They look beautifully rustic, but many older ones were treated with a toxic substance called creosote, which can leach into your soil and your veg. It’s not worth the risk.
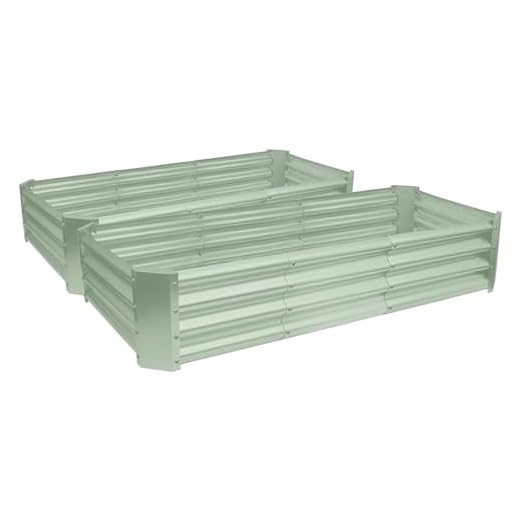
Corrugated Metal: The Modern Look
Galvanised steel beds are becoming very popular. They look sleek and contemporary and last for ages.
- Pros: Extremely durable (will last for decades), won’t rot or be eaten by pests, quick to assemble from kits.
- Cons: Can be more expensive upfront. Some people worry about them getting too hot in summer, but once filled with soil, this is rarely an issue in the UK climate.
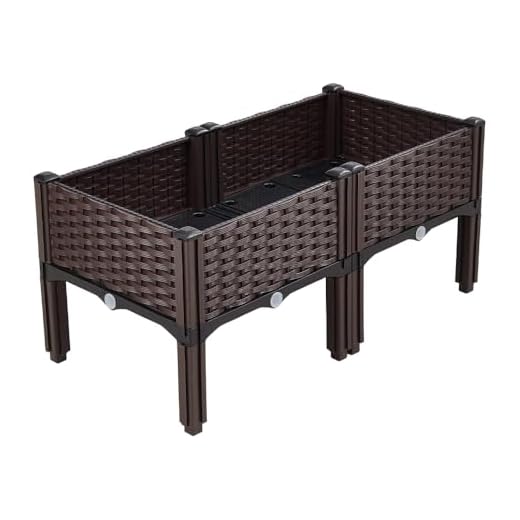
Recycled Plastic: The Tough Cookie
Made from recycled plastic lumber, these are a sustainable and long-lasting option.
- Pros: Lasts a lifetime, completely rot-proof and maintenance-free, uses up waste plastic.
- Cons: Can be pricey, and the look might not appeal to everyone.
Brick or Stone: The Permanent Feature
If you’re looking for a permanent, structural feature, building a bed from bricks or concrete blocks is a great option.
- Pros: Incredibly durable and robust, excellent thermal mass (holds warmth).
- Cons: Expensive, requires some building skill (or hiring a builder), and it’s a permanent decision!
The Build: Assembling Your Raised Bed
If you’ve bought a kit, simply follow the instructions. If you’re making a simple timber frame yourself, it’s a straightforward DIY job. Here’s a basic plan for a 2.4m x 1.2m x 0.3m bed.

You’ll Need:
- Two 2.4m lengths of 30cm x 5cm timber.
- Two 1.2m lengths of 30cm x 5cm timber (or get a 2.4m length and cut it in half).
- Wooden stakes for the corners (about 45cm long).
- A drill and exterior-grade screws.
The Simple Steps:
- Prepare the Ground: Clear the chosen spot of any weeds or large stones. You can mow the grass very short or strip the turf, but you don’t have to.
- Lay Out the Frame: Place your timber planks on the ground in a rectangle.
- Fix the Corners: This is the most important bit. You want strong corners that won’t bow outwards under the weight of the soil. The easiest way is to screw the planks together to form the rectangle, then hammer a wooden stake into the ground on the inside of each corner and screw the frame to the stakes. This provides excellent support.
- Check for Level: Use a spirit level to make sure the frame is reasonably level. It doesn’t have to be perfect, but a level bed will water more evenly.
The Secret Sauce: How to Fill Your Raised Bed
This is where the magic happens. What you put inside your raised bed will determine its success for years to come. Do not just fill it with bags of multi-purpose compost! That will be a soggy, expensive disaster. You need a balanced mix that holds moisture, provides nutrients, and allows for good drainage.
We’re going to use a layering method, often called the ‘garden lasagne’. It’s cheap, effective, and brilliant for the soil.
Layer 1: The Cardboard Foundation
- What: Plain brown cardboard boxes (remove any plastic tape).
- Why: This is a crucial first step. It acts as a weed barrier, smothering any grass or weeds underneath. It also provides a slow-release source of carbon for the soil and encourages worms to move in.
- How: Lay a thick layer of overlapping cardboard directly onto the ground inside your frame. Give it a good watering to help it start breaking down.
Layer 2: The Bulky Base (The ‘Browns’)
- What: Twigs, small branches, straw, wood chippings, or even scrunched-up newspaper.
- Why: This layer creates air pockets at the bottom of the bed, which is fantastic for drainage. As this woody material slowly rots down over years, it will release nutrients and hold moisture like a sponge. This technique is a simplified version of a method called Hügelkultur.
- How: Fill the bottom third of your bed with this bulky material.
Layer 3: The Activator (The ‘Greens’)
- What: Nitrogen-rich materials. Think grass clippings (not from a lawn treated with weedkiller!), kitchen scraps (no meat or dairy), chicken manure, or comfrey leaves.
- Why: This layer provides the nitrogen needed to help the ‘brown’ layer break down. It kick-starts the composting process within your bed.
- How: Add a 5-10cm layer on top of the woody base.
Layer 4: The Perfect Growing Mix
This is the top half of your bed, where your plants will actually be growing. The ideal recipe is a mix of two key ingredients:
- 50% Good Quality Topsoil: This provides the structure, minerals, and body of your soil. You can buy it in bags from a garden centre or, more cheaply, get a bulk bag delivered from a local supplier.
- 50% Peat-Free Compost: This provides the nutrients and organic matter that will feed your plants. Use well-rotted garden compost, bagged multi-purpose compost (make sure it’s peat-free!), or well-rotted manure.
How to Mix: The best way is to add the topsoil and compost to the bed in alternating layers or shovel-fulls, and then use a fork to gently mix them together in the top 30cm of the bed. Don’t compact it down! You want it to be light and airy. Water it well and leave it to settle for a few days if you can.
Let’s Get Planting: What to Grow in Your Raised Bed
Now for the best bit! You can grow almost anything in a raised bed, but they are particularly brilliant for vegetables, salads, and herbs. Here are some easy wins for the UK climate.

The Salad Bar
Raised beds are perfect for a ‘cut and come again’ salad patch. The soil is clean, and they’re often right outside the back door.
- Great choices: Mixed lettuce leaves, rocket, spinach, radishes, spring onions.
- Top Tip: Sow a short row of seeds every two weeks throughout the spring and summer. This gives you a continuous supply, rather than a huge glut all at once.
Root Vegetables
The deep, loose, stone-free soil in a raised bed is a dream for root vegetables. You’ll get beautifully straight carrots and perfect parsnips.
- Great choices: Carrots (try short-rooted varieties like ‘Chantenay’), beetroot, parsnips, turnips.
- Top Tip: Thin your seedlings ruthlessly! Carrots and parsnips need space to develop. Follow the spacing instructions on the seed packet.
The Brassica Family
Cabbages, broccoli, and their relatives love the nutrient-rich soil in a raised bed.
- Great choices: Kale (incredibly productive), purple sprouting broccoli, summer cabbage, Brussels sprouts.
- Top Tip: Brassicas are a favourite snack of the Cabbage White butterfly caterpillar. Cover your plants with fine insect-proof netting from the moment you plant them out to protect them.
Legumes and Fruiting Veg
These are the stars of the summer garden.
- Great choices: Bush beans, climbing French beans (give them a bamboo cane wigwam), peas, courgettes, tomatoes (bush varieties), strawberries.
- Top Tip: One courgette plant is probably enough for one family! They are incredibly productive. Pick them when they’re small for the best flavour.
Companion Planting: The Clever Trick
Companion planting is the art of growing certain plants together for their mutual benefit.
- Marigolds: Planting French Marigolds around tomatoes is said to deter whitefly. Their scent can confuse pests.
- Nasturtiums: These act as a ‘trap crop’ for aphids, drawing them away from your beans. Plus, the flowers and leaves are edible and look great in a salad.
- Herbs: Strong-smelling herbs like mint (keep it in a pot sunk into the bed, as it spreads!), rosemary, and sage can help to confuse pests looking for your prize vegetables.
A Year in the Life of a Raised Bed: Care and Maintenance
Your raised bed isn’t a “set and forget” project, but the good news is that maintenance is much easier than in a traditional garden.
Spring
This is the start of the season. Your main job is to prepare the bed for planting. The soil level will have dropped over winter as it settled. Top it up with a 5cm layer of fresh, peat-free compost or well-rotted manure. Gently fork this into the top few centimetres of soil. Now you’re ready for sowing and planting.
Summer
- Watering: The excellent drainage of a raised bed is a bonus, but it does mean they can dry out faster than the ground. In warm, dry spells, you will need to water regularly. It’s better to give the bed a really deep soak every few days than a light sprinkle every day. This encourages deep roots. Water the soil, not the leaves, to prevent fungal diseases.
- Feeding: Your initial soil mix is full of nutrients, but hungry plants like tomatoes and courgettes will benefit from an extra feed during the growing season. A liquid seaweed feed or a homemade comfrey tea every couple of weeks will work wonders.
- Weeding: You’ll have very few weeds, but pull out any that you see as soon as they appear.
The Slug and Snail Battle
Ah, the number one enemy of the British vegetable gardener. Raised beds don’t magically get rid of slugs, but they do make them easier to manage.
- The Barrier Method: Run a strip of self-adhesive copper tape around the top edge of your timber bed. Slugs and snails hate crawling over copper as it gives them a tiny electric shock.
- Beer Traps: A classic for a reason. Sink a jam jar or yogurt pot into the soil so the rim is at ground level and half-fill it with cheap beer. Slugs are attracted to the yeast, fall in, and drown.
- The Night-Time Patrol: The most effective method of all. Go out after dark with a torch and pick them off by hand.
Autumn and Winter
As your summer crops finish, pull them out and add them to the compost heap. You can now either plant winter crops (like winter salads, garlic, or broad beans) or you can ‘put the bed to sleep’. Don’t leave the soil bare over winter. Cover it with a thick mulch of compost, shredded leaves, or even black plastic sheeting. This protects the soil from winter rain, prevents weeds from growing, and keeps the worms happy.
Levelling Up: Advanced Raised Bed Techniques
Once you’ve mastered the basics, there are lots of ways to make your raised beds even more productive.

- Add a Cold Frame: A simple wooden frame with a glass or plastic lid can be placed on top of your raised bed. This turns it into a mini-greenhouse, allowing you to grow crops much earlier in the spring and later into the autumn.
- Install Irrigation: A soaker hose or drip irrigation system laid on the soil surface is a super-efficient way to water your beds. It delivers water directly to the roots, reducing waste and saving you time.
- Go No-Dig: The principles of filling a raised bed are very similar to the ‘No-Dig’ method championed by experts like Charles Dowding. The idea is to never dig or disturb the soil. Each year, you simply add another layer of compost to the surface. The worms and soil life will do the work for you, creating an incredibly fertile and healthy soil structure.
Common Mistakes to Avoid (We’ve All Made Them!)
- Making it Too Wide: The classic error. You make a huge bed, and then you can’t reach the middle without stepping on the soil, compacting your beautiful, fluffy mix. Stick to the 1.2m (4ft) maximum width rule.
- Skimping on the Soil: Filling a raised bed properly is an investment. It’s tempting to just use cheap soil or half-fill it. Don’t. The quality of your filling is the single biggest factor in your success.
- Forgetting to Water: Because they drain so well, they need more frequent watering than in-ground beds during dry spells. Keep an eye on them.
- Placing it in the Shade: That sunny spot might be a bit of a walk from the back door, but your sun-loving tomatoes will thank you for it. Don’t sacrifice sunlight for convenience.
The Verdict: Small Space, Big Rewards?
So, let’s go back to our original question. Is raised bed gardening really worth the effort?
The answer is a resounding yes.
For a relatively small amount of upfront work, you create a contained, manageable, and hugely productive gardening space. You overcome the fundamental British garden challenges of poor soil and a damp climate. You reduce the back-breaking work of digging and weeding, leaving more time for the enjoyable jobs of planting and harvesting.
You can grow a surprising amount of fresh, healthy food for your family in just one or two raised beds. The taste of a tomato picked warm from the sun, or a salad harvested minutes before you eat it, is something you just can’t buy.
It’s more than just growing vegetables, though. It’s about creating a little patch of order and productivity, a space that works for you. It’s about reconnecting with where our food comes from and enjoying the simple, profound satisfaction of nurturing something from a tiny seed into a delicious meal.
So, if you’ve been looking at your less-than-perfect garden space and feeling uninspired, perhaps it’s time to think inside the box. Give it a go. You might just be amazed at the rewards you can reap.
Further Reading
- Royal Horticultural Society (RHS) – Raised Beds: https://www.rhs.org.uk/advice/grow-your-own/features/raised-beds
- Gardeners’ World – How to build a raised bed for vegetables: https://www.gardenersworld.com/how-to/diy/how-to-build-a-raised-vegetable-bed/
- Charles Dowding – No Dig Gardening: https://charlesdowding.co.uk/
- Allotment & Gardens – How to Build Raised Beds: https://www.allotment-garden.org/gardening-information/raised-beds/how-to-construct-raised-beds/


