Tomato Plant Profile: Journey from Seed to Fruit
Your complete guide to growing delicious, homegrown tomatoes in the UK. This definitive article covers everything from sowing seeds to harvesting your perfect crop.
This post may contain affiliate links. If you make a purchase through these links, we may earn a commission at no additional cost to you.
The British summer is a curious thing. One moment it’s lashing rain, the next it’s a heatwave that has us all complaining about how hot it is. But through it all, there’s a constant, a comforting ambition that unites gardeners across the land, from the sprawling allotments of Yorkshire to the tiniest urban window boxes in London: to grow the perfect tomato.
There’s nothing quite like that first bite of a homegrown tomato. The skin pops with a satisfying snap, and a burst of flavour—sweet, tangy, and impossibly rich—fills your mouth. It tastes of sunshine and honest work, a far cry from the watery, bland versions often found on supermarket shelves. This is more than just a vegetable (or, botanically speaking, a fruit); it’s a rite of passage, a small miracle you’ve coaxed from a tiny seed.
This article is your definitive guide to that journey. We’ll follow the tomato from its humble origins to its final, glorious moment on your plate. We’ll demystify the process, tackle the common British gardening hurdles, and give you the know-how to raise a plant that doesn’t just survive, but truly thrives. Whether you’re a seasoned green thumb or have only ever killed a houseplant, this is your complete road map to a summer filled with delicious, homegrown tomatoes.
The Tomato’s British Passport: A Brief History
Before we get our hands dirty, let’s take a quick look back. The tomato’s story in Britain is one of suspicion, acceptance, and eventual adoration. It didn’t arrive with a fanfare; rather, it crept in, almost unnoticed, from its birthplace in the highlands of South America.
Spanish conquistadors brought the tomato to Europe in the 16th century, but for a long time, the British viewed it with serious doubt. Botanists recognised it as a relative of the deadly nightshade plant, and its shiny, red fruit looked suspiciously like something you shouldn’t eat. For centuries, it was grown purely as an ornamental plant. People admired its vibrant colour and unusual shape in their gardens but wouldn’t dare put it on their dinner plate.
The tide began to turn in the 18th century, with the growing influence of Mediterranean cuisine brought back by travellers and traders. The Italians and Spanish had long since embraced the tomato, and as their recipes filtered into British kitchens, so did a cautious curiosity. Early British recipes often involved cooking the tomatoes with sugar and spices, perhaps as a way to mask their “foreign” tartness or just to be on the safe side.
The real breakthrough came with the advent of large-scale glasshouse cultivation in the 19th century, particularly in places like Worthing, on the south coast of England. With the new technology of plate glass, growers could create the warm, sunny conditions that tomatoes crave, regardless of the famously unpredictable British weather. By the late 19th century, Worthing had become a “town of hot-houses,” supplying vast quantities of tomatoes to London markets via the new railway network.
This homegrown industry flourished until the late 20th century, when cheaper imports from places like Spain and the Netherlands began to dominate. Today, while we still import a lot, the focus for British growers has shifted to quality and specialist varieties, making the homegrown tomato a mark of pride.
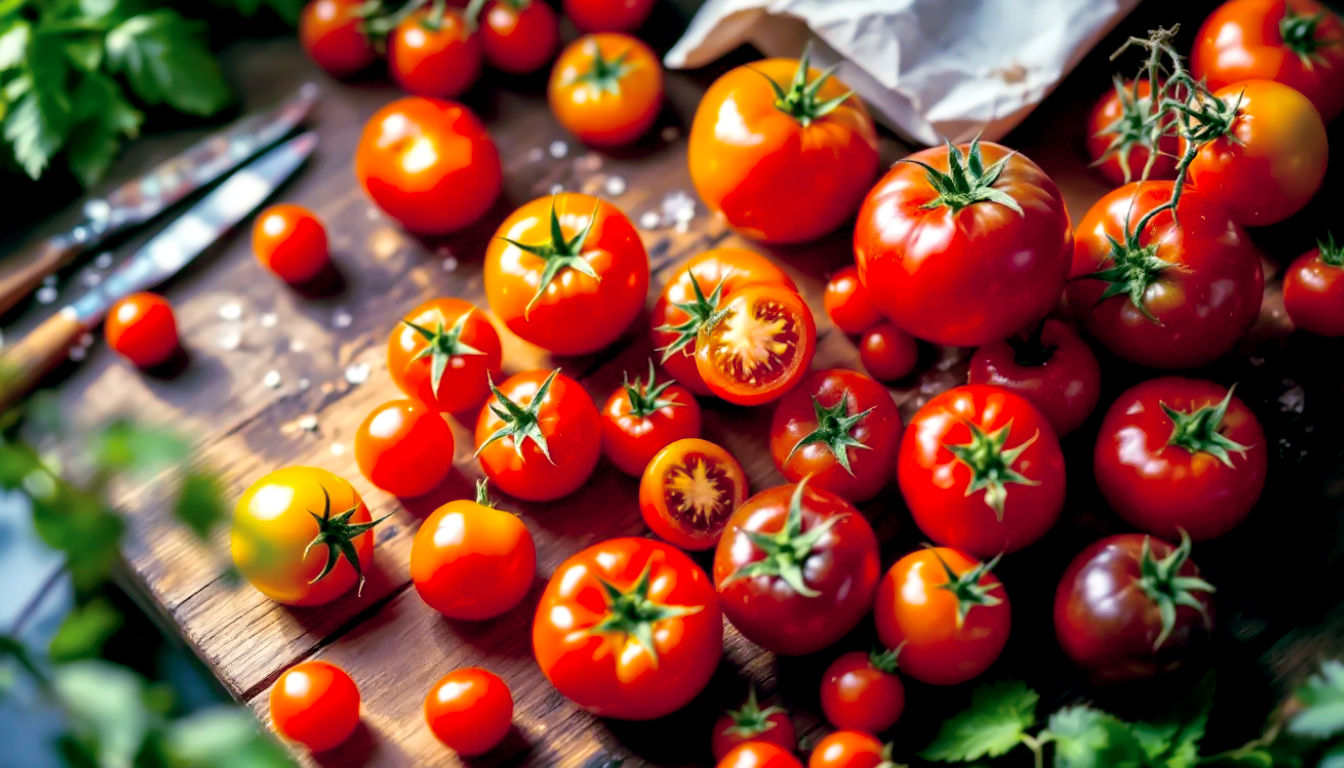
Picking Your Perfect Plum: Tomato Varieties for the UK
The first and most important decision you’ll make is which type of tomato to grow. This isn’t just about flavour; it’s about finding a variety that’s happy with the British climate and your particular growing setup, whether it’s a sun-drenched greenhouse or a damp little balcony.
Tomato plants generally fall into two categories:
- Cordon (or Indeterminate) varieties: These grow as a single, tall vine and will keep growing and producing fruit until the first frost. They are best suited for greenhouses or a very sheltered, sunny spot outdoors, as they need tall supports (canes or string) and regular pruning. Most traditional greenhouse varieties, like ‘Moneymaker’ and ‘Alicante’, are cordon types.
- Bush (or Determinate) varieties: These plants are more compact and stop growing when they’ve reached a certain size. They are perfect for pots, hanging baskets, and smaller spaces. They require minimal pruning and are a great choice for beginners or those with limited space. Classic bush varieties include ‘Tumbling Tom’ and ‘Tiny Tim’.
For the British climate, it’s also a good idea to choose varieties known for their resilience. Look for those labelled as “blight-resistant” or “suitable for outdoor growing.” Some tried-and-tested favourites for British gardeners include:
- ‘Gardener’s Delight’: A hugely popular and reliable cherry tomato that lives up to its name. It produces an abundance of sweet, juicy fruit on long trusses.
- ‘Sungold‘: An orange cherry tomato known for its exceptionally sweet flavour. It’s a cordon type and a consistent winner in taste tests.
- ‘Crimson Crush’: A newer, cordon variety with excellent blight resistance, making it a great choice for growing outdoors.
- ‘Black Russian’: A slightly unusual heirloom variety with dark, mahogany-coloured fruits and a rich, smoky flavour. A perfect choice if you want something a bit different.
Choosing the right variety for your space and skill level is the first step towards a successful crop. Don’t be afraid to experiment!
The Genesis: From a Tiny Seed to a Little Sprout
The journey begins not in a pot, but with a packet of seeds. Sowing tomato seeds is a delicate process that requires patience and the right timing.
Timing is Everything: In the UK, you’ll want to start your seeds indoors, in a warm, sheltered spot. The ideal time is from late February to mid-March if you have a greenhouse, or from late March to early April if you plan to plant them outside. Starting them too early means you’ll have large, unwieldy plants that are desperate to get outside long before the weather is warm enough.
The Sowing Process:
- Gather your kit: You’ll need a seed tray or small pots, and a good quality, peat-free seed compost.
- Fill and moisten: Fill your chosen containers with compost, gently firm it down, and water it thoroughly. It should be moist, but not soaking wet.
- Sow your seeds: Place a couple of seeds on the surface of the compost in each pot or module. Tomatoes don’t need to be sown too deeply, so a light covering of compost is all that’s needed.
- Find a warm spot: Tomato seeds need warmth to germinate. The ideal temperature is around 18°C. A heated propagator is great, but a sunny windowsill is just as good. Covering the pots with a clear plastic bag or a sheet of glass can help trap moisture and warmth, creating a mini-greenhouse.
- Patience, young grasshopper: Germination usually takes about 7 to 14 days. Once you see the first tiny seedlings emerge, uncover them and move them to the brightest spot you can find to stop them from becoming ‘leggy’ (long and thin, as they stretch for light).
The Great Leap Forward: Potting On and Hardening Off
Once your seedlings have their first set of proper leaves (the ones that appear after the initial two, round ‘seed leaves’), they’re ready to move.
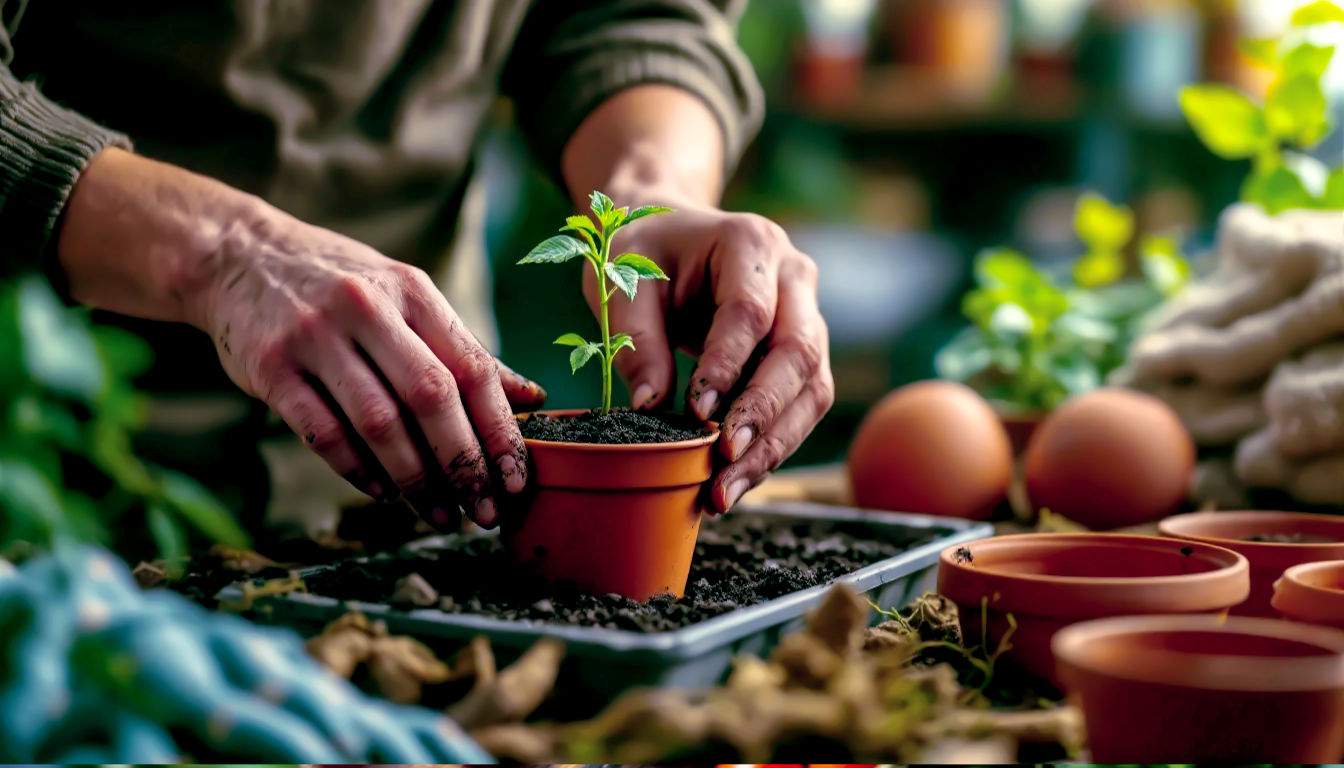
Potting On: This is the process of moving your young plants into a larger pot to give their roots more space to grow.
- Prepare your pots: Choose pots about 9-10cm wide and fill them with a slightly richer, multi-purpose compost.
- Handle with care: Gently lift each seedling from its tray, holding it by a leaf rather than the delicate stem. The stem bruises easily, and a damaged leaf is no big deal.
- Plant it deep: If your seedling is a bit leggy, plant it more deeply than it was before, so that the first set of leaves is just above the compost surface. This encourages a stronger root system to develop from the buried stem.
- Keep them warm: Place the potted-on seedlings in a bright, warm place. A conservatory or a greenhouse is ideal. Keep the compost consistently moist but not waterlogged.
Hardening Off: This is a crucial, non-negotiable step before planting your tomatoes outside. It’s the process of acclimatising the plants to the harsher outdoor conditions—cooler temperatures, wind, and direct sunlight. Without it, they’ll suffer from shock and may not recover.
Start this process about 10 days before you plan to plant them in their final position. On a warm day, put the pots outside in a sheltered, shady spot for a few hours. Gradually increase the time they spend outdoors each day, and expose them to a little more sun. By the end of the ten days, they should be spending both day and night outdoors (unless a late frost is forecast).
Home Sweet Home: Planting Out
Once all risk of frost has passed (usually late May or early June in the UK), your young tomato plants are ready for their final home.
Choosing the Spot: Tomatoes need two things above all else: sunshine and shelter. A sunny, south-facing spot in the garden is best. For those growing in containers or growing bags, a patio or deck that gets at least 6 hours of sun a day is perfect.
Planting in the Ground or Pots:
- In the ground: If you’re planting directly into the soil, make sure it’s well-drained and has had some organic matter (like garden compost or well-rotted manure) worked into it. Dig a hole deep enough for the plant’s root ball and space the plants about 45-60cm apart.
- In pots or grow bags: Tomatoes thrive in pots. Choose a large container (at least 30-40cm in diameter) for a single plant to give the roots enough room. Using a good quality, loam-based compost or a specially designed tomato compost will give them the best start.
Adding Support: If you’re growing cordon varieties, you’ll need to put a stake or cane in the pot or ground at the same time as planting. Pushing a cane in after the plant has grown can damage the roots. Tie the main stem to the cane loosely as it grows.
A Helping Hand: Essential Care for a Bumper Crop
Once your tomatoes are in their final position, the real work begins. Consistent care is the key to a bountiful harvest.
Watering: The Golden Rule
This is perhaps the most critical part of tomato care. Tomatoes need consistent watering. They hate being dry, but they also hate being waterlogged.
- How often? In hot weather, especially if they are in pots or a greenhouse, they may need watering every day, sometimes even twice a day.
- How to do it right: Water the soil at the base of the plant, not the leaves. Wet leaves are an open invitation for diseases like blight. A good, long soak is better than a quick splash, as it encourages the roots to grow deep. Watering in the morning is a great habit to get into, as it allows the foliage to dry out before nightfall.
- The Analogy: Think of your tomato plant like a fussy celebrity. It demands a regular schedule. It can’t cope with a day of drought followed by a flood. Keep it on a schedule and it’ll be happy.
Feeding: A Tomato’s Favourite Treat
Tomatoes are hungry plants. Once the first fruits have started to swell, they need a boost of nutrients. You should switch from a general-purpose feed to a high-potassium liquid tomato feed. You’ll find plenty of these in any British garden centre, often with names like ‘Tomorite’. Feed them once every 10-14 days, following the instructions on the bottle.
The Science Bit:
- Simplified Explanation: Tomato feed is like a protein shake for your plants. It gives them the right stuff (potassium) to make big, tasty fruit instead of just a load of leafy growth.
- Detailed Explanation: Potassium (K) is an essential macronutrient for plants, crucial for fruit development, ripening, and overall plant health. While nitrogen (N) promotes lush, leafy growth, too much of it can lead to fewer fruits and can even make the plant more susceptible to diseases like blight. This is why a balanced, high-potassium feed is so important during the fruiting phase.
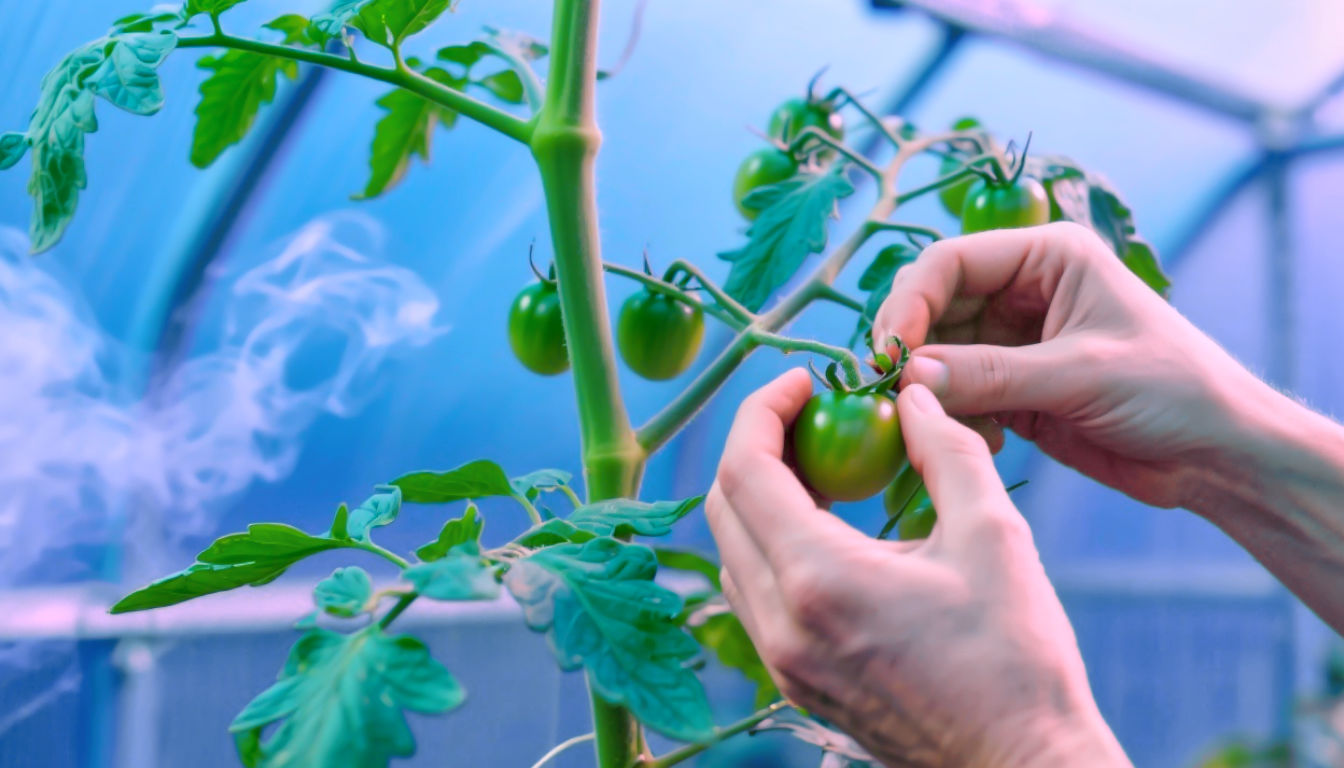
Pruning and Training: Keeping Things Tidy
This is the part that can feel a bit scary, but it’s essential for cordon varieties. Bush tomatoes can largely be left to their own devices, but cordon types need regular attention to encourage them to focus their energy on making fruit, not useless greenery.
- Pinching out sideshoots: As a cordon plant grows, you’ll see small shoots sprouting in the ‘armpit’ where a leaf joins the main stem. These are sideshoots, or suckers. If you leave them, they will grow into another stem, diverting energy from the main one. Simply pinch them off between your finger and thumb. Do this every few days, and your plant will stay neat and tidy.
- Trussing and stopping: Each cluster of tomatoes is called a truss. As your plant gets taller, it will keep producing more. Around late summer (August in the UK), once you have four to six trusses, you should ‘stop’ the plant. This means pinching out the growing tip at the very top of the main stem. It forces the plant to concentrate all its remaining energy on ripening the fruit that’s already there, ensuring you get a good harvest before the weather turns.
The Uninvited Guests: Pests, Diseases, and Other Troubles
Even with the best care, you’ll likely encounter some problems. A true gardener knows that dealing with these challenges is part of the fun.
- Tomato Blight: This is the big, scary one for British gardeners. Blight is a fungus-like pathogen that thrives in humid, damp conditions, which, as we know, are a hallmark of the British summer. It can turn a healthy plant into a slimy mess overnight.
- How to spot it: Look for brown patches on the leaves and stems, which rapidly spread and turn the plant to mush.
- Prevention is key:
- Choose blight-resistant varieties.
- Ensure good airflow between your plants.
- Water the soil, not the leaves.
- Grow in a greenhouse or under a polytunnel if you can.
- What to do: Once blight hits, there’s not much you can do. It’s often best to remove and dispose of the affected plants immediately to prevent the spread to other tomatoes or potatoes. Never compost blighted plants at home.
- Blossom End Rot: This is the most common and alarming-looking problem for homegrown tomatoes. You’ll spot a dark, sunken, leathery patch on the bottom of the fruit (the “blossom end”).
- The Cause: It’s not a disease, but a physiological disorder caused by a calcium deficiency in the fruit. This isn’t because your soil lacks calcium (it almost never does), but because the plant can’t absorb it effectively. The most common reason for this is irregular watering. The plant needs a steady flow of water to transport calcium to the fruit.
- The Solution: The affected fruits are a write-off, but you can save the rest of the crop. The key is to get your watering routine sorted. Water consistently and thoroughly, and mulch around the base of the plant to help retain moisture.
- Pests: The usual suspects—greenfly and whitefly—can be a nuisance, especially in a greenhouse. A simple, soapy water spray can help, or you can release natural predators like ladybirds to keep them in check.
The Moment of Truth: From Flower to Fruit
The life of a tomato plant is a continuous, fascinating cycle. After all your hard work, the first sign of a proper reward comes when you see the tiny yellow flowers appear on the trusses.

These flowers don’t need a bee to be pollinated; they are self-pollinating. However, in a greenhouse, giving the plant a gentle shake or tapping the trusses can help the pollen transfer and improve fruit set.
After the flower is pollinated, the tiny fruit begins to swell at its base. It will start as a small, hard green sphere. Then, slowly but surely, it will begin to change colour. This is the most exciting part of the journey. The green will give way to a pale yellow, then orange, and finally, that unmistakable, glorious red (or whatever colour your chosen variety should be). This colour change is your cue.
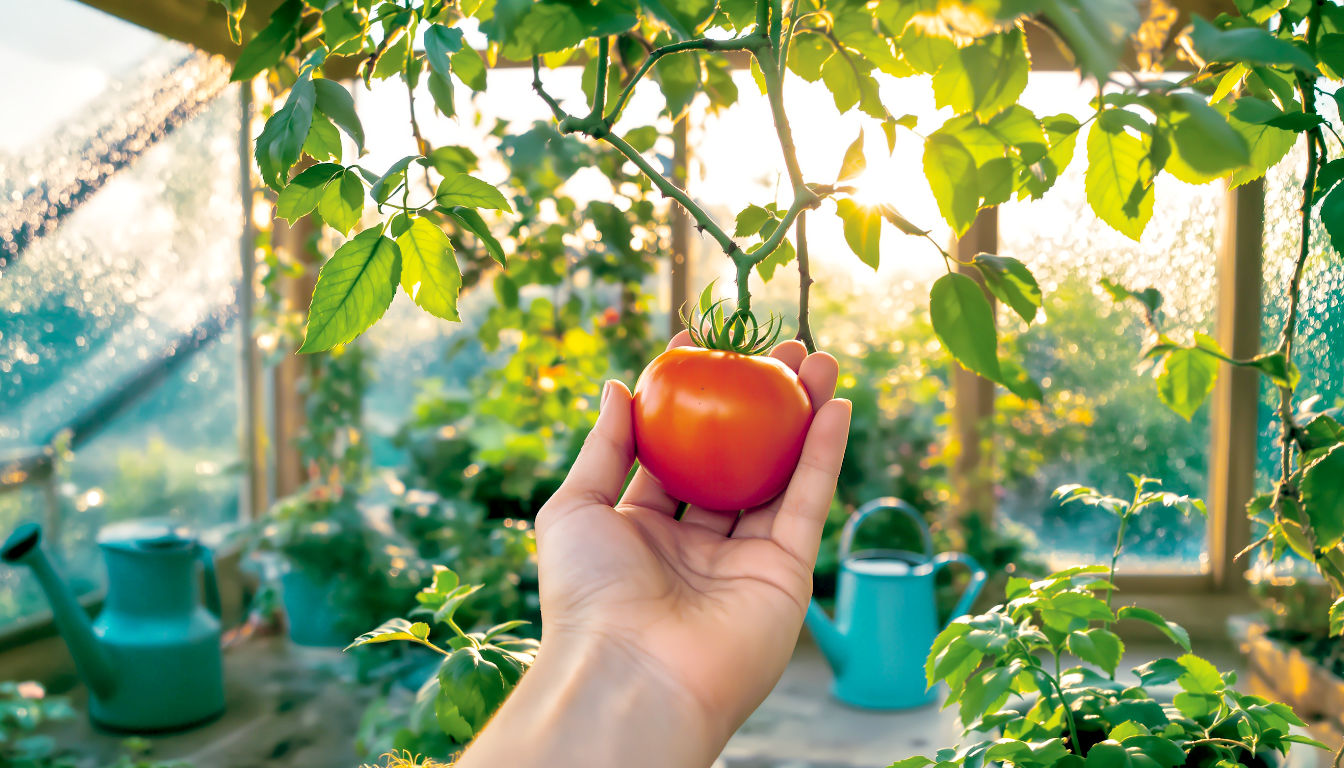
The Sweet Reward: Harvesting Your Homegrown Haul
Knowing when to pick your tomatoes is a skill that comes with experience, but there are some reliable signs.
- Colour: A ripe tomato will have a deep, uniform colour.
- Feel: It should feel firm but give slightly when you gently squeeze it.
- Smell: A ripe tomato will have a rich, earthy scent.
- Ease of picking: A ripe tomato will come away easily from the stem with a gentle twist.
Don’t store them in the fridge! Tomatoes lose their flavour when they get too cold. Instead, keep them in a fruit bowl at room temperature. They’ll continue to ripen and sweeten over a few days.
You can also pick green tomatoes at the end of the season before the first frost and ripen them on a sunny windowsill, or turn them into a classic green tomato chutney.
The Enduring Legacy
Growing tomatoes is a masterclass in patience, observation, and adaptability. It’s a small patch of nature you control, and while there are triumphs and disappointments, every season teaches you something new. The result isn’t just a handful of delicious fruit; it’s a reconnection with the natural world and a satisfying, sun-warmed reward for your efforts. So, what are you waiting for? Get sowing, get growing, and get ready for a taste of pure British summer.
Further Reading
- Royal Horticultural Society (RHS): A highly respected source for all things gardening in the UK. Their guides on growing vegetables are essential reading.
- Gardeners’ World Magazine: A popular and trusted British magazine and website providing practical, seasonal advice.
- Allotment & Leisure Gardener: A great resource, especially for those with an allotment plot, offering a wealth of community knowledge and tips.
- The National Trust: While focused on heritage, their websites often have excellent, simple guides to growing produce and cooking with tomatoes.