The Beginner’s Guide to 1-Inch Oak: Your Starter Guide to British Woodcraft
The definitive guide for British beginners on the versatility of 1-inch oak. Discover why it’s the perfect starter wood and get started today.
This post may contain affiliate links. If you make a purchase through these links, we may earn a commission at no additional cost to you.
So, you’ve decided to dip your toes into the wonderful world of woodworking. Fantastic choice! There’s something deeply satisfying about turning a simple piece of timber into something beautiful and useful with your own two hands. But where on earth do you start? Walk into any timber merchant, and you’ll be faced with a dizzying array of woods, all with funny names and different price tags. It’s enough to make you want to pack it all in and head back to the sofa.
But don’t worry, because there’s one wood that stands out as a reliable, forgiving, and truly stunning choice for beginners: oak. And specifically, we’re talking about one-inch thick oak boards.
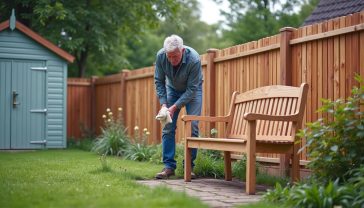
Think of one-inch oak as the perfect partner for your first woodworking dance. It’s strong and sturdy but not so difficult to work with that you’ll be pulling your hair out. It has a rich history, woven into the very fabric of Britain—from the mighty warships of Nelson’s navy to the timber-framed pubs that still stand today. When you work with oak, you’re not just building a shelf; you’re connecting with centuries of British craftsmanship.
This guide is your complete introduction to everything you need to know about starting your journey with one-inch oak. We’ll cover why it’s such a brilliant material for beginners, what to look for when you’re buying it, the basic tools you’ll need, and a few simple projects to get you started. So, grab a cuppa, get comfortable, and let’s begin your adventure into the timeless craft of woodworking.
What’s So Special About Oak Anyway?
Before we dive into the nitty-gritty of one-inch boards, let’s get to know the star of the show a bit better. What makes oak such a beloved wood, not just in the UK but around the world?
In simple terms, oak is a hardwood. That just means it comes from a deciduous tree—the kind that loses its leaves in autumn. Hardwoods are generally denser and more durable than softwoods (which come from evergreen trees like pine), and oak is one of the toughest of the lot.
A Tale of Two Oaks: English vs. American
When you go to buy oak in the UK, you’ll usually find two main types on offer: English (or European) Oak and American Oak. They’re like cousins—similar in many ways, but with their own distinct personalities.
- English Oak (Quercus robur): This is the classic, iconic oak of the British Isles. It tends to have a warmer, golden-brown colour and a more distinctive, sometimes wilder, grain pattern. It’s packed with something called tannins, which is a natural chemical that makes the wood incredibly resistant to rot and insects. It’s the reason ancient oak-framed buildings are still standing strong after 500 years! However, these tannins can also react with steel, leaving blue-black stains, so it’s something to be mindful of.
- American White Oak (Quercus alba): As the name suggests, this oak comes from across the pond. It’s generally a bit lighter in colour, often with a pale, creamy hue, and its grain is usually straighter and more uniform than its English cousin. It’s still very strong and durable, but it has fewer tannins. This makes it a little less prone to staining but also slightly less resistant to the elements if left untreated.
For a beginner, American White Oak is often the friendlier choice. It’s typically more affordable, more consistent to work with, and its predictable grain can make cutting and shaping a bit easier. But if you want that classic, heritage look for your project, nothing beats true English Oak.
The Magic of the Grain
One of the things that makes oak so beautiful is its grain. This is the pattern of fibres you see on the surface of the wood. In oak, the grain is open and quite coarse, which gives it a lovely, tactile texture.
You’ll also notice little flecks or silvery ribbons running across the grain, especially in English Oak. These are called medullary rays. They are part of the tree’s plumbing system, carrying sap from the centre to the outside. When the oak is cut in a special way (called quarter-sawn), these rays are revealed, creating a stunning, shimmering pattern known as ray fleck. It’s a hallmark of high-quality oak and a feature that woodworkers have prized for centuries.
Why One-Inch Oak is the Beginner’s Best Friend
Alright, so oak is great. But why the focus on one-inch thick boards? A one-inch board (which is often about 25mm in metric) hits the sweet spot for beginners for several key reasons.
1. It’s Versatile and Manageable
A one-inch thickness is the Goldilocks of woodworking—not too thick, not too thin.
- It’s substantial enough to build sturdy, durable projects like small tables, shelves, chopping boards, and boxes without feeling flimsy.
- It’s not so thick that it becomes a nightmare to work with. You can cut it with a good handsaw without needing a gym membership, and it’s not too heavy to lift and move around your workspace. Thicker boards can be incredibly heavy and require more powerful (and expensive) tools to shape.
2. It’s Forgiving
When you’re just starting, you’re going to make mistakes. It’s all part of the learning process! One-inch oak is wonderfully forgiving. If you make a cut slightly off-line or create a dent, you have enough thickness to sand it down or plane it smooth and try again. With thinner materials, a small mistake can sometimes ruin the whole piece. This extra bit of wiggle room is a huge confidence booster.
3. It Teaches You Good Habits
Working with a proper hardwood like oak from the start teaches you fundamental skills that will serve you for your entire woodworking life.
- You’ll learn how to read the grain direction to avoid tear-out when planing or chiselling.
- You’ll get a feel for using sharp tools, as oak won’t tolerate a dull saw or chisel.
- You’ll learn about wood movement—how timber expands and contracts with changes in humidity—and why it’s crucial to consider this when building furniture. Oak is very stable, but it still moves, making it a great teacher.
4. The Results are Instantly Rewarding
Let’s be honest: you want the things you make to look good. And with oak, it’s hard to go wrong. Even a simple project, when made from beautiful one-inch oak, will look and feel like a high-quality piece of furniture. The weight, the texture, and the rich colour provide an immediate sense of accomplishment that’s incredibly motivating. A simple pine shelf is fine, but an oak shelf is a statement.
Your First Trip to the Timber Merchant: Buying 1″ Oak
Buying wood for the first time can be a bit intimidating. It’s not like popping down to B&Q for a tin of paint. But with a little knowledge, you’ll be navigating the timber yard like a pro.
Understanding the Lingo: PSE vs. Rough Sawn
When you look for one-inch oak, you’ll generally find it sold in two forms:
- PSE (Planed Square Edge): This is the most beginner-friendly option. The board has been machined on all four sides to be smooth, flat, and square. It’s ready to use right off the rack. You’ll pay a bit more for PSE, but it saves you a huge amount of time and effort in preparing the wood, which is ideal when you’re starting out. For your first few projects, always go for PSE.
- Rough Sawn: This is timber straight from the sawmill. It has a fuzzy, rough surface and its edges won’t be perfectly straight or square. To use it, you need to flatten and square it yourself using tools like planes and a thicknesser. While it’s cheaper to buy, preparing rough-sawn timber is a skill in itself. It’s something to aspire to, but leave it for later.
What to Look For When Choosing Your Boards
Even with planed boards, not all pieces are created equal. Take your time to inspect the timber before you buy. Here’s a checklist of what to look for and what to avoid.
The Good Stuff:
- Straight Grain: Look for boards where the grain lines run mostly parallel along the length of the board. This makes the wood more stable and easier to work.
- Clear Colour: A nice, consistent colour without too many dark streaks or discoloured patches is usually a sign of good quality.
- Good Ray Fleck: If you can see those lovely silvery rays, that’s a bonus!
Things to Avoid:
- Twisting and Warping: Look down the length of the board from one end, holding it at eye level. Does it twist like a propeller? Is it bowed (curved along its length) or cupped (curved across its width)? A little bit of movement is natural, but avoid any boards that are severely bent out of shape. They will be a nightmare to work with.
- Knots: Knots are where branches once grew. Small, tight knots (often called “pin knots”) can add character to a piece. However, you should avoid large, loose, or “dead” knots, as these can fall out, leaving a hole. Also, be wary of boards with lots of knots clustered together, as this can create a weak spot.
- Splits and Cracks: Check the ends of the board carefully for any splits (known as “checks”). These can run deep into the wood and will need to be cut off, wasting material.
- Sapwood: This is the outer layer of the tree, just beneath the bark. It’s usually much lighter in colour than the main heartwood. While not necessarily a defect, a large band of sapwood can look out of place in a finished project.
Don’t be shy about having a good rummage through the rack to find the best boards. The staff at a good timber merchant will be used to this and should be happy to help you.
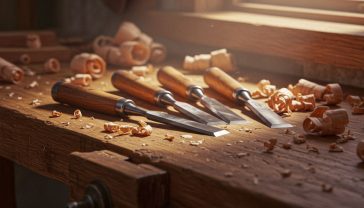
The Essential Toolkit for the Oak Beginner
You don’t need a workshop full of expensive machinery to get started with oak. In fact, learning with a few basic hand tools is the best way to develop your skills. Here’s a short-list of the absolute essentials. Invest in the best quality you can afford—good tools will last a lifetime.
1. Measuring and Marking
Accuracy is everything in woodworking.
- Combination Square: This is your multi-tool for marking. It lets you draw lines that are perfectly square (90 degrees) or at a 45-degree angle to an edge. Invaluable.
- Marking Knife: Ditch the pencil! A marking knife (like a Stanley knife) slices the wood fibres instead of just drawing on top of them. This gives you a much more precise line to guide your saw or chisel, and it helps prevent the wood from splintering.
- Tape Measure: For measuring longer lengths. A good quality 5-metre tape will do just fine.
2. Cutting
- A Good Handsaw: You need a saw for cutting across the grain (a crosscut saw) and one for cutting along the grain (a rip saw). However, for a beginner, a good quality universal handsaw from a brand like Bahco or Spear & Jackson is a great compromise. Look for one with around 8-10 TPI (Teeth Per Inch).
- Bench Hooks: A simple, shop-made jig that hooks over your workbench to hold your wood steady while you saw. You can make a pair from scrap wood in about 15 minutes.
3. Shaping and Smoothing
- A Block Plane: This is a small, versatile plane that you can hold in one hand. It’s perfect for tidying up saw cuts, smoothing edges, and creating small chamfers (bevelled edges). A low-angle block plane is particularly good for working with the tricky grain of oak.
- Sandpaper: Get a selection of grits, from around 80-grit (coarse) for removing marks, up to 240-grit (fine) for getting a silky-smooth finish.
4. Joining
- Wood Glue: A good quality PVA wood glue (like Titebond II or III) is essential. It creates a bond that is actually stronger than the wood itself.
- Clamps: You can never have too many clamps! To start, get at least two or three F-clamps or sash clamps with a capacity of at least 30cm (12 inches). They are used to hold pieces together tightly while the glue dries.
5. Safety Gear
Don’t even think about starting without these.
- Safety Glasses: Sawdust in the eye is no fun. Wear them every single time.
- Dust Mask: Oak dust can be an irritant. Protect your lungs. A simple FFP2 or FFP3 rated mask is a must.
Your First Oak Projects: Simple, Stylish, and Satisfying
Okay, you’ve got your beautiful one-inch oak boards and your shiny new tools. It’s time to make something! The key to a successful first project is to start simple. Nail the basics, build your confidence, and then move on to more complex things.
Here are three classic beginner projects that are perfect for using one-inch oak.
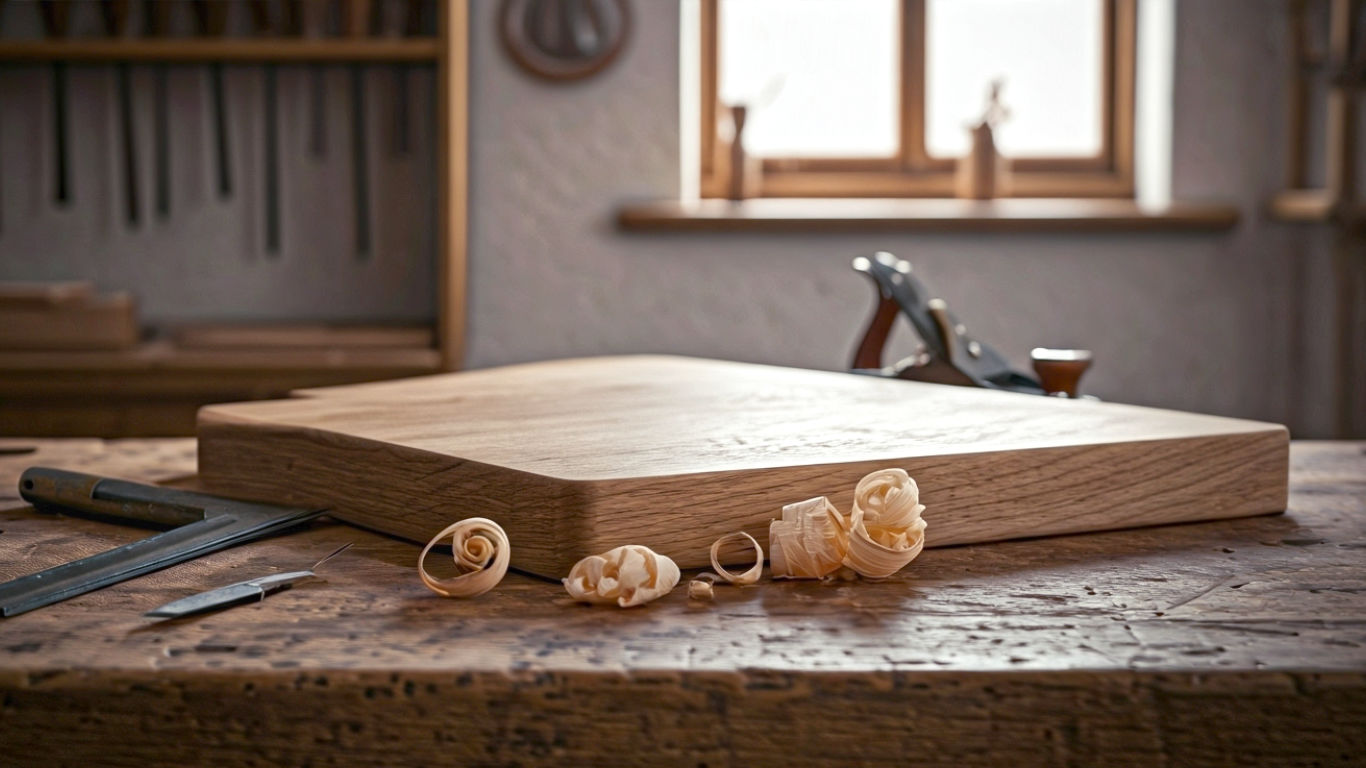
Project 1: The Classic Chopping Board
A chopping board is the perfect first project. It involves accurate cutting, smoothing, and finishing, but the construction is very straightforward.
- The Goal: To create a solid, beautiful, and functional chopping board.
- Skills You’ll Learn:
- Measuring and marking accurately.
- Sawing straight lines.
- Planing edges smooth and square.
- Sanding to a high finish.
- Applying a food-safe finish.
- Basic Steps:
- Cut to Size: Decide on the size of your board (a good starting size is around 25cm x 35cm). Mark your lines carefully with your combination square and marking knife.
- Saw It Out: Use your handsaw to cut the board to its final dimensions. Take your time and focus on following the line.
- Smooth the Edges: Use your block plane to smooth the sawn edges. Aim to get them perfectly flat and square to the face of the board.
- Add a Detail (Optional): Use your block plane to create a small chamfer around the top and bottom edges. This makes the board more comfortable to handle and looks very professional. You could also drill a hole in one corner for hanging.
- Sand, Sand, Sand: Start with 80-grit sandpaper to remove any plane marks, then work your way up through 120, 180, and finally 240-grit. After the final sanding, wipe the board with a damp cloth. This will “raise the grain.” Let it dry, then give it one last light sand with 240-grit. This trick will keep it feeling smooth even after it gets wet.
- Apply Finish: The best finish for a chopping board is a food-safe mineral oil or a specialised board butter (a mix of oil and beeswax). Slather it on, let it soak in for a few hours, then wipe off the excess. Repeat this a few times until the wood stops absorbing the oil.
Project 2: The Floating Bookshelf
This is a stylish and modern project that looks much more complicated than it actually is. It’s a great introduction to basic joinery.
- The Goal: To create a simple, elegant shelf that appears to float on the wall.
- Skills You’ll Learn:
- All the skills from the chopping board.
- Drilling accurate holes.
- Basic wall-mounting techniques.
- Basic Steps:
- Prepare the Shelf: Cut your one-inch oak board to the desired length (e.g., 60cm). Plane and sand all the surfaces just like you did for the chopping board.
- Get the Hardware: You’ll need a set of concealed “floating shelf” brackets. These are essentially metal rods that screw into the wall and slide into holes you drill in the back of your shelf. You can buy these easily online or from hardware shops.
- Drill the Holes: This is the crucial step. You need to drill holes in the back edge of your shelf that are the exact diameter and depth to accept the mounting rods. Use a drill with a sharp wood bit and a depth stop (or a piece of masking tape wrapped around the bit) to ensure you don’t drill too deep. Make sure the holes are perfectly parallel to the faces of the shelf.
- Finish the Shelf: Apply a durable finish like a hardwax oil (such as Osmo Polyx-Oil) or a clear varnish. This will protect the wood from scuffs and spills. Apply two or three thin coats, sanding lightly with a fine grit paper between coats.
- Mount to the Wall: Follow the instructions that came with your brackets to fix them securely to the wall. Make sure they are level! Then, simply slide your finished shelf onto the rods.
Project 3: A Simple Box with a Lid
Making a box introduces you to the concept of joinery—fitting pieces of wood together to create a corner. We’ll use a very simple but strong joint here.
- The Goal: To build a small, lidded box, perfect for storing keepsakes.
- Skills You’ll Learn:
- Cutting multiple pieces to identical lengths.
- Creating simple rebate joints.
- Gluing up a four-sided structure.
- Basic Steps:
- Cut the Pieces: You’ll need six pieces of your one-inch oak: a top and a bottom, two long sides, and two short sides. The key here is accuracy: the two long sides must be identical, and the two short sides must be identical.
- Cut the Rebates: A rebate is simply a rectangular groove cut along the edge of a piece of wood. We will cut rebates on the inside edges of the top and bottom of all four side pieces. This creates a lip for the top and bottom panels to sit in, which is much stronger than just gluing them to the edges. You can cut these carefully with your handsaw and tidy them up with a chisel.
- Glue-Up: This can be tricky, so do a “dry run” first without any glue to make sure everything fits together. When you’re ready, apply a thin, even layer of wood glue to all the joining surfaces. Assemble the box and use your clamps to hold it all together tightly. Check that the corners are square using your combination square.
- Clean-Up and Finish: Once the glue is dry (leave it for at least a few hours, ideally overnight), remove the clamps. Scrape or sand off any dried glue squeeze-out. Sand the entire box smooth and apply your chosen finish.
Common Pitfalls and How to Avoid Them
Your first few projects will be a learning curve. Here are a few common mistakes that beginners make with oak, and how you can sidestep them.
- Underestimating Wood Movement: Don’t glue a solid oak panel into a frame without leaving room for it to expand and contract. This is what causes panels to crack. For bigger projects, learn about techniques like “breadboard ends” for tables or using “buttons” to attach tops to frames.
- Using a Dull Saw: Oak will punish a dull saw. You’ll get tired quickly, your cuts will wander, and the edge will be ragged. Take the time to learn how to sharpen your tools, or buy good quality ones that hold their edge. Sharp tools are safer tools.
- Sanding Too Little (or Too Much): Don’t skip grits when sanding. Each grit of sandpaper is designed to remove the scratches from the previous one. If you jump from 80-grit straight to 240-grit, you’ll just be polishing the bottom of the deep scratches, and they will show up glaringly once you apply a finish.
- Being Impatient with Glue: Give your glue plenty of time to dry properly. Clamping isn’t just about holding the pieces together; it’s about applying enough pressure to create a strong, thin glue line. Check the instructions on the bottle, but 24 hours is a good rule of thumb before putting any stress on a joint.
- Ignoring the Grain: Always try to plane “downhill” with the grain. If you plane against it, the blade will catch and lift the wood fibres, causing “tear-out.” Look at the side of the board to see which way the grain is running.
The Enduring Legacy of Oak
Working with one-inch oak is more than just a hobby; it’s a gateway into a craft that has shaped our nation. From the ships that explored the world to the furniture that has been passed down through generations, oak has been a constant, reliable presence in British life.
By choosing to start your journey with this incredible timber, you are not only learning a new skill but also becoming part of that long and proud tradition. Your first chopping board or shelf might seem like a small step, but it’s the beginning of a deeply rewarding journey. The strength, beauty, and character of oak will inspire you, and the skills you learn working with it will last a lifetime.
So go on, find a good local timber merchant, pick out a few beautiful boards of one-inch oak, and make something. Make mistakes, learn from them, and create something you can be proud of. Welcome to the club.
Further Reading & Resources
To continue your journey, check out these highly respected UK-based resources:
- Woodland Heritage: A wonderful charity dedicated to preserving our woodlands and the craft of woodworking. https://www.woodlandheritage.org/
- The British Woodworking Federation (BWF): The trade association for the woodworking and joinery manufacturing industry in the UK. A great source of industry knowledge. https://www.bwf.org.uk/
- Get Woodworking: A fantastic online resource with guides and projects aimed at helping people get into the hobby. https://getwoodworking.com/
- Paul Sellers’ Blog & Videos: Paul Sellers is a master craftsman who champions hand-tool woodworking. His free videos and blog are an invaluable resource for beginners. https://paulsellers.com/