The Guide to Garden Stepping Stones: A Quintessentially British Affair
Discover how to transform your outdoor space with the perfect stepping stone path. Our complete guide covers materials, design, and DIY installation for UK gardens.
This post may contain affiliate links. If you make a purchase through these links, we may earn a commission at no additional cost to you.
There’s something wonderfully timeless about a stepping stone path, isn’t there? It’s a feature that feels right at home in any British garden, whether it’s a rambling country cottage affair in the Cotswolds or a neat urban oasis in London. It whispers of secret gardens, childhood adventures, and quiet moments spent wandering amongst the flowerbeds. A simple trail of stones can do so much more than just keep your shoes clean; it can transform your outdoor space, guiding the eye, creating a sense of journey, and adding a touch of rustic charm or sleek modernity.
But where do you start? The world of stepping stones is surprisingly vast. From rugged, natural slate to perfectly uniform concrete slabs, the choices can feel a bit overwhelming. How do you pick the right material? How do you lay them so they don’t wobble? And how do you create a design that looks like it truly belongs in your garden?
Well, don’t you worry. Think of this as your friendly chat over the garden fence, your ultimate guide to getting it right. We’re going to dig into everything you need to know, from the history of these humble paths to the nitty-gritty of installation. We’ll help you choose the perfect stones, design a path that complements your garden’s personality, and lay them like a pro. By the time we’re done, you’ll have all the knowledge you need to create a beautiful, practical, and long-lasting stepping stone path that you’ll be proud of for years to come.
What Exactly Are Stepping Stones, and Why Do We Love Them?
At its heart, a stepping stone path is simply a walkway made from individual slabs, or ‘stones’, laid with gaps in between them. Unlike a solid path, they’re designed for a single footfall at a time. The gaps are usually filled with grass, gravel, or low-growing plants like thyme or chamomile, which release a lovely scent when you tread on them.
But their appeal goes far beyond the practical. Here in Britain, we have a deep connection to our gardens. They’re our sanctuaries, our little patches of nature. Stepping stones tap into that connection.
- They create a sense of adventure. A winding stepping stone path invites exploration. It encourages you to slow down, to look at your garden from a different perspective. It’s not just a way to get from the patio to the shed; it’s a journey.
- They blend with nature. Because they aren’t a solid, imposing structure, stepping stones allow the garden to flow around and through them. Grass and plants can grow in the gaps, softening the edges and making the path feel like a natural part of the landscape.
- They’re incredibly versatile. You can create a stepping stone path in almost any garden, of any size or style. A few simple stones can lead you through a tiny courtyard, while a more elaborate path can meander through a large, sprawling lawn. They work just as well in a minimalist, modern design as they do in a traditional cottage garden.
A Quick Stroll Through History: The Origins of the Garden Path
The idea of using stones to cross tricky ground is as old as humanity itself. Our ancestors would have used them to ford streams or navigate boggy marshes. But the concept of the stepping stone as a deliberate garden feature has a more refined history, with deep roots in Eastern traditions.
In ancient Japanese gardens, stepping stones, or tobi-ishi, were far more than just a way to get around. They were a crucial part of the garden’s design and philosophy. Each stone was carefully chosen and placed to control the pace and direction of a visitor’s journey. The spacing would dictate whether you took a long stride or a short, careful step, encouraging you to pause and appreciate a particular view—a beautiful lantern, a carefully pruned tree, or the reflection of the moon in a pond. It was a form of walking meditation.
These ideas gradually filtered into Western garden design. As British explorers and plant hunters travelled the world, they brought back not only new and exotic plants but also new ideas about how to shape the landscape. By the Victorian era, our gardens were becoming more informal and naturalistic, moving away from the rigid, geometric designs of the past. Thinkers like William Robinson championed the idea of the ‘wild garden’, and stepping stones were the perfect fit for this new aesthetic. They allowed for a more organic, meandering path that felt less man-made and more in tune with nature.
Today, that love for natural, informal design is stronger than ever, and the humble stepping stone remains a beloved feature of the quintessential British garden.
Choosing Your Stones: A Guide to Materials
The material you choose for your stepping stones will have the biggest impact on the look, feel, and durability of your path. It’s important to think about your garden’s style, your budget, and how much maintenance you’re willing to do. Let’s break down the most popular options here in the UK.
Natural Stone: The Authentic Choice
For a truly timeless and authentic look, nothing beats natural stone. Each piece is unique, with its own colours, textures, and imperfections. It’s been shaped by the earth over millions of years, and it brings a sense of history and permanence to the garden.
Sandstone
Sandstone is a hugely popular choice, and for good reason. It has a warm, earthy quality that sits beautifully in a garden setting.
- Appearance: It comes in a lovely range of colours, from creamy buffs and yellows (like Cotswold stone) to rosy pinks and even grey-greens. The surface is often slightly riven, meaning it has a gently uneven texture that provides good grip.
- Best for: Cottage gardens, rustic designs, and informal country-style spaces. It pairs wonderfully with traditional brick houses and lush, colourful planting.
- Things to consider: Sandstone is porous, which means it can absorb water. In our damp British climate, this can make it susceptible to green algae and moss, especially in shady spots. You’ll need to give it a good scrub with a stiff brush once a year to keep it looking its best.
Slate
If you’re after a more dramatic, contemporary look, slate is a fantastic option. It’s been used as a building material in Britain for centuries, particularly in Wales and Cornwall.
- Appearance: Slate is known for its deep grey, blue, and black tones, although you can also find it in shades of green and purple. It has a very distinctive layered texture, which can be either smooth and honed or more naturally cleft.
- Best for: Modern, minimalist, and Japanese-inspired gardens. Its dark colour creates a stunning contrast with bright green foliage and vibrant flowers.
- Things to consider: Dark slate can get quite hot in direct sun. While that might sound nice, it can be a bit of a shock for bare feet! Some cheaper slates can also flake or delaminate over time, so it’s worth investing in good quality stone.
Granite
Granite is one of the toughest and most durable stones you can buy. It’s an igneous rock, formed from cooled magma, which makes it incredibly hard-wearing.
- Appearance: Granite is recognisable by its speckled, crystalline appearance. It typically comes in shades of grey, pink, and black. It can be finished in various ways, from a rough, textured surface to a highly polished one.
- Best for: High-traffic areas and formal garden designs. Its durability makes it perfect for paths that will see a lot of use. A sawn, geometric granite paver can look very sharp and elegant.
- Things to consider: Granite is at the more expensive end of the scale. It’s also very heavy, so installation can be hard work.
Limestone
Limestone is another classic choice, often seen in grander, more traditional garden designs.
- Appearance: It tends to have a smoother, more uniform texture than sandstone, with subtle fossil markings and veining. Colours range from pale ivory and grey to a darker black.
- Best for: Formal gardens, courtyards, and classic patios. Its refined appearance lends an air of elegance.
- Things to consider: Like sandstone, limestone is porous and can be prone to algae. It’s also susceptible to acid rain, which can cause slight pitting on the surface over many years, although many people feel this just adds to its character.
Man-Made Materials: The Practical Alternatives
While natural stone is beautiful, it’s not always the most practical or budget-friendly option. Man-made alternatives can offer great durability, consistency, and value for money.
Concrete Slabs
Don’t dismiss concrete out of hand! Modern concrete paving has come a long way from the boring grey council slabs of the past.
- Appearance: The beauty of concrete is that it can be made to look like almost anything. You can get high-quality replicas of natural stone, complete with realistic riven surfaces and colour variations. You can also find slabs in a huge range of colours, shapes, and sizes, from simple squares to intricate patterns.
- Best for: Almost any garden style, depending on the finish. It’s a great all-rounder and perfect if you’re on a budget. Concrete sleepers can create a fantastic rustic or contemporary look.
- Things to consider: The colour can fade over time, especially with cheaper slabs. While very durable, they can crack if laid on an uneven base.
Porcelain Paving
Porcelain is a relative newcomer to the garden paving scene, but it’s rapidly becoming one of the most popular choices in the UK.
- Appearance: Porcelain is a type of ceramic that’s fired at a very high temperature, making it incredibly dense and strong. The design is printed onto the surface, which means the possibilities are endless. You can get incredibly realistic wood, stone, and concrete effects.
- Best for: Contemporary, low-maintenance gardens. Its clean lines and uniform appearance are perfect for creating a sleek, modern outdoor living space.
- Things to consider: Porcelain is non-porous, which is great for stain resistance and preventing algae growth. However, it does mean that water will sit on the surface, so it’s crucial to lay it with a slight slope, or ‘fall’, to allow for drainage. It can also be more difficult to cut than other materials.
A Nod to the Unconventional: Creative Stepping Stone Ideas
Why stick to the traditional? Your stepping stone path is a chance to inject some personality into your garden.
- Log Slices: For a truly rustic, woodland feel, thick slices of a log (from a durable wood like oak or cedar) can make wonderful stepping stones. They will biodegrade over time, but they look fantastic nestled amongst ferns and shade-loving plants.
- Mosaic Stones: Feeling crafty? You can create your own unique stepping stones using mosaic kits or by setting broken tiles, pebbles, and sea glass into a concrete mould. It’s a wonderful way to add a splash of colour and a personal touch.
- Glow-in-the-Dark Pebbles: For a touch of magic, you can embed special glow-in-the-dark pebbles into your concrete stepping stones. They absorb sunlight during the day and cast a gentle, ethereal glow at night, guiding your way.
Designing Your Path: The Art of Placement
Now that you’ve got an idea of the materials, it’s time to think about the design. A well-designed path should look effortless, as if it has always been there. But achieving that look takes a bit of planning.
Straight or Curved?
The first decision to make is the shape of your path.
- Straight paths are direct, formal, and efficient. They create a strong visual line, leading the eye directly to a focal point, like a statue, a bench, or a beautiful doorway. They work best in formal, geometric garden layouts or in very small spaces where a straight line is the most practical option.
- Curved paths are informal, gentle, and mysterious. A gentle, sweeping curve feels more natural and encourages a slower pace. It can also be used to create a sense of intrigue, as you can’t see the end of the path from the beginning. This is a great trick for making a small garden feel larger, as it leads the eye on a longer journey.
A good rule of thumb: Lay out your proposed path with a garden hose or a rope first. Live with it for a few days, walk along it, and see how it feels. This allows you to easily make adjustments until you find a shape that you’re happy with and that feels natural to walk.
Getting the Spacing Right
This is the single most important factor in making your path comfortable and safe to walk on. If the stones are too close together or too far apart, it will feel awkward and unnatural.
The key is to space them centre-to-centre based on the length of an average stride. For most adults, this is around 60-65cm (24-26 inches).
- Start by placing your first and last stones.
- Take a normal, comfortable step from the centre of the first stone.
- Where your foot naturally lands is where the centre of the next stone should be.
- Repeat this process along the entire length of your planned path.
It’s a good idea to get a few different people to test it out. Everyone’s stride is slightly different, so you’re aiming for a comfortable average. Remember, it’s better to have the stones slightly too close than too far apart, especially if children or older people will be using the path.
Size, Shape, and Orientation
Don’t feel you have to stick to one size or shape.
- Varying sizes: Using a mix of large and small stones can create a more dynamic and natural-looking path. Arrange them irregularly for an informal feel.
- Shape: Square and rectangular stones lend themselves to more formal, regular patterns. Irregular, organic shapes look more rustic and are perfect for a cottage garden vibe.
- Orientation: Think about how you orient rectangular stones. Placing them horizontally can make a path feel wider, while placing them vertically can emphasise its length and direction.
How to Lay Stepping Stones: A Step-by-Step Guide
Laying stepping stones is a very achievable DIY project. With a bit of patience and some elbow grease, you can create a professional-looking path in a weekend. Here’s how to do it properly, ensuring your stones are stable, level, and built to last through many British winters.
What You’ll Need
Tools:
- Spade
- Trowel
- Wheelbarrow
- Spirit level
- Rubber mallet
- Tape measure
- Stiff brush
Materials:
- Your chosen stepping stones
- Sharp sand
- Cement (optional, for a stronger mortar mix)
- MOT Type 1 aggregate (optional, for very soft or boggy ground)
Step 1: Mark Out Your Path
Lay your stones out on the surface of the lawn or soil, following the design and spacing you decided on earlier. This gives you a final chance to check the layout and make any last-minute adjustments.
Step 2: Cut Out the Turf
Using your spade or a sharp knife, carefully cut around the edge of each stone. Go about 5cm (2 inches) wider than the stone itself to give you a bit of wiggle room. Once you’ve cut the outline, lift the turf and the soil beneath it and put it to one side (it’s great for patching up other areas of the lawn!).
You need to dig down deep enough to accommodate a sturdy base plus the thickness of the stone itself. A good depth to aim for is around 10-15cm (4-6 inches). The goal is to have the top of the stepping stone sitting either level with or just slightly above the surface of the lawn. This makes mowing much easier, as you can run the mower right over the top without hitting the stone.
Step 3: Prepare the Base (The Most Important Bit!)
A solid base is the secret to a wobble-free path that won’t sink over time. Don’t skip this step!
- For normal ground: A base of sharp sand is usually sufficient. Fill the hole you’ve dug with about 5-7cm (2-3 inches) of sand.
- For very soft or clay soil: If your ground is particularly wet or unstable, it’s a good idea to put down a layer of MOT Type 1 aggregate first (this is a mix of crushed stone that compacts down really well). A 5cm layer, compacted firmly, will create a much more stable foundation. Then add your layer of sand on top.
Step 4: Mix Your Mortar (Optional but Recommended)
For the most durable and stable result, it’s best to bed your stones on a mortar mix rather than just dry sand. It helps to lock them in place.
A standard mortar mix for this job is 5 parts sharp sand to 1 part cement. Mix it together in a wheelbarrow, adding a little water at a time until you have a damp, workable consistency—not too wet, not too dry. It should be like the consistency of a crumble topping. This is often called a ‘semi-dry’ mix.
Step 5: Bed the Stone
Place a generous mound of your mortar mix (or just the damp sand if you’re not using cement) into the hole. You want enough so that the stone will sit slightly proud of the surface when you first place it.
Carefully place the stepping stone on top of the mound. Now, using your rubber mallet, gently tap the stone down into the base. Start in the middle and work your way out to the edges. Use your spirit level to check that it’s level, both side-to-side and front-to-back. If one side is too high, give it a few more taps. If it’s too low, you’ll need to lift the stone and add a bit more mortar underneath.
Keep checking and tapping until the stone is sitting at the correct height and is perfectly level. It should feel completely solid, with no rocking or wobbling.
Step 6: Finishing Touches
Once the stone is perfectly in place, use your trowel or your hands to fill in the gaps around the edges with soil. Pack it in firmly to provide extra support.
If you’ve lifted turf, you can now trim it to fit snugly around the stone. Water it well to help it re-establish.
Repeat this process for every stone in your path. If you’ve used a mortar mix, it’s best to avoid walking on the path for at least 24-48 hours to give it time to set properly.
Caring for Your Stepping Stone Path
Your beautiful new path is in! Now, how do you keep it looking its best? Luckily, maintenance is fairly straightforward.
- Regular Sweeping: Keep the stones clear of leaves and debris, as this can trap moisture and encourage algae to grow.
- Annual Clean: Once a year, usually in the spring, give the stones a good scrub with a stiff brush and a bucket of hot, soapy water. This will remove most dirt and algae. For stubborn stains, a specialist patio cleaner can be used, but always test it on a small, inconspicuous area first.
- Avoid Pressure Washers (with caution!): While it’s tempting to blast away the grime with a pressure washer, be careful. The high-powered jet can damage the surface of softer stones like sandstone and can blast out the pointing or bedding material from underneath, causing the stones to become loose. If you must use one, use a wide fan setting and keep it at a low pressure.
- Weeding: Keep the gaps between the stones tidy. If you have grass, just mow over it. If you have gravel or planting, pull up any unwanted weeds as they appear.
- Checking for Wobbles: Every so often, walk the path and check for any stones that have become loose. If you find one, it’s best to lift it and re-bed it on a fresh layer of mortar before it becomes a trip hazard.
Inspiration: Path Ideas for Every British Garden
Need a little inspiration? Here are a few ideas for how to integrate a stepping stone path into different garden styles.
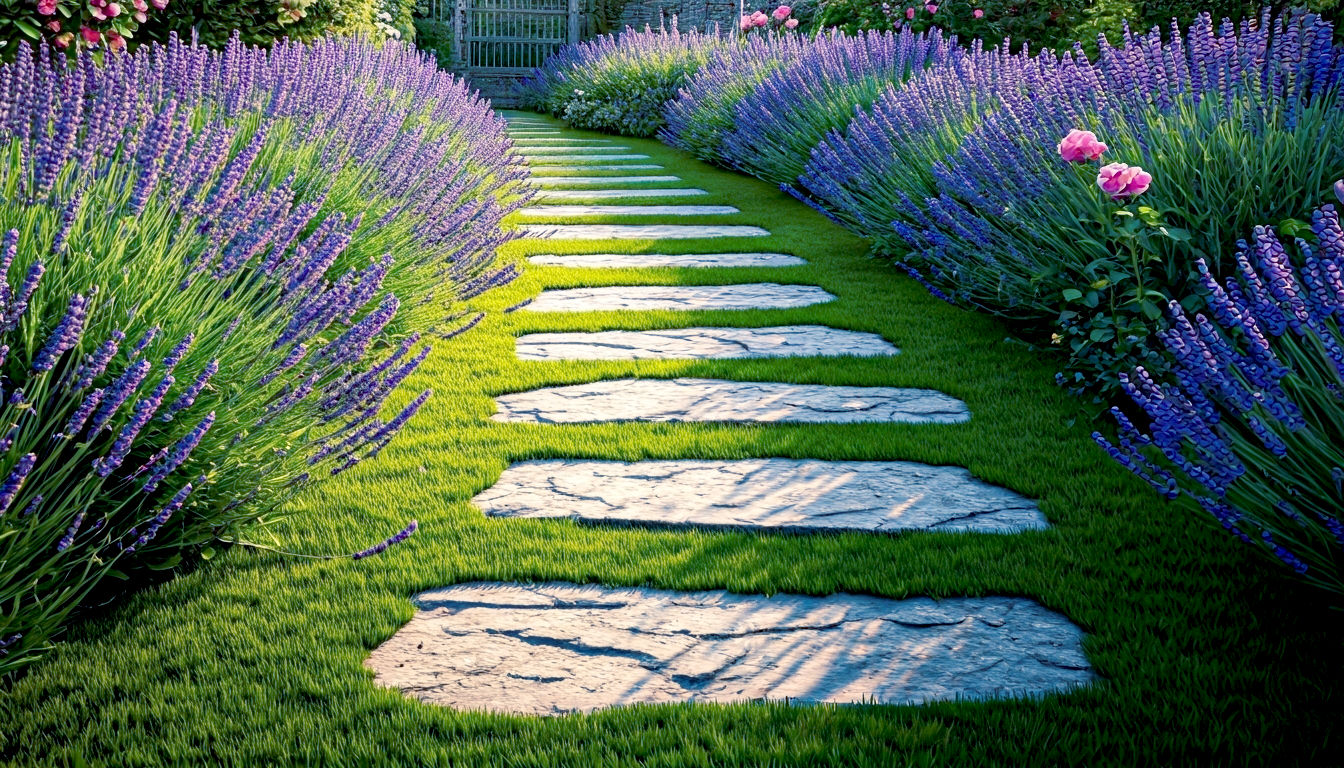
The Classic Cottage Garden
- Stones: Irregular, riven sandstone or reclaimed Yorkstone.
- Layout: A gentle, meandering curve that disappears behind a profusion of flowers.
- Gap Filler: Let the lawn grow right up to the edges, or plant creeping thyme and chamomile in the gaps for a beautiful scent.
- Planting: Surround the path with classic cottage garden plants like roses, lavender, foxgloves, and geraniums that spill over the edges, softening the lines.
The Sleek Modern Garden
- Stones: Large, geometric slabs of dark slate, granite, or porcelain in a uniform grey.
- Layout: A bold, straight line or a series of sharp, angular turns. Perfect symmetry can work wonderfully here.
- Gap Filler: A contrasting decorative aggregate like white marble chips, black basalt, or smooth Scottish pebbles.
- Planting: Use architectural plants with strong shapes, like ornamental grasses, phormiums, and clipped box balls, to complement the clean lines of the path.
The Family-Friendly Garden
- Stones: Concrete slabs with a non-slip texture. Choose large, flat stones to create a stable surface for little feet.
- Layout: A fun, winding path leading to a play area, a treehouse, or a hidden den.
- Gap Filler: A durable, hard-wearing lawn is the most practical choice.
- Creative Touch: Why not get the kids involved in making some personalised mosaic stepping stones to add to the path?
The Woodland and Shade Garden
- Stones: Slices of logs, or dark, mossy-looking slate to blend in with the shady surroundings.
- Layout: An informal, naturalistic path that looks like it was uncovered rather than built.
- Gap Filler: Low-growing, shade-loving ground cover plants like Mind-your-own-business (Soleirolia soleirolii) or woodruff.
- Planting: Nestle the path amongst ferns, hostas, hellebores, and wild garlic for a magical, woodland feel.
A Path to a More Beautiful Garden
A stepping stone path is so much more than a functional feature. It’s a design element that can bring structure, charm, and a sense of personality to your outdoor space. It invites you to slow down, to connect with your garden, and to appreciate the simple pleasure of a quiet walk amongst the plants you’ve nurtured.
Whether you choose the rugged authenticity of natural stone or the sleek practicality of porcelain, the key is to create a path that feels right for you and your garden. By taking the time to plan the design, prepare the ground properly, and lay the stones with care, you can build a beautiful, enduring feature that will enhance your garden and bring you joy for many seasons to come. So go on, take the first step.
Further Reading: