The Great British Guide to Quilting: From First Stitch to Finished Treasure
Ready to start quilting? Our comprehensive guide takes you from choosing the right tools to finishing your first quilt, with simple steps and tips for beginners.
This post may contain affiliate links. If you make a purchase through these links, we may earn a commission at no additional cost to you.
Have you ever looked at a beautiful, cosy quilt and thought, “I wish I could make that”? Well, you absolutely can. Quilting might seem like a mysterious craft reserved for grandmas with endless patience, but it’s really just about cutting up fabric and sewing it back together in a lovely pattern. It’s a bit like making a jigsaw puzzle you can snuggle under.
For centuries, people across Britain have been quilting. From the grand country houses of Northumberland to the tiny miners’ cottages in Wales, quilts have kept us warm, told our stories, and brought a splash of colour to our homes. They are stitched with history, love, and a good dose of practical British spirit.
This guide is your friendly companion to starting your own quilting adventure. We’ll take it step-by-step, from choosing your first needle and thread to making that final, satisfying stitch. We won’t use fancy jargon, and we’ll explain everything as if we were chatting over a cuppa. So, put the kettle on, find a comfy chair, and let’s unravel the wonderful world of quilting together. By the end, you’ll have the confidence and know-how to turn a pile of fabric into a treasured heirloom.
What on Earth is a Quilt, Anyway?
Before we dive in, let’s get our terms straight. A quilt isn’t just a blanket. It’s a special kind of textile sandwich. Imagine two layers of fabric with a soft, warm filling squished in the middle. That filling is called wadding or batting. The three layers are then stitched together, and this stitching is what we call quilting.
- The Quilt Top: This is the star of the show! It’s the top layer, where you create your beautiful pattern. This is usually done through patchwork, which is the art of sewing small pieces of fabric together.
- The Wadding (or Batting): This is the cosy middle layer that makes the quilt warm. It can be made from cotton, wool, polyester, or even bamboo.
- The Backing Fabric: This is the bottom layer of the quilt sandwich. It’s usually a single, large piece of fabric.
The magic happens when you stitch all three layers together. These stitches can be simple straight lines or wonderfully elaborate patterns that add texture and design to the finished quilt. So, in short: patchwork is making the top, and quilting is sewing the three layers together. Simple, right?
A Brief History of British Quilting: More Than Just a Blanket
Quilting in Britain has a rich and fascinating history that’s stitched into the very fabric of our nation. It wasn’t always about making pretty patterns; for a long time, it was about pure survival.
The earliest examples of quilting in Europe date back to the Middle Ages. Knights would wear quilted garments called gambesons under their armour for protection and comfort. It turns out a layer of padded fabric is surprisingly good at stopping a sword!
But the quilting we know and love today really took off in the 17th and 18th centuries. As trade routes opened up, beautiful printed cotton fabrics from India became available, and wealthy women in Britain began using them to create decorative quilts for their homes. These were often wholecloth quilts, where the quilting stitches themselves formed an intricate pattern on a single piece of fabric, like the famous Durham and Welsh quilts known for their stunningly detailed stitching.
The Industrial Revolution changed everything. With factories churning out cheap and colourful cotton fabric, quilting became accessible to everyone. For working-class families in the North of England and Wales, quilting was a necessity. They used scraps of old clothing, flour sacks, and anything else they could get their hands on to make warm bed coverings. This “make do and mend” attitude is at the heart of patchwork. These quilts weren’t just for warmth; they were a record of a family’s life, with patches from a baby’s dress or a father’s old work shirt.
Groups like the Miners’ Wives of the Durham coalfields created a distinct style of quilting that is still celebrated today. Their patterns were bold, their stitches were strong, and their quilts were the centre of the home. Quilting bees were social events where women would gather to work on a quilt together, sharing stories, news, and a bit of gossip.
Today, quilting is enjoying a massive revival. It’s no longer just a necessity but a beloved hobby and a vibrant art form. From the traditional designs of the past to the bold, modern creations of today, British quilting is alive and well, connecting us to a long line of resourceful and creative makers.
Your Quilting Toolkit: Everything You Need to Get Started
Walking into a fabric shop can be overwhelming. There are gadgets and gizmos for everything! But honestly, you only need a few key tools to start your quilting journey. Think of this as your quilting starter pack.
The Absolute Essentials
You can’t get far without these basics.
1. Rotary Cutter, Mat, and Ruler
This trio is the holy trinity of modern quilting. While you can use scissors, a rotary cutter will give you much faster, straighter, and more accurate cuts.
- Rotary Cutter: It looks a bit like a pizza cutter but is incredibly sharp. A 45mm blade is the perfect all-rounder for beginners. Always, always use the safety guard when you’re not cutting. These things are sharper than they look!
- Self-Healing Cutting Mat: This is the special mat you cut on. It protects your table and your rotary cutter blade. The “self-healing” bit means the cuts you make in the surface will close back up. Get the biggest one you can afford and have space for—an A2 size (roughly 18″ x 24″) is a brilliant starting point.
- Quilting Ruler: These are see-through acrylic rulers marked with a grid. They are essential for cutting straight lines and accurate shapes. A good starter size is a 6″ x 24″ ruler. It’s long enough to cut across the full width of your fabric. A smaller square ruler, like a 6.5″ x 6.5″, is also incredibly handy.
2. Fabric
The fun part! For your first project, 100% cotton is your best friend. It’s easy to cut, press, and sew. It doesn’t stretch too much, and it holds a crease well. Most fabric shops have a brilliant selection of “quilting cottons.”
- How much to buy? Start with “fat quarters.” A fat quarter is a piece of fabric that measures about 18″ x 22″. It’s a great pre-cut size that gives you a usable shape for a good price. Buying a “fat quarter bundle” is a fantastic way to get a coordinated set of fabrics without having to worry about matching colours yourself.
3. Thread
Don’t skimp on thread! Cheap thread can snap and cause all sorts of sewing machine headaches. Look for a good quality 100% cotton thread in a 50-weight. A neutral colour like grey, cream, or beige is incredibly versatile and will blend in with most fabrics. Brands like Aurifil, Gütermann, or Coats are excellent choices.
4. Sewing Machine
You don’t need a fancy, all-singing, all-dancing machine. Any basic sewing machine that can do a reliable straight stitch will be perfectly fine for quilting.
- Essential Feature: Make sure you have a “quarter-inch foot” (often written as a 1/4″ foot). This special presser foot is designed to guide your fabric so you can sew a perfect quarter-inch seam every time. This is crucial for accurate patchwork. If your machine didn’t come with one, you can usually buy one separately.
5. Needles
You’ll need needles for both your machine and for hand sewing.
- Machine Needles: Change your machine needle regularly! A good rule of thumb is to use a new needle for every new project. A dull needle can cause skipped stitches and damaged fabric. A universal size 80/12 is a great place to start.
- Hand Sewing Needles: You’ll need these for finishing your quilt binding. Look for needles labelled “sharps” or “betweens” (quilting needles).
6. Basic Sewing Supplies
You probably have some of these already!
- Sharp Fabric Scissors: For trimming threads and cutting smaller pieces. Keep them for fabric only, or they’ll go blunt!
- Pins: Glass-headed pins are best as you can iron over them without them melting.
- Seam Ripper: Your best friend when you make a mistake (and you will!).
- Iron and Ironing Board: Pressing your seams is non-negotiable in quilting. It’s the secret to flat blocks and sharp points.
Nice-to-Have Extras
Once you get hooked, you might want to add these to your collection.
- Walking Foot: This is a special sewing machine foot that helps feed all three layers of your quilt sandwich through the machine evenly. It’s a lifesaver for quilting straight lines.
- Fabric Pens/Markers: For marking quilting lines or drawing on fabric. Make sure you get one that disappears with air, water, or heat.
- Safety Pins: Curved safety pins are specifically designed for “basting” your quilt (pinning the three layers together). They are much easier to open and close than regular safety pins.
Your First Stitches: A Step-by-Step Guide to Making a Quilt Block
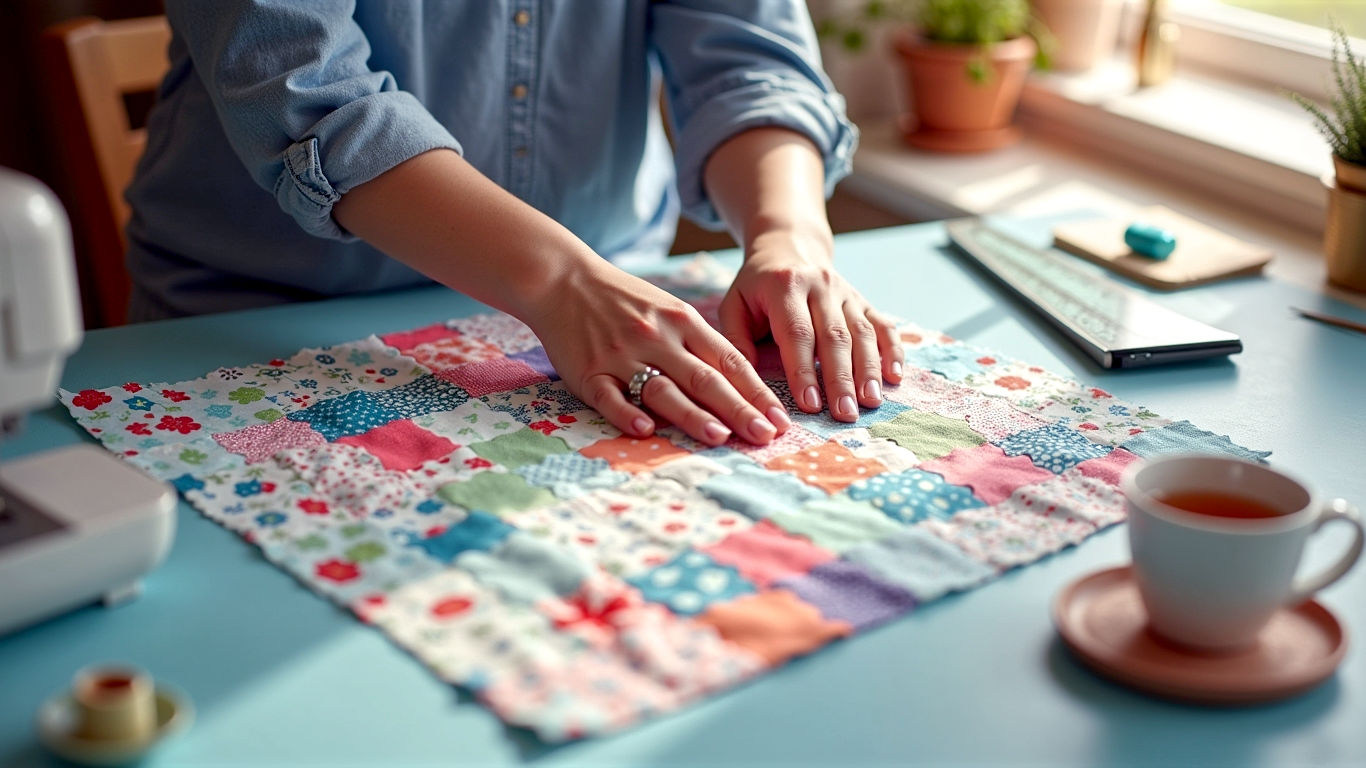
Right, you’ve got your gear. Let’s get sewing! The best way to learn is by doing. We’re going to make a simple Nine Patch block. It’s a classic for a reason: it teaches you all the fundamental skills you need. A Nine Patch block is simply nine squares of fabric sewn together in a three-by-three grid.
Step 1: Prepare Your Fabric
Before you even think about cutting, you need to prepare your fabric. Pop it in the washing machine on a cool wash. Why? Because fabric can shrink, and it’s much better for it to shrink before you sew it into a quilt than after! It also removes any chemicals from the manufacturing process.
Once it’s washed and dried, give it a good press with your iron. Use a bit of steam to get it nice and crisp. Smooth, flat fabric is much easier to cut accurately.
Step 2: Cut Your Squares
For our Nine Patch block, we’re going to need nine squares of fabric, each measuring 3.5 inches x 3.5 inches. We’ll use two different fabrics: a light one and a dark one. You’ll need five squares of the dark fabric and four squares of the light fabric.
- Lay your fabric on your cutting mat. Make sure it’s smooth and flat.
- Cut a straight edge. Line up your quilting ruler with one of the lines on your mat and place it on your fabric. Run your rotary cutter firmly along the edge of the ruler to create a perfectly straight starting edge.
- Cut your strips. Now, turn your fabric. Line up the 3.5-inch mark on your ruler with the straight edge you just cut. Cut your first 3.5-inch wide strip. Repeat this until you have enough strips.
- Cut your squares. Take one of your strips and turn it 90 degrees. Line up the 3.5-inch mark on your ruler with the bottom edge of the strip and cut your first square. Continue cutting 3.5-inch squares from your strips until you have five dark and four light.
Top Tip: Accuracy is everything in quilting. Take your time with this step. Measure twice, cut once!
Step 3: Lay Out Your Block
Arrange your nine squares on your table in a three-by-three grid. The pattern should look like a checkerboard, with the dark squares in the corners and the centre.
| Dark | Light | Dark |
|---|---|---|
| Light | Dark | Light |
| Dark | Light | Dark |
This helps you keep track of which piece goes where.
Step 4: Sew Your Rows
We’re going to sew the squares together in rows.
- Set up your machine. Attach your quarter-inch foot and set your machine to a straight stitch. A slightly shorter stitch length (around 2.0-2.2mm) is good for patchwork as it makes the seams stronger.
- Sew the first row. Take the first two squares from the top row (one dark, one light). Place them right sides together, making sure the edges are perfectly aligned. Sew along the right-hand edge with a quarter-inch seam allowance. Don’t backstitch at the beginning or end.
- Add the third square. Open up the two squares you just sewed. Now take the third square from the top row (a dark one) and place it right sides together with the light square. Sew along the right-hand edge, again with a quarter-inch seam. You’ve now completed your first row!
- Repeat for the other two rows. Do exactly the same for the middle and bottom rows. You will now have three separate rows of three squares each.
Step 5: Press Your Seams
This is a crucial step! Good pressing makes everything fit together perfectly.
- Take your sewn rows to the ironing board.
- For the top and bottom rows, press the seams towards the dark fabric. This means you push the seam allowance with your iron so it lies flat underneath the dark squares.
- For the middle row, press the seams towards the dark fabric in the centre.
- Why do we do this? This technique is called “nesting seams.” When you come to sew the rows together, the seam allowances will push up against each other perfectly, like little puzzle pieces, giving you lovely sharp corners where your squares meet.
Step 6: Sew the Rows Together
- Take your top and middle rows. Place them right sides together. You should feel the seams “lock” into place where they meet. This is the magic of nesting!
- Pin the rows together, placing a pin at each seam intersection to keep them from shifting.
- Sew along the long edge with a quarter-inch seam.
- Now, add the bottom row in the same way. Place it right sides together with the middle row, nest your seams, pin, and sew.
- Give your finished block one final press. First, press the new long seams to one side. Then, flip the block over and give it a final press from the front.
Congratulations! You’ve just made your first quilt block. It should measure 9.5 inches x 9.5 inches. (Don’t worry if it’s slightly off; we all have to start somewhere!).
Building Your Quilt: From Block to Blanket
Making one block is great, but a quilt is made of many blocks. Let’s look at the big picture.
- Make More Blocks: Decide how big you want your quilt to be. A small lap quilt might need 16 blocks (arranged in a 4×4 grid), while a single bed quilt would need many more. Keep making your Nine Patch blocks until you have enough.
- Assemble the Quilt Top: Once you have all your blocks, you sew them together in exactly the same way you sewed the squares and rows. First, sew the blocks into rows. Then, sew the rows together to complete your quilt top. You can add sashing (strips of fabric between the blocks) or a border (a frame of fabric around the outside) to make your quilt bigger and add another design element.
- Make the Quilt Sandwich: This is where you bring the three layers together.
- Lay your backing fabric on a large, flat surface (the floor works well!), wrong side up. Use masking tape to tape the corners down so it’s smooth and taut.
- Next, lay your wadding on top, smoothing out any wrinkles.
- Finally, lay your quilt top on the very top, right side up.
- Smooth everything out from the centre outwards. The three layers should be flat and wrinkle-free.
- Baste the Layers: Basting is temporarily securing the three layers together so they don’t shift while you’re quilting. You can do this in a few ways:
- Pin Basting: Use curved safety pins. Start in the centre and place a pin every 4-5 inches, working your way out to the edges.
- Spray Basting: Use a temporary spray adhesive designed for fabric. This is quicker but needs to be done in a well-ventilated area.
- Thread Basting: Use a needle and thread to make large, running stitches all over the quilt.
- Quilt It!: Now for the actual quilting. This is the process of stitching through all three layers.
- Straight-Line Quilting: The easiest method for beginners. Use a walking foot on your sewing machine to sew straight lines across your quilt. You can follow the lines of your patchwork (“stitch in the ditch”) or create a grid pattern.
- Free-Motion Quilting: This is more advanced. It involves dropping the “feed dogs” on your machine (the little teeth that pull the fabric through) and using a special “darning foot.” This allows you to move the quilt freely in any direction to draw patterns with your stitches. It takes practice, but the results can be stunning.
- Hand Quilting: A traditional and beautifully meditative process. You use a special needle (a “between”) and a thimble to make small, even running stitches through the layers.
- Bind the Edges: The final step! Binding is the fabric strip that goes around the raw edges of the quilt to give it a clean, durable finish.
- You’ll cut long strips of fabric (usually 2.5 inches wide), sew them together into one very long strip, and then fold and press it in half lengthwise.
- This folded strip is then sewn onto the front of the quilt, wrapped around to the back, and stitched down by hand for a neat, invisible finish.
And that’s it! You’ve officially made a quilt. Step back and admire your handiwork.
Common Pitfalls and How to Avoid Them
Every new quilter makes mistakes. It’s part of the learning process! Here are a few common trip-ups and how to handle them.
- Problem: My points don’t match up!
- Solution: This is almost always down to an inaccurate quarter-inch seam. Check you are using a quarter-inch foot and that your needle is in the centre position. Pressing your seams to nest them will also make a huge difference.
- Problem: My fabric is stretching and warping.
- Solution: Be gentle! Don’t pull or stretch your fabric as you sew or press. When you press, place the iron down, lift it up, and place it down again. Don’t drag it across the fabric, as this can distort the grain.
- Problem: My rotary cutter isn’t cutting cleanly.
- Solution: It’s probably time for a new blade. Rotary cutter blades get blunt surprisingly quickly. A fresh blade makes cutting a joy. Also, make sure you are pressing down firmly and evenly.
- Problem: I hate hand sewing the binding.
- Solution: That’s okay! You can stitch the binding down by machine. It won’t be as invisible, but a finished quilt is better than a perfect but unfinished one! There are plenty of tutorials online for machine binding.
The most important rule in quilting? Don’t aim for perfection on your first try. Your first quilt will have wobbly stitches and slightly wonky corners, and that is perfectly fine. It’s handmade! It’s supposed to have character. The “quilt police” aren’t going to come and inspect your seam allowance. Just enjoy the process, learn from your mistakes, and be proud of what you’ve created.
The Future of Quilting: A Modern Craft
Quilting today is more exciting than ever. While the traditional techniques are still cherished, a new generation of “modern quilters” is pushing the boundaries. They use bold colours, minimalist designs, and improvisational techniques to create quilts that are true works of art.
There is a huge and welcoming community of quilters online. On Instagram, you can find endless inspiration by searching hashtags like #modernquilting or #ukquilters. There are also countless blogs, YouTube channels, and online courses dedicated to the craft.
Quilting is a wonderful way to slow down, be creative, and make something beautiful and practical with your own two hands. It connects us to our past but also allows for endless personal expression. Whether you’re making a simple cot quilt for a new baby or an ambitious king-sized masterpiece for your own bed, the feeling of snuggling under a quilt that you made yourself is truly special.
So go on, pick out some fabric you love, and have a go. You might just find that you’ve discovered a passion that will keep you warm for years to come.
Further Reading
To continue your quilting journey, here are some highly respected resources in the quilting world:
- The Quilters’ Guild of the British Isles: The leading organisation for quilters in the UK. Their website is a treasure trove of information, events, and galleries. (https://www.quiltersguild.org.uk/)
- The Victoria and Albert Museum (V&A): The V&A has an incredible collection of historic quilts. Exploring their online collection is a fantastic way to get inspired by the quilters of the past. (https://www.vam.ac.uk/)
- Today’s Quilter & Love Patchwork & Quilting Magazines: Two of the UK’s top quilting magazines, full of patterns, tutorials, and inspiration from contemporary designers. (https://www.gathered.how/magazines-love-patchwork-quilting/)
- The Festival of Quilts: Europe’s leading patchwork and quilting event, held annually at the NEC in Birmingham. It’s an unmissable experience for any quilting enthusiast. (https://www.thefestivalofquilts.co.uk/)