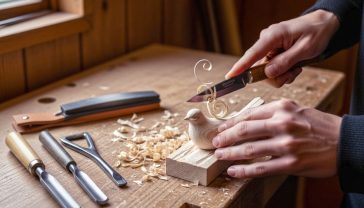
More Than Just Maintenance: A Shooter’s Guide to Bespoke Firearm Cleaning & Restoration
Discover the art of proper firearm care. This guide covers everything from the essential tools in a bespoke kit to a step-by-step cleaning ritual.
This post may contain affiliate links. If you make a purchase through these links, we may earn a commission at no additional cost to you.
For anyone who appreciates the fine craftsmanship of a British firearm, whether it’s a classic Purdey shotgun passed down through generations or a modern high-performance rifle, you’ll know it’s more than just a tool. It’s a piece of history, a work of art, and a trusted companion in the field. And just like any valuable possession, it deserves the very best care. But we’re not just talking about a quick wipe-down after a day out. We’re talking about a deeper level of care – a proper, thorough clean and restoration that keeps your firearm performing flawlessly and looking its best for years to come.
This is where a professional bespoke firearm cleaning and restoration kit comes in. It’s a world away from the generic, one-size-fits-all kits you might find in a catalogue. A bespoke kit is tailored to you and your firearms. It’s about having the right tools, the right materials, and the right knowledge to do the job properly. Think of it like the difference between a high-street suit and a Savile Row original; both will keep you warm, but only one is crafted to perfection.
In this guide, we’ll explore everything you need to know about professional firearm cleaning and restoration. We’ll delve into why it’s so important, what goes into a truly bespoke kit, and how to use it to keep your firearms in pristine condition. Whether you’re a seasoned game shooter in the Scottish Highlands, a target-shooting enthusiast in Surrey, or someone who has inherited a family heirloom, this guide will give you the confidence to care for your firearm like a true professional.
The Heart of the Matter: Why Proper Firearm Care is Non-Negotiable
You wouldn’t drive a classic Aston Martin without regularly checking the oil and polishing the chrome, would you? The same principle applies to firearms. Proper cleaning and maintenance are absolutely essential for three key reasons: safety, reliability, and longevity.
Safety First, Always
A dirty firearm is an unsafe firearm. Over time, residue from burnt powder (fouling), lead, copper, and other debris can build up in the barrel and action. This build-up can cause all sorts of problems. It can lead to increased pressure when a round is fired, which in the worst-case scenario could cause a catastrophic failure. A blockage in the barrel, even a small one, could be incredibly dangerous.
Regular cleaning ensures that the internal workings of your firearm are clear and functioning as the manufacturer intended. It’s a fundamental part of responsible gun ownership. You’re not just protecting your equipment; you’re protecting yourself and those around you.
Reliability When it Counts
Imagine you’re lining up the perfect shot on a crisp autumn morning. You pull the trigger, and… click. Nothing happens. There are few things more frustrating for a shooter. More often than not, a failure to fire or eject can be traced back to poor maintenance.
Grit, grime, and old oil can gum up the moving parts of a firearm’s action, causing it to jam or misfire. For anyone who relies on their firearm, whether for sport or professional use, this is simply not an option. A clean, well-lubricated firearm will cycle smoothly and reliably, every single time. It’s the peace of mind that comes from knowing your equipment won’t let you down.
Preserving a Legacy
Many firearms, especially in Britain, are more than just tools; they are heirlooms. A beautifully crafted shotgun or rifle can be passed down from one generation to the next, becoming a tangible link to family history and tradition. But without proper care, these pieces of history can quickly deteriorate.
Rust is the arch-nemesis of any firearm. Even a small amount of moisture, perhaps from a damp day in the field or even the oils from your hands, can start the process of corrosion. If left unchecked, rust can pit the metal, weaken the structure, and ruin the firearm’s value and appearance. Similarly, the wooden stock of a rifle or shotgun needs care to prevent it from drying out, cracking, or warping.
Proper cleaning and restoration aren’t just about keeping a gun working; they’re about preserving its soul. It’s about honouring the craftsmanship that went into its creation and ensuring it can be enjoyed by future generations.
From Flintlock to Modern Rifle: A Brief History of Gun Cleaning
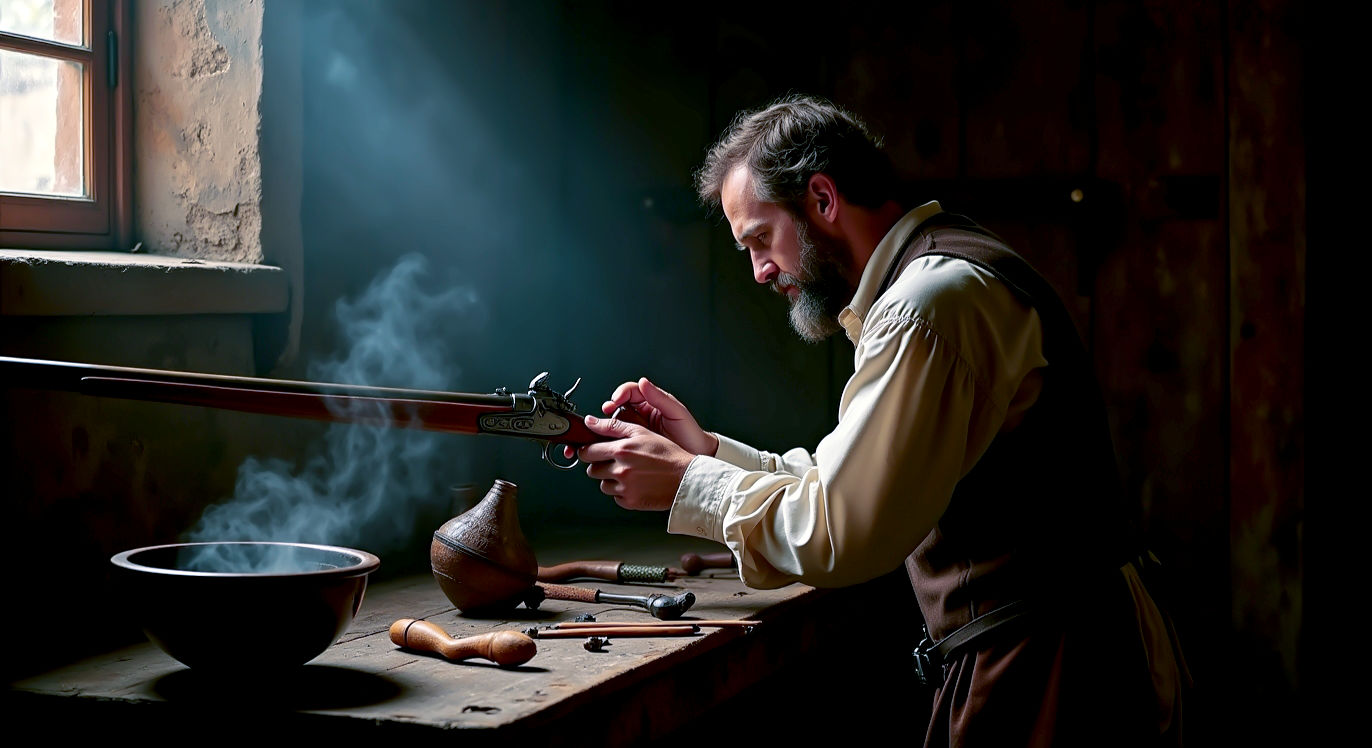
The need to clean firearms is as old as the firearms themselves. Early gunsmiths and soldiers quickly realised that the black powder used in the first flintlocks and matchlocks was incredibly corrosive. It left behind a thick, grimy residue that would quickly foul the barrel and rust the metal if not meticulously cleaned after every use.
The Age of Ramrods and Boiling Water
In the early days, cleaning was a simple but essential chore. Soldiers would use a ramrod with a piece of cloth (a “patch”) attached to the end to scrub the inside of the barrel. Often, the only solvent available was boiling water, which was surprisingly effective at dissolving the black powder fouling. The firearm would then be carefully dried and oiled with animal fat to prevent rust. It was a time-consuming process, but absolutely vital to keep a musket operational on the battlefield.
As firearms technology evolved, so did cleaning methods. The introduction of breech-loading firearms in the 19th century made cleaning the barrel much easier, as you could now access it from both ends. This period, which coincided with the golden age of British gunmaking in London and Birmingham, saw the development of more specialised tools. Cleaning rods were made from materials like brass to avoid scratching the inside of the barrel, and different attachments, known as jags and brushes, were designed to tackle specific cleaning tasks.
The 20th Century and the Rise of Chemical Solvents
The biggest leap forward came with the development of modern smokeless powder in the late 19th and early 20th centuries. While much cleaner than black powder, it brought its own challenges. The higher pressures and velocities of modern ammunition meant that copper and lead from the bullets would be stripped off and left behind in the barrel. This “copper fouling” could be very difficult to remove with simple scrubbing.
This led to the birth of the chemical solvent industry. Scientists and gunsmiths developed powerful solvents specifically designed to dissolve copper and lead deposits without harming the steel of the barrel. Brands that are still familiar to us today began to emerge, offering shooters a much more efficient way to keep their barrels pristine.
Today, we have a vast array of cleaning tools and chemicals at our disposal, from carbon fibre rods and bore guides to advanced, non-toxic solvents. Yet, the fundamental principles remain the same as they were centuries ago: remove the fouling, protect the metal, and ensure the firearm is safe and reliable. The history of gun cleaning is a story of continuous innovation, driven by the enduring need to care for these remarkable machines.
Anatomy of a Bespoke Kit: The Tools of the Trade
So, what exactly sets a bespoke cleaning and restoration kit apart from a standard, off-the-shelf one? The answer lies in its tailored nature. A bespoke kit is assembled with a specific firearm, or type of firearm, in mind. It contains precisely the right tools and materials for the job, ensuring you can clean every nook and cranny without causing any damage. Let’s break down the essential components.
The Foundation: The Cleaning Rod
The cleaning rod is the most fundamental tool in any kit. Its job is to push patches, brushes, and mops through the barrel. It sounds simple, but the quality and type of rod you use are incredibly important.
- One-Piece vs. Multi-Piece: For serious cleaning at home, a one-piece rod is always the best choice. They are stronger, more rigid, and less likely to bend or break inside the barrel. Multi-piece rods that screw together are convenient for carrying in the field, but they have joints that can trap grit and potentially scratch the inside of your barrel.
- Material Matters: The golden rule is that the cleaning rod should be made of a softer material than your barrel. This prevents accidental scratching of the rifling (the spiral grooves inside a rifle barrel that make the bullet spin). Carbon fibre rods are a popular modern choice as they are lightweight, strong, and won’t scratch steel. Coated stainless steel is another excellent option. Traditionalists might favour a classic brass rod, which is also perfectly safe. Avoid bare steel or aluminium rods at all costs.
- The Right Fit: Your rod must be the correct length and diameter for your firearm. It should be long enough to pass all the way through the barrel with room to spare for your hand, but not so long that it becomes unwieldy.
Protecting the Crown: Bore Guides
For any rifle owner, a bore guide is an essential piece of kit. This is a simple tube-like device that fits into the chamber of your rifle. It does two crucial things: it aligns the cleaning rod perfectly with the centre of the bore, preventing it from scraping the sides, and it stops solvents and gunk from dribbling back into the trigger mechanism and action. It’s a small tool that makes a huge difference in protecting the accuracy and integrity of your rifle.
The Business End: Brushes, Jags, and Mops
These are the attachments that screw onto the end of your cleaning rod and do the actual work inside the barrel.
- Bore Brushes: These are used for the heavy scrubbing to remove stubborn fouling. They are typically made of bronze or stiff nylon. A bronze brush is great for tackling tough carbon and copper deposits, but it does wear out and needs to be replaced regularly. Nylon brushes are less aggressive and are good for general-purpose cleaning. You should have brushes that are the correct calibre for your firearm.
- Jags: A jag is a pointed tip designed to hold a cleaning patch snugly. As you push it through the barrel, the tight fit ensures the patch makes full contact with the inside surface, effectively wiping away loosened debris and applying solvents or oil. They are usually made of brass or nickel-plated brass.
- Slotted Patch Holders: This is an alternative to a jag. It has a simple slot that you thread a patch through. They are less precise than a jag, as the patch can bunch up, but they are useful for applying a liberal amount of solvent to the bore.
- Cotton Mops: These are soft, fluffy attachments used for the final stages of cleaning. They are perfect for applying a thin, even coat of protective oil to the bore after it has been scrubbed clean.
The Magic Potions: Solvents and Lubricants
The world of gun cleaning chemicals can be bewildering, but they generally fall into three categories.
- Bore Solvents: These are the workhorses. Their job is to break down and dissolve the fouling in your barrel. You’ll find general-purpose solvents that tackle both carbon and copper, as well as specialised solvents that focus on one or the other. For most shooters, a good quality all-in-one solvent is perfectly adequate. Always make sure you use solvents in a well-ventilated area, as some can have strong fumes.
- Degreasers: These are used to clean the action, trigger group, and other metal parts of the firearm. They cut through old, grimy oil and leave a clean, dry surface ready for fresh lubrication.
- Lubricants and Protectants: Once your firearm is clean, you need to protect it. This is where gun oils and greases come in. A light coat of gun oil is applied to all metal surfaces to prevent rust and to keep moving parts working smoothly. Gun grease is a thicker lubricant that is used on specific high-friction points, such as the locking lugs on a bolt-action rifle or the hinge pin on a shotgun.
The Finishing Touches: Patches, Cloths, and More
No kit is complete without a good supply of consumable items and other handy tools.
- Cleaning Patches: These are small squares of cotton flannel used with your jag or slotted holder. You’ll go through a lot of these, so it’s always good to have plenty on hand. Make sure you get the right size for your calibre.
- Microfibre Cloths: Essential for wiping down the exterior of your firearm and applying a final coat of protective oil.
- Utility Brushes: A set of small brushes, similar to toothbrushes but with nylon, brass, and steel bristles, is incredibly useful for cleaning the action and other hard-to-reach parts.
- Dental Picks: A set of non-marring polymer dental picks is perfect for scraping away stubborn carbon build-up in tight corners without scratching the metal.
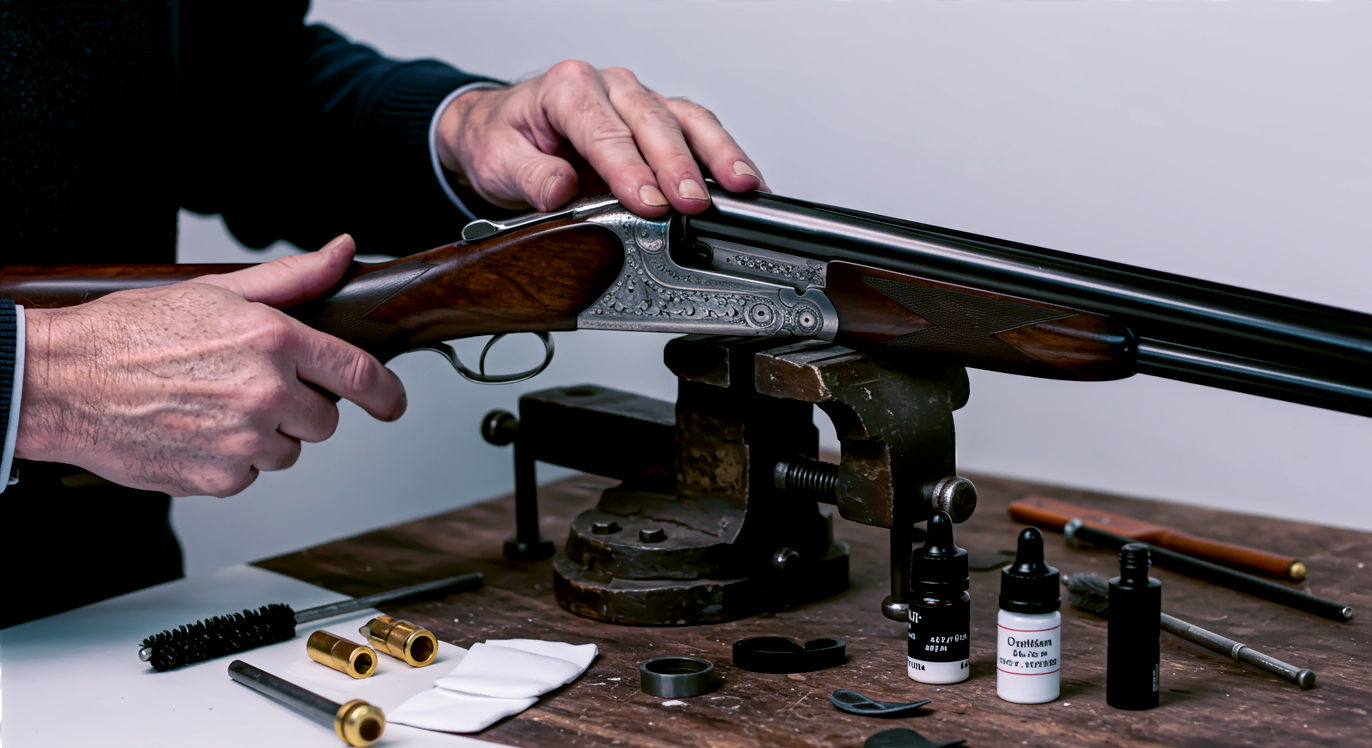
- A Secure Vise or Cradle: A dedicated gun vise or cradle is perhaps the most important part of a professional setup. Trying to clean a firearm while it’s sliding around on a table is frustrating and unsafe. A good vise holds the firearm securely, freeing up both of your hands to work. It makes the whole process easier, safer, and more effective.
A Closer Look: The BushWear Gun Vise Maintenance Box
Finding all the right components for a bespoke kit can be a challenge, which is why integrated solutions have become so popular. A great example of this is the BushWear Gun Vise Maintenance Box. It’s designed to be an all-in-one station for the serious firearm owner, blending practicality with comprehensive features.
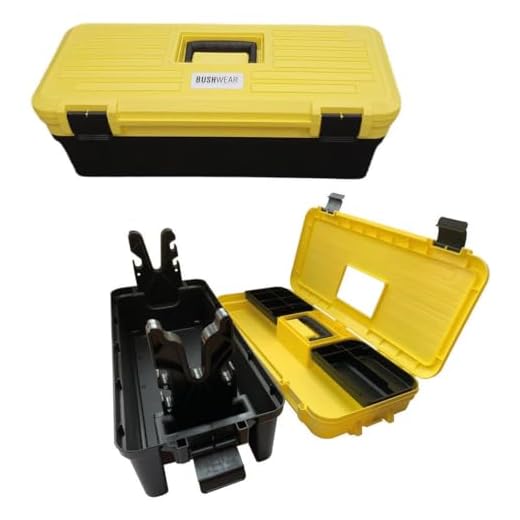
BushWear Gun Vise Maintenance Box – Complete Firearm Cleaning Kit with Gun Vise & Portable Case | All-in-One Rifle, Shotgun & Handgun Maintenance Solution…
-
All-in-One Solution: A complete maintenance kit that includes all the necessary tools for firearm cleaning and upkeep.
-
Integrated Gun Vise: Features a built-in gun vise to securely and safely hold your firearm, making maintenance tasks much easier.
-
Durable & Portable: Comes in a robust carrying case, designed for easy storage and transport to the range or on hunting trips.
-
High-Quality Construction: Made from durable materials to ensure the kit is long-lasting.
-
Versatile Use: Suitable for a wide variety of firearms, including rifles, shotguns, and handguns, making it a practical choice for any gun owner.
What makes a product like this stand out is that it’s built around the most crucial element: a stable work platform. The box itself unfolds to become a gun vise. The rubberised yokes hold a rifle or shotgun securely in place, preventing any wobbling or slipping while you work. This is a game-changer compared to balancing a firearm on your lap or a workbench. Having that stability means you can confidently run a cleaning rod down the barrel or apply focused pressure to scrub a dirty part without the risk of the gun falling or a tool slipping and causing a scratch.
Inside, the box is essentially a portable gunsmith’s toolkit. It comes with a comprehensive set of cleaning rods, brushes, jags, and mops that cover a wide range of calibres, from small-bore rifles to 12-gauge shotguns. This versatility is a huge plus, as it means you don’t need to buy separate kits if you own multiple types of firearms. The components are well-organised in their own compartments, so you’re not rummaging around for the right-sized brush.
The design cleverly integrates storage with function. There are compartments for your solvents, oils, and patches, keeping everything you need within arm’s reach. The whole thing packs down into a sturdy, portable case that you can easily take to the shooting range or on a hunting trip. It’s a well-thought-out system that provides the core of what any shooter would need for thorough, professional-level maintenance. While a true purist might eventually add a few specialised tools of their own, for the vast majority of British shooters, a comprehensive solution like the BushWear box is an excellent foundation for a lifetime of proper firearm care.
The Ritual of Cleaning: A Step-by-Step Guide
Cleaning a firearm shouldn’t be a chore. Think of it as a ritual, a chance to connect with your equipment and ensure it’s in perfect working order. Here’s a general step-by-step process. Always remember to consult your firearm’s specific owner’s manual first.
Step 1: Preparation and Safety
First things first: safety. Before you even think about cleaning, you must make sure the firearm is unloaded. Visually and physically check the chamber, magazine, and feeding path to confirm there is no ammunition anywhere in the firearm. Do this every single time.
Set up your cleaning area. Lay down a mat to protect your work surface and catch any drips. Have all your tools and supplies from your bespoke kit laid out and ready to go. Ensure you have good lighting and ventilation. Finally, secure the firearm in your gun vise or cradle.
Step 2: Cleaning the Barrel
The barrel is where most of the fouling builds up, so it requires the most attention.
- Initial Patches: Push a couple of dry patches through the barrel from the breech end to the muzzle. This will remove any loose grit and grime. Never pull a dirty patch back through the barrel.
- Apply Solvent: Soak a clean patch with your chosen bore solvent and push it through the barrel. You want to give the barrel a good, wet coating. Let the solvent sit for 10-15 minutes to do its work.
- Brush It Out: Attach a bronze or nylon bore brush to your cleaning rod and make several passes through the barrel (the number of passes recommended by the solvent manufacturer is a good guide, often 10-20). This scrubbing action will loosen the fouling that the solvent has broken down.
- Patch It Out: Remove the brush and attach a jag with a clean, dry patch. Push it through the barrel. It will probably come out looking very dirty. Keep pushing clean patches through until they come out clean and white. This is the most satisfying part of the process!
- Repeat if Necessary: If your patches are still coming out with streaks of grey (lead), black (carbon), or blue/green (copper), you may need to repeat the solvent and brushing steps.
Step 3: Cleaning the Action
The action is the heart of the firearm, containing the trigger, bolt, and all the other moving parts. It needs to be kept clean to function reliably.
- Disassembly: Following your owner’s manual, disassemble the firearm as much as you are comfortable with. For most rifles, this will mean removing the bolt. For shotguns, you will typically remove the barrel and fore-end.
- Scrub and Wipe: Use your utility brushes and a good degreaser to scrub all the metal parts of the action. Pay close attention to the bolt face, locking lugs, and extractor. An old toothbrush and some cotton swabs are great for getting into tight spots.
- Wipe Dry: Use a clean cloth or compressed air to make sure all parts of the action are completely dry.
Step 4: Lubrication and Protection
Now that everything is clean, it’s time to protect it.
- Oil the Action: Apply a very thin layer of high-quality gun oil to all the metal surfaces of the action. A little goes a long way – you don’t want to drown it in oil, as this will just attract more dirt. Apply a small amount of grease to the specific points recommended in your manual.
- Protect the Barrel: Push a cotton mop or a patch lightly dampened with gun oil through the clean barrel. This leaves a thin protective film that will prevent rust from forming.
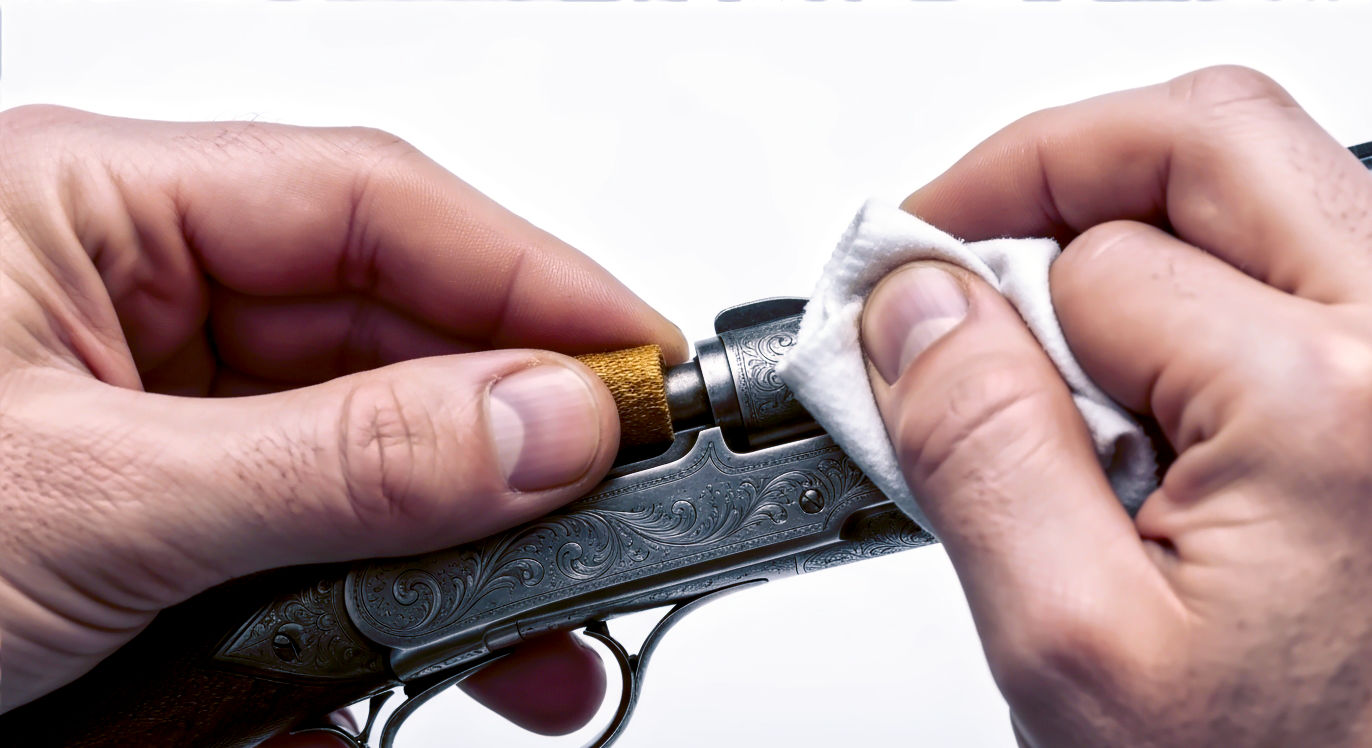
- Wipe Down the Exterior: Use a silicone-treated cloth or a microfibre cloth with a few drops of oil to wipe down the entire exterior of the firearm, including the barrel, receiver, and trigger guard. This not only protects the metal but also removes any fingerprints.
Step 5: Caring for the Stock
Don’t forget the wood! If your firearm has a wooden stock, it needs a little TLC too. Wipe it down with a clean, dry cloth. For traditional oil-finished stocks, you can periodically apply a small amount of boiled linseed oil or a specialised stock finish to nourish the wood and maintain its lustre.
Step 6: Reassembly and Final Checks
Carefully reassemble your firearm. Once it’s back together, perform a function check. Work the action, test the safety, and (with an unloaded firearm) do a dry fire to ensure everything is working correctly. Now your firearm is clean, protected, and ready for its next outing.
Beyond Cleaning: The Art of Restoration
Sometimes, a firearm needs more than just a standard clean. This is especially true for older, inherited guns or those that have seen hard use. Restoration is a more involved process that aims to bring a firearm back to its former glory. While major restoration work, such as re-bluing the metal or re-finishing a stock, is best left to a professional gunsmith, there are some minor restoration tasks you can tackle with the right tools from a bespoke kit.
Removing Minor Surface Rust
If you catch it early, minor surface rust can often be removed without damaging the underlying metal finish. The key is to use a gentle abrasive. Take a very fine grade of bronze wool (grade 0000), apply a few drops of gun oil, and gently rub the affected area. The bronze is softer than the steel, so it will remove the rust without scratching the bluing. Always test on a small, inconspicuous area first.
Polishing and Protecting the Wood
A tired-looking wooden stock can often be revived. Start by cleaning it thoroughly with a soft cloth and a specialised wood cleaner to remove years of built-up wax and grime. Once it’s clean, you can apply a good quality stock wax or conditioning oil. Apply it sparingly with a soft cloth, let it soak in, and then buff it to a gentle sheen. This will help to restore the wood’s natural depth and colour, as well as protecting it from moisture.
The Future of Firearm Care: Trends and Innovations
The world of firearm maintenance is always evolving. We are seeing a move towards more environmentally friendly and non-toxic cleaning products. New bio-based solvents and lubricants are emerging that work just as well as their traditional petroleum-based counterparts, but without the harsh fumes and disposal concerns.
Technology is also playing a role. Tools like the borescope – a tiny camera that lets you inspect the inside of your barrel – are becoming more affordable for the average shooter. This allows you to see fouling and wear in incredible detail, helping you to clean more effectively and spot potential problems before they become serious.
Ultimately, however, the core principles of firearm care will always remain the same. It’s about diligence, attention to detail, and having the right tools for the job. A professional bespoke cleaning and restoration kit isn’t just a collection of brushes and oils; it’s an investment. It’s an investment in the safety, reliability, and longevity of your treasured firearms. It’s about taking pride in your equipment and honouring the tradition of responsible gun ownership that has been a cornerstone of British country life for centuries. By embracing the ritual of cleaning, you’re not just maintaining a tool – you’re preserving a legacy.
Further Reading
For those looking to delve deeper into the world of firearm maintenance and British shooting traditions, these resources are highly respected and offer a wealth of information:
- The Gun Trade Association: The official body for the sporting gun trade in the UK, offering news, advice, and a directory of registered dealers and gunsmiths.
- Fieldsports Magazine: A leading publication for game shooting and country pursuits in the UK, with articles on gun reviews, maintenance tips, and shooting etiquette.
- Pigeon Watch: One of the largest online forums for shooting enthusiasts in the UK, with active discussions on gun cleaning, reloading, and all aspects of the sport.
- The British Association for Shooting and Conservation (BASC): The largest shooting organisation in the UK, providing guidance on best practices, safety, and the legal aspects of firearm ownership.