The Guide to Home Servers: Your Digital Kingdom in a Box
Discover how a home server can be your private media library, and smart home hub. This definitive guide explains everything for a UK beginner.
This post may contain affiliate links. If you make a purchase through these links, we may earn a commission at no additional cost to you.
Ever felt that slight panic when your favourite streaming service removes a classic film? Or maybe you’re tired of juggling files across a dozen different cloud accounts, never quite sure where that important document is. What if you could create your own private, powerful hub for all your digital stuff—your movies, music, photos, and files—right in your own home?
Welcome to the world of home servers.
It might sound a bit techy, like something from a spy film, but a home server is surprisingly simple in concept. Think of it as your personal digital butler, a clever box that sits quietly in a corner, organising your digital life and serving it up to you whenever and wherever you need it. It’s your own private Netflix, your personal Spotify, your secure Dropbox, and so much more, all under your complete control.
In this guide, we’ll demystify the home server. We’ll explore what it is, why you might want one, and how it can transform the way you manage your digital world. Forget the jargon and the complicated setups; we’re going to break it down into simple, practical terms. By the end, you’ll see that building your own digital kingdom isn’t just for tech wizards—it’s something anyone with a bit of curiosity can do. Let’s get started.
What on Earth is a Home Server?
At its heart, a home server is just a computer that’s always on and connected to your home network. Its job is to store, manage, and share files and services with other devices in your home, like your laptop, smartphone, tablet, or smart TV.
You could use an old desktop computer you have lying around, a tiny, credit-card-sized computer, or a specially designed box called a NAS (Network Attached Storage). The key thing is that it’s dedicated to its tasks. It doesn’t get cluttered with everyday browsing or gaming; it just sits there, reliably doing its job 24/7.
A Simple Analogy: The Digital Library
Imagine your home is a small town. Your laptop, phone, and TV are the houses where people live. The home server is the town’s central library.
- Storage: The library holds all the town’s books (your files), movies (your videos), and records (your music). Instead of each house keeping its own small collection, everything is stored centrally and safely in one place.
- Access: Anyone in the town with a library card (a device on your network) can borrow a book or watch a film. You can access the library’s collection from your own home (your phone or laptop) without having to store it all yourself.
- Special Services: The library might also offer other services, like a printing press (a print server) or a secure postbox (your own email or cloud service).
This central ‘library’ is what makes a home server so powerful. It organises your digital life, makes it accessible everywhere, and keeps it safe.
Is it Different from The Cloud?
Yes, and this is a crucial point. When you use services like Google Drive, Dropbox, or iCloud, you’re renting a small slice of someone else’s massive computer—a server in a giant data centre somewhere in the world. This is what we call “the cloud.”
A home server is your own private cloud. The key differences are:
| Feature | The Cloud (e.g., Google Drive) | Your Home Server |
|---|---|---|
| Location | On a remote server owned by a company. | In your own home, on your hardware. |
| Control | The company controls your data, privacy, and terms. | You have 100% control over your data. |
| Cost | Often a recurring monthly or annual subscription fee. | A one-off cost for the hardware, then it’s free to use. |
| Privacy | Your data is subject to the company’s privacy policy. | Completely private. No one else can access it. |
| Speed | Limited by your internet connection speed. | Super-fast access on your home network. |
| Storage | You pay more for more storage. | You can add as much storage as you need. |
While cloud services are incredibly convenient, a home server gives you ultimate ownership, privacy, and flexibility. You make the rules.
Why Would I Bother Getting a Home Server?
So, it’s a computer that stores stuff. Big deal, right? Well, the magic of a home server isn’t just in what it is, but in what it can do. Here are some of the most popular reasons people in the UK are setting up their own servers.
1. Create Your Own Media Empire (Like Netflix, but Yours)
This is the killer app for most home server enthusiasts. Imagine having every film, TV series, and song you own beautifully organised and ready to stream to any device, anytime.
- What it is: Using software like Plex or Jellyfin, your home server can scan all your video and music files. It automatically downloads artwork, trailers, cast information, and episode summaries, presenting it all in a slick, professional-looking interface, just like Netflix.
- How it works: You open the Plex app on your smart TV, phone, or laptop. You see your entire media library, beautifully arranged. You press play, and the server streams the film directly to your screen. You can even share your library with family and friends, no matter where they are.
- Why it’s great: No more buffering, no more ads, and no more discovering your favourite show has been removed from a streaming service. It’s your collection, forever.
2. Centralise and Back Up Your Precious Files
How many photos are scattered across your family’s phones? Where are your important documents stored? A home server brings order to the chaos.
- What it is: It acts as a central hub for all your files. Think of it as a shared network drive that everyone in the house can access.
- How it works: You can automatically back up photos from your phone the moment you connect to your home Wi-Fi. You can save documents directly to the server from your laptop, knowing they’re safe and accessible from any other device.
- Why it’s great: No more hunting for files. More importantly, you can set up automated backups. The server can back up your main computer every night, creating a perfect copy in case of a disaster. It can even back itself up to an external drive or a cloud service for ultimate peace of mind. Your treasured family photos and important paperwork are protected.
3. Build Your Own Private Google Drive or Dropbox
Tired of paying monthly fees for cloud storage, or worried about the privacy of your data? A home server lets you roll your own.
- What it is: With software like Nextcloud or ownCloud, you can create a secure, private cloud storage service that works just like the commercial ones.
- How it works: You install the Nextcloud app on your phone and computer. You can then sync files between your devices, share documents with a secure link, and access everything through a clean web interface. It even includes features like a shared calendar and contacts.
- Why it’s great: You get all the convenience of the cloud with none of the downsides. There are no subscription fees, no storage limits beyond what you install yourself, and you have absolute certainty that your data is private. It’s perfect for sensitive documents or just for reclaiming control of your digital life.
4. Run a Smart Home Hub
If you’re venturing into the world of smart homes, a home server can be the central brain for all your gadgets.
- What it is: Software like Home Assistant can run on your server, connecting all your smart lights, plugs, thermostats, and sensors, regardless of their brand.
- How it works: Instead of relying on a dozen different apps and cloud services (one for your Philips Hue lights, another for your Hive thermostat), Home Assistant brings them all together. You can create powerful automations, like “When my phone detects I’m arriving home and it’s after sunset, turn on the hallway lights and adjust the heating.”
- Why it’s great: It puts you in control of your smart home, making it more powerful and, crucially, more private. Your data stays within your home, not on a company’s servers.
5. Other Cool and Nerdy Projects
Once you have a server running 24/7, you can start experimenting with all sorts of other interesting projects:
- Block ads on your entire network: Run Pi-hole, a piece of software that blocks adverts on every device connected to your Wi-Fi, from your phone to your smart TV. No more YouTube ads!
- Host your own website or blog: Run a personal website from your own home.
- Manage your passwords: Use a self-hosted password manager like Vaultwarden (compatible with Bitwarden) for ultimate security.
- Run a gaming server: Host a private Minecraft or Valheim server for you and your mates.
A home server is a gateway to a world of digital creativity and control. It’s a tool that grows with your interests.
The Different Types of Home Server Hardware
Okay, you’re intrigued. But what kind of machine do you actually need? The good news is, you have plenty of options, from recycling old kit to buying a purpose-built device.
1. The Recycled PC
This is the cheapest and most common starting point. That old desktop computer gathering dust in the loft can be given a new lease of life as a server.
- What it is: Any old desktop or even a laptop from the last decade.
- Pros:
- It’s free! You already own it.
- Powerful: Even an old PC is often more powerful than needed for basic server tasks.
- Expandable: You can easily add more hard drives or memory.
- Cons:
- Bulky and noisy: An old desktop tower isn’t the most discreet or quiet thing.
- Power-hungry: It will use more electricity than other options, which is a key consideration with UK energy prices. An old PC could cost you £100-£200 a year in electricity to run 24/7.
- Best for: Beginners who want to experiment without spending any money.
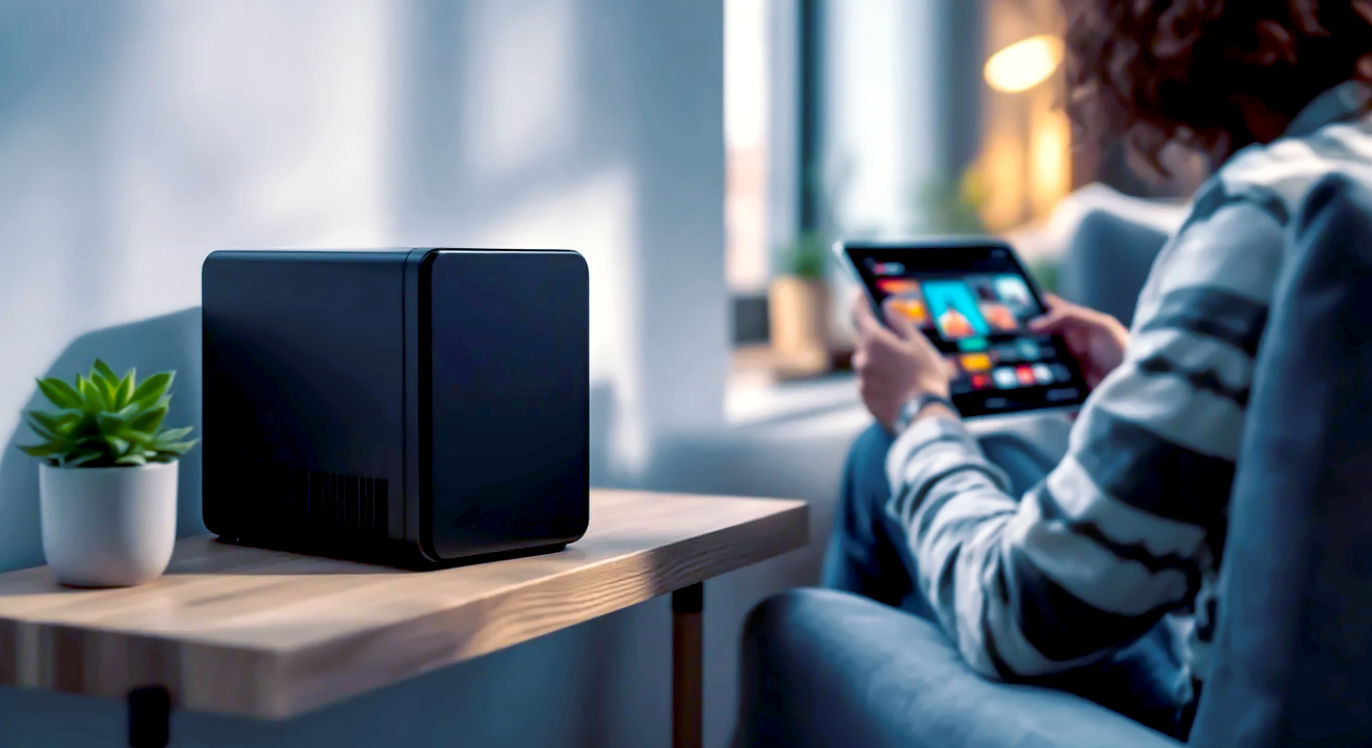
2. The NAS (Network Attached Storage)
A NAS is a device specifically designed to be a home server. Companies like Synology and QNAP are the big players here.
- What it is: A small, quiet box with slots for one or more hard drives. It runs a user-friendly, custom-built operating system designed for server tasks.
- Pros:
- Easy to use: The software is designed for non-techy users, with a simple web interface and an “app store” for installing services like Plex or Nextcloud with one click.
- Low power consumption: They are highly energy-efficient, costing far less to run 24/7 than a full PC.
- Compact and quiet: Designed to sit happily in your living room or office.
- Reliable: Built for 24/7 operation.
- Cons:
- Expensive: You’re paying a premium for the convenience. A decent two-bay NAS (without drives) starts at around £200-£300.
- Less flexible: You’re limited to the software and hardware options provided by the manufacturer.
- Best for: People who want a simple, reliable, “it just works” solution and are willing to pay for it.
3. The Single-Board Computer (SBC)
These are tiny, credit-card-sized computers that have exploded in popularity. The Raspberry Pi is the most famous example.
- What it is: A tiny, complete computer on a single circuit board.
- Pros:
- Tiny and silent: You can hide it anywhere.
- Extremely low power consumption: It costs pennies to run, often less than £10 a year in electricity.
- Cheap to buy: A Raspberry Pi kit costs around £50-£80.
- Huge community: There are endless guides and tutorials online for setting one up.
- Cons:
- Not very powerful: While amazing for its size, a Raspberry Pi will struggle with demanding tasks like transcoding multiple 4K video streams in Plex.
- Limited storage: You typically connect storage via USB, which can be a bit messy and less reliable than internal drives.
- Best for: Hobbyists and people running lightweight services like Pi-hole or Home Assistant.
4. The Custom-Built Server
For the ultimate enthusiast, you can build your own server from scratch, choosing every component yourself.
- What it is: Picking a case, motherboard, CPU, and RAM specifically for a server build.
- Pros:
- Ultimate control: You get exactly the performance, size, and features you want.
- Can be cost-effective: You can choose components to balance power and price perfectly.
- A fun project: If you enjoy building things, this is a rewarding experience.
- Cons:
- Complex: This requires a lot of research and is not for beginners.
- Time-consuming: It takes time to choose parts, build it, and configure the software.
- Best for: Tech enthusiasts who want maximum performance and customisation.
Getting Started: A Quick-Start Guide
Let’s assume you’ve found an old PC to get started with. Here’s a very basic roadmap of what you’d do next.
Step 1: Choose Your Operating System (OS)
You don’t want to run Windows on a server. It’s expensive, resource-hungry, and not designed for 24/7 server tasks. Instead, you’ll use a free, specialised server OS.
- For Beginners: TrueNAS SCALE or Unraid
- TrueNAS SCALE: A powerful, free system that’s fantastic for storage and has a great app system. It’s built on a very reliable foundation (Linux and ZFS) which protects your data from corruption.
- Unraid: Not free (a lifetime license costs around £50), but beloved by home server users for its incredible flexibility. It lets you mix and match hard drives of different sizes and is very easy to manage.
- For the More Adventurous: A standard Linux distribution
- You could install something like Ubuntu Server. This gives you a blank canvas. It’s more work but offers the most control.
Step 2: Prepare the Computer
- Open it up and give it a clean. Dust is the enemy of computers. Use a can of compressed air to blow out the fans and components.
- Install the hard drives. You’ll want at least one large hard drive for your data. Ideally, you want two or more drives so you can set them up in a RAID configuration.
A Quick Word on RAID (Redundant Array of Independent Disks)
RAID is a way of using multiple hard drives together to protect your data.
- RAID 1 (Mirroring): With two identical drives, everything written to the first drive is instantly copied to the second. If one drive fails, you have a perfect copy on the other and lose nothing. This is highly recommended for important data.
- RAID 5/6 (Parity): This is a more advanced setup for three or more drives. It provides protection against a drive failure without halving your total storage space.
Many server operating systems, like TrueNAS, manage this for you, so you don’t need to be an expert. The key takeaway is: one copy of your data is not enough. A drive failure will happen eventually.
Step 3: Install the OS
This is usually done by creating a bootable USB stick. You download the OS installer, use a tool like Rufus or BalenaEtcher to write it to a USB stick, plug it into your server-to-be, and follow the on-screen instructions.
Step 4: Access and Configure Your Server
Once the OS is installed, you usually won’t need a keyboard or monitor connected to the server anymore. You’ll manage it from your main computer through a web browser.
You find your server’s IP address (a local network address like 192.168.1.10) and type that into your browser. This will bring up the server’s control panel.
Step 5: Install Your First Application
From the control panel, you can start installing applications. Let’s use Plex as an example.
- Go to the “Apps” or “Plugins” section of your server’s dashboard.
- Search for “Plex.”
- Click “Install.”
- The system will handle the download and setup for you.
- Once installed, you’ll be given a link to the Plex web interface. From there, you tell Plex where your movie and music files are stored, and it will start scanning and organising them.
Congratulations, you’ve just taken your first step and built your own media server!
Common Pitfalls and Things to Consider
Building a home server is a journey, not a destination. Here are a few things to keep in mind.
- Electricity Costs: As mentioned, an old PC can be thirsty. Use an electricity usage monitor plug to see how much it’s costing you. If it’s too high, you might want to consider switching to a more efficient option like a NAS or Raspberry Pi in the long run.
- Noise: A server running 24/7 can be noisy if it has old fans. You might need to replace them with quieter models or think carefully about where you place the server—a cupboard or garage is often a better choice than the living room.
- Backups, Backups, Backups! I can’t stress this enough. A server centralises your data, which is convenient, but it also creates a single point of failure. Follow the 3-2-1 backup rule:
- 3 copies of your data.
- 2 different types of media (e.g., your server and an external USB drive).
- 1 copy off-site (e.g., using a cloud backup service like Backblaze or just keeping a drive at a friend’s house).
- Security: If you want to access your server from outside your home (e.g., streaming music to your phone while on the train), you need to do it securely. This is a more advanced topic, but modern tools like Tailscale or Cloudflare Tunnels make it much easier and safer than the old methods of opening ports on your router. Avoid exposing your server directly to the internet unless you know what you’re doing.
The Future of the Home Server
In an age where we’re increasingly aware of data privacy and the rising costs of subscriptions, the idea of a home server is making a huge comeback. It’s a quiet rebellion against renting our digital lives from big tech companies.
The technology is getting easier, cheaper, and more powerful every year. User-friendly operating systems like TrueNAS and Unraid have lowered the barrier to entry, while cheap, powerful hardware like the Raspberry Pi has opened up a world of possibilities for tinkerers.
Your home server can start as a simple project—a way to organise your film collection—and evolve into the digital heart of your home. It’s a tool for learning, a platform for creativity, and a way to build a digital life that is truly your own. It’s your digital kingdom, and you are the one on the throne. Why not start building it today?
Further Reading
To dive deeper into the world of home servers, here are some highly respected communities and resources:
- Self-Hosted Subreddit: An incredibly active and helpful community for everything related to running your own services.
- Perfect Media Server: A long-running website with guides and forums dedicated to building the ultimate media server.
- ServeTheHome: For those who want to get into the more professional end of home labbing, with hardware reviews and industry news.
- The official documentation for projects like Plex, Jellyfin, Home Assistant, and TrueNAS are invaluable resources.