The Guide to Editing Your WordPress Footer: From Basics to Pro Tricks
Learn every method to edit your WordPress footer. This guide covers the Customizer, widgets, the Full Site Editor, plugins, and code for UK users.
This post may contain affiliate links. If you make a purchase through these links, we may earn a commission at no additional cost to you.
Right then, let’s talk about the footer of your WordPress website. It’s that bit at the very bottom of every page. You know the one. Most people ignore it, thinking it’s just a place for boring copyright notices. But honestly? That’s like saying the last page of a book doesn’t matter. Your footer is a quiet powerhouse. It’s one of the few things your visitors see on every single page, and it can be a massive help for navigation, trust-building, and even getting more business.
Think of it as the friendly doorman of your website. It’s the last thing people see before they leave, so it’s your final chance to guide them, give them the info they need, and leave a good impression. Whether you want to add your social media links, pop in your business address in Bristol, or just get rid of that pesky “Powered by WordPress” text, you’ve come to the right place.
This guide will walk you through everything, step-by-step. We’ll start with the simple stuff that anyone can do in a few clicks and then move on to the more advanced tricks that will make you look like a proper web wizard. No jargon, no nonsense—just clear, simple instructions to help you take control of your website’s footer. Let’s get it sorted.
What on Earth is a WordPress Footer, Anyway?
Before we start tinkering, let’s get our heads around what we’re actually dealing with. The footer is the section that sits right at the bottom of your website. It’s separate from the main body content (where your blog posts and pages live) and the header (the bit at the top with your logo and main menu).
The brilliant thing about a footer is its consistency. It appears on every single page of your site. This makes it the perfect spot for essential information that you want people to be able to find easily, no matter where they are on your site.
Why Your Footer is More Important Than You Think
It’s easy to dismiss the footer. After all, it’s “below the fold,” and visitors have to scroll all the way down to see it. But here’s a secret: people do scroll. Especially when they’re looking for specific information. When a visitor can’t find what they need in the main navigation, their next instinct is often to check the footer. It’s a bit like a safety net for user experience.
Here’s why you should give your footer some love:
- It Builds Trust: A well-organised footer with contact details, a privacy policy, and your company registration number makes you look legitimate and trustworthy. For a UK business, this is where you’d put your registered address and company number to comply with the Companies Act 2006. It shows you’re a real, professional outfit.
- It Boosts SEO (Search Engine Optimisation): Search engines like Google crawl your entire site, including the footer. You can place links to important pages here (like your main services or location pages), which helps Google understand your site’s structure and what you consider important. It also helps spread “link equity” around your site.
- It Improves Navigation: Your header menu should be clean and simple, focused on the most important pages. The footer is your chance to add secondary navigation—links to things like your FAQ, careers page, terms and conditions, or blog categories. It helps visitors who are digging deeper into your site.
- It Can Drive Conversions: Your footer can be a great place for a final call to action. A simple newsletter sign-up form, a link to your best-selling product, or a button to “Request a Quote” can capture leads you might otherwise have missed.
What Should You Put in Your Footer?
So, what kind of treasure do you bury at the bottom of your digital island? It depends on your website, but here are some of the most common and useful things to include:
- Copyright Notice: The classic. A simple line like “© 2025 Your Company Name. All Rights Reserved.” It looks professional and protects your content.
- Privacy Policy & Terms and Conditions: In the age of GDPR, this is a must-have, especially for any UK or EU-facing website. Linking to your privacy policy is crucial for legal compliance.
- Contact Information: Your address, phone number, and email. For local businesses, this is essential. Adding a small map can be a nice touch.
- Social Media Icons: Little logos that link directly to your Facebook, Instagram, Twitter (or X), and LinkedIn profiles. It’s an easy way to get more followers.
- Navigation Links: A simplified sitemap with links to key pages like ‘About Us’, ‘Contact’, ‘Blog’, ‘Services’, and perhaps some popular categories.
- Newsletter Sign-up: A simple form to capture email addresses and grow your mailing list.
- Company Logo: Reinforces your brand identity one last time.
- Awards and Certifications: If you’ve won an award or have a special certification (like a ‘Made in Britain’ logo or an industry accreditation), the footer is a great place to show it off.
Now that we know why the footer is so important and what we can put in it, let’s get our hands dirty and start editing.
The Three Main Ways to Edit Your WordPress Footer
WordPress is famously flexible, which is brilliant but can sometimes be a bit confusing. When it comes to editing your footer, there isn’t just one way to do it. The method you use will depend almost entirely on the theme you have installed.
Think of your theme as the design blueprint for your site. Some themes are simple and old-school, while others are modern and packed with new features. Let’s break down the three main methods you’re likely to encounter.
- The Theme Customizer (The Classic Way): For years, this was the standard way. It’s a user-friendly interface that lets you see your changes live. Most older themes and many popular modern themes (like Astra or OceanWP) still rely heavily on it.
- Footer Widgets (The Building Block Way): This method is often used alongside the Theme Customizer. Your footer is divided into columns (e.g., three or four widget areas), and you can drag and drop different “widgets” (like text boxes, menus, or image galleries) into these columns.
- The Full Site Editor (The New Way): This is the future of WordPress. If you’re using a modern “block theme” (like the default Twenty Twenty-Four theme), you’ll use the Full Site Editor. It’s a powerful, visual editor that lets you change every part of your site—header, footer, and everything in between—using blocks, just like you do with pages and posts.
How do you know which one your theme uses?
It’s easy. From your WordPress dashboard, go to Appearance.
- If you see Customize and Widgets in the menu, your theme uses the classic methods (Customizer and Widgets).
- If you see Editor, your theme is a modern block theme and uses the Full Site Editor.
We’ll cover all three methods in detail, so no matter what your theme throws at you, you’ll be ready.
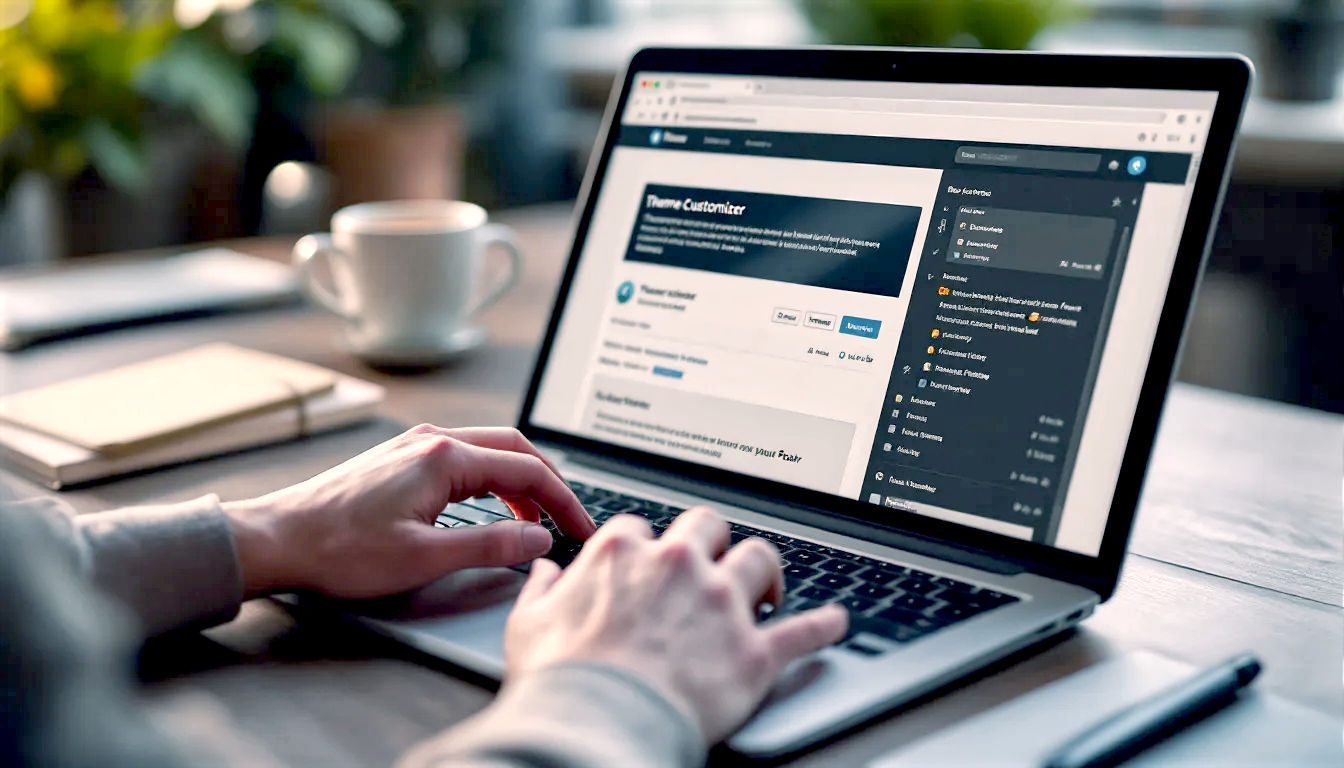
Method 1: Editing Your Footer with the Theme Customizer
The Theme Customizer is a real gem because it lets you play around with settings without breaking anything. It gives you a live preview of your website on the right and a panel of options on the left. Your changes only go live when you hit the “Publish” button. It’s like having a safety net.
Let’s walk through how to use it.
Step 1: Navigate to the Theme Customizer
- Log in to your WordPress dashboard.
- On the left-hand menu, hover over Appearance and click on Customize.
This will launch the Customizer. You’ll see your website homepage with the options panel on the left.
Step 2: Find the Footer Settings
Now, you’ll need to do a little bit of detective work. Every theme organises its Customizer options differently, but you’re usually looking for a tab that says something like Footer, Footer Settings, Footer Builder, or Footer Options.
Have a look through the main tabs. Common places to find it are:
- As a top-level menu item (e.g., “Footer”).
- Inside a “Layout” or “General Settings” tab.
For example, in the popular Astra theme, you’ll find a dedicated “Footer Builder” tab. In others, it might be simpler.
Step 3: Customise the Footer Layout and Content
Once you’ve found the footer section, you’ll see a range of options. These can vary massively from theme to theme, but here are some common things you can change:
Changing the Copyright Text
This is the most common request! Almost every theme will have a simple text box where you can edit the copyright notice.
- Look for a field labelled Copyright, Footer Credit, or Footer Text.
- Delete the default text (which often includes a credit to the theme developer) and type your own. For example:
© 2025 Your Business Name Ltd. All rights reserved. Registered in England and Wales No. 12345678. - Many themes support “shortcodes” here. For example, you might be able to type
[current_year]to have the year update automatically, so you don’t have to change it every January.
Adjusting the Footer Layout
Many themes let you change the structure of your footer.
- Look for options like Footer Layout or Footer Widgets Layout.
- You might see graphical options showing different column layouts (e.g., one, two, three, or four columns).
- You can select the layout that best suits the content you want to add. For example, a four-column layout is great for a navigation menu, contact details, social links, and a newsletter sign-up.
Changing Colours and Backgrounds
Want to make your footer match your brand’s colours?
- Look for a Colours or Design tab within the footer settings.
- You should find colour pickers for the Footer Background Colour, Text Colour, and Link Colour.
- Simply click on them and choose your desired colours. The live preview will update instantly so you can see how it looks.
Step 4: Publish Your Changes
Once you’re happy with how your footer looks, don’t forget the most important step! Click the blue Publish button at the top of the Customizer panel. If you don’t, all your hard work will be lost when you close the window.
The Theme Customizer is a fantastic and safe way to handle basic footer edits, especially for changing colours and copyright text. But what if you want to add more complex content, like a menu or a list of recent posts? That’s where widgets come in.
Method 2: Using Widgets to Build Your Footer
If your Theme Customizer lets you set up footer columns, the next step is to fill those columns with content. This is where widgets shine. Widgets are small, independent blocks of content that you can place in specific areas of your site, like the sidebar or, in our case, the footer.
Think of your footer as an empty set of shelves (the columns), and widgets are the books, photo frames, and plants you put on them.
Step 1: Access the Widgets Area
There are two common ways to get to the widget settings:
- Via the Dashboard: In your WordPress dashboard, go to Appearance > Widgets. This will take you to the main widget management screen.
- Via the Theme Customizer: As we saw before, you can go to Appearance > Customize. Look for a tab called Widgets. This is often the better way to do it, as you get that handy live preview.
Step 2: Identify Your Footer Widget Areas
On the Widgets screen, you’ll see a list of all the available widget areas for your theme. You’re looking for ones named something like:
- Footer 1 / Footer Column 1
- Footer 2 / Footer Column 2
- Footer Bar Section 1
The number of footer widget areas corresponds to the number of columns you set in the Theme Customizer.
Step 3: Add Widgets to Your Footer
Now for the fun part. To add a widget, simply click on the footer area you want to add it to. A block inserter button (+) will appear. Click it, and you’ll see a list of all the available widgets (or “blocks,” as they are now called in the modern widget editor).
Here are some of the most useful widgets for your footer:
Text Widget (or Paragraph Block)
This is the most versatile widget. You can use it for almost anything.
- How to use it: Add a Paragraph block. You can type in plain text, like your company address and phone number. You can also add links and basic formatting (bold, italics). This is perfect for your contact details or a short ‘About Us’ snippet.
Navigation Menu Widget
Want to add a list of helpful links? The Navigation Menu widget is your best friend.
- How to use it: First, you need to create a menu. Go to Appearance > Menus and create a new menu (e.g., call it “Footer Menu”). Add the pages you want to link to (like Privacy Policy, T&Cs, About, Contact). Save it.
- Now, back in the Widgets area, add the Navigation Menu widget to your chosen footer column. From the dropdown, select the “Footer Menu” you just created. Voilà! A neat, tidy list of links appears.
Custom HTML Widget
This is for when you need to add something a bit more advanced, like code from a third-party service.
- How to use it: Add the Custom HTML widget. You can then paste in code snippets. This is perfect for things like embedding a Google Map, a social media feed, or a Mailchimp sign-up form.
Image Widget
Ideal for adding your logo or certification badges.
- How to use it: Add the Image widget. You can then upload an image from your computer or choose one from your Media Library.
Recent Posts Widget
A great way to keep visitors on your site by showing them your latest blog articles.
- How to use it: Add the Latest Posts widget. You can customise it to show the number of posts you want to display and whether to show the featured image or post date.
Step 4: Arrange and Save Your Widgets
You can drag and drop widgets within a column to reorder them. You can also drag them between different footer columns.
Once you’re happy with your setup, click the Update button (if you’re on the main Widgets screen) or the Publish button (if you’re in the Customizer).
Using a combination of the Theme Customizer for the overall design and widgets for the specific content gives you a huge amount of control over your footer without ever needing to touch a line of code.
Method 3: The Full Site Editor (For Block Themes)
Welcome to the cutting edge of WordPress. If you’ve installed a new WordPress site recently, you’re likely using a block theme, and that means you have access to the Full Site Editor (FSE). This is a game-changer.
Instead of having separate screens for menus, widgets, and the customizer, the FSE gives you one powerful, visual editor to build your entire website. You can design your header, footer, and page templates using the same block-based interface you use to write posts. It gives you ultimate freedom.
It can feel a bit daunting at first, but it’s incredibly powerful once you get the hang of it.
Step 1: Open the Full Site Editor
- From your WordPress dashboard, go to Appearance > Editor.
- This will launch the Full Site Editor. It might open on your homepage template.
Step 2: Access the Footer Template Part
In the FSE, your site is made up of templates (like the template for a single post or your homepage) and smaller, reusable chunks called Template Parts (like your header and footer). We need to find and edit the footer template part.
- In the editor view, you can often just scroll down to the bottom of the page and click directly on the footer area. The editor will highlight it and show you that you’re editing the “Footer” template part.
- Alternatively, open the main navigation panel on the left (it might be an icon). Go to Patterns, and then scroll down to the “Template Parts” section. You should see Footer. Click on it to edit it in isolation.
Step 3: Edit the Footer Like a Page
This is where the magic happens. Your footer is now just a collection of blocks, exactly like a page or post. You can:
- Change Text: Simply click on any text (like the copyright notice) and type to change it.
- Add New Blocks: Click the + icon to add any block you want. Want to add your logo? Add an Image block. Need social media links? Add the Social Icons block. Want a three-column layout? Add a Columns block and then place other blocks inside it.
- Rearrange Blocks: Use the up/down arrows or the drag-and-drop handle to move blocks around.
- Customise Block Settings: Click on any block, and the settings panel will appear on the right. Here, you can change colours, fonts, spacing, and much more. For example, you can click on the main Group block that contains your entire footer and set a background colour for the whole section.
Useful Blocks for Your Footer in the FSE:
- Columns Block: The foundation for creating a multi-column footer.
- Site Logo / Site Title Block: To add your branding.
- Navigation Block: To create a footer menu (you can build it right there without leaving the editor).
- Social Icons Block: A quick and stylish way to add links to your social profiles.
- Paragraph Block: For all your text needs (copyright, address, etc.).
- Search Bar Block: A handy addition to help users find things.
Step 4: Save Your Changes
Once your footer looks perfect, click the Save button at the top right of the screen. WordPress will cleverly ask you to confirm which template parts you want to save (it should have “Footer” pre-selected). Confirm the save, and your new footer will be live across your entire website.
The Full Site Editor offers incredible flexibility. You’re no longer limited by what your theme developer decided to give you. If you can imagine it, you can probably build it.
Advanced Footer Edits: Plugins and Code
What if the options in your theme are too limited? Perhaps you want to add a fancy, animated call to action, or you need different footers for different pages. When the built-in tools don’t cut it, it’s time to bring in the big guns: plugins and code.
Using a Plugin to Enhance Your Footer
Plugins are like apps for your WordPress site. There are thousands of them available, and many can help you create a custom footer. This is a great option if you’re not comfortable with code but need more power than your theme offers.
A popular choice is a Header & Footer Builder plugin. These plugins often work with a drag-and-drop interface, allowing you to build a custom footer from scratch and replace your theme’s default footer with it.
Elementor, for example, has a powerful Theme Builder feature (in the Pro version) that lets you design a footer visually and apply it across your site. Other page builders like Beaver Builder and Divi offer similar functionality.
How it generally works:
- Install and activate your chosen header/footer plugin.
- Navigate to the plugin’s settings (e.g., in Elementor, this would be Templates > Theme Builder).
- Choose to create a new Footer.
- Design your footer using the plugin’s drag-and-drop interface. You’ll have access to a wide range of widgets and design options.
- Set the display conditions. This is the clever bit. You can tell the plugin to show this footer on the entire site, or only on specific pages (like your blog posts, or everywhere except the homepage).
- Publish your new footer. The plugin will now override your theme’s default footer.
This method gives you the design freedom of a page builder without you having to switch your entire theme.
For the Brave: Editing the footer.php File
Warning: This is an advanced technique. Directly editing theme files can break your site if you’re not careful. Always, always take a backup of your site before you begin, and ideally, use a child theme to make your changes.
If you’re comfortable with a bit of HTML and PHP, you can edit the footer file directly. Every WordPress theme has a file called footer.php. This file contains the code that generates the HTML for your site’s footer.
Why edit the code directly?
Sometimes you need to add a tracking script (like Google Analytics or a Facebook Pixel) just before the closing </body> tag, or you need to make a structural change that the theme options don’t allow.
How to Do It (Safely):
- Create a Child Theme: A child theme inherits all the functionality and styling of its “parent” theme. When you make changes in a child theme, you’re not altering the original theme files. This is crucial because if you edit the parent theme directly, your changes will be completely wiped out the next time the theme is updated. Many tutorials online can show you how to create one.
- Copy
footer.phpto Your Child Theme: Using an FTP client or your hosting provider’s File Manager, navigate to your theme’s folder (/wp-content/themes/your-theme-name/). Find thefooter.phpfile and copy it into your child theme’s folder. - Edit the Copied File: Now you can safely edit the
footer.phpfile inside your child theme. Go to Appearance > Theme File Editor in your WordPress dashboard. Make sure your child theme is selected in the top right, and then click onfooter.phpfrom the list of files. - Make Your Changes: You’ll see a mix of HTML and PHP. You might see a function like
<?php dynamic_sidebar( 'footer-1' ); ?>, which is the code that pulls in your widgets. You can add your own HTML around this. For example, to hard-code a copyright notice, you could add<p>© 2025 My Company</p>just before the</footer>tag. - Save Your Changes: Click Update File.
This method offers ultimate control but comes with risks. A single typo can cause the dreaded “white screen of death.” Only attempt this if you know what you’re doing and have a backup ready.
Common Footer Problems and How to Fix Them
Even with the best tools, things can sometimes go a bit wrong. Here are a few common footer headaches and their solutions.
- Problem: “My changes aren’t showing up!”
- Solution: This is almost always a caching issue. Your browser, your website (via a caching plugin like W3 Total Cache), or your hosting provider might be showing you a saved, older version of the page. Clear all your caches. First, clear your browser cache. Then, go to your caching plugin’s settings in the WordPress dashboard and find the “Purge All Caches” or “Clear Cache” button.
- Problem: “My footer looks all messed up on mobile.”
- Solution: This means the footer isn’t responsive. If you’re using the Theme Customizer or Full Site Editor, look for a mobile preview icon (it usually looks like a little phone or tablet). This lets you see how your footer looks on smaller screens and make specific adjustments for mobile view. You might need to reduce font sizes or stack columns vertically. If you’ve added custom code, you’ll need to add responsive CSS (using media queries).
- Problem: “I deleted the ‘Powered by WordPress’ text, and now my whole site is broken!”
- Solution: This can happen if you were editing the
footer.phpfile and accidentally deleted a crucial bit of code, like a closing</div>tag or a PHP function. This is why using a child theme and backups is so important. Restore your site from a backup, or if you know what you did, re-open the file editor and fix the mistake. If you’re using the Theme Customizer, this shouldn’t happen, as it’s much safer.
- Solution: This can happen if you were editing the
Conclusion: Your Footer, Your Rules
And there you have it. We’ve journeyed from the simple ‘what is a footer?’ to the nitty-gritty of theme files. The key takeaway is this: your WordPress footer is a valuable piece of website real estate, and you have complete control over it.
Whether you choose the safe and easy Theme Customizer, the block-building power of Widgets, the futuristic freedom of the Full Site Editor, or the surgical precision of code, the right method is the one that works for you and your theme.
Don’t neglect your footer. Spend a bit of time on it. Make sure it contains helpful information, reflects your brand, and provides a clear, final point of contact for your visitors. A great footer is the finishing touch on a professional, trustworthy, and user-friendly website. It’s the perfect way to say a final, helpful goodbye to your visitors—and invite them to come back soon.
Further Reading
For those who wish to delve deeper, here are some highly respected resources in the WordPress community:
- WordPress.org Official Documentation: The official source for all things WordPress.
- WPBeginner: An excellent resource for tutorials and guides, perfect for those new to WordPress.
- Kinsta Blog: Offers in-depth articles on WordPress performance, development, and management.
- Smashing Magazine: Provides high-quality articles for web designers and developers, with a strong focus on best practices.