The Guide to Blocking Websites on Chrome: A Definitive UK Handbook
Your definitive guide to blocking websites on Google Chrome. Learn simple methods for productivity and parental controls on any device in the UK.
This post may contain affiliate links. If you make a purchase through these links, we may earn a commission at no additional cost to you.
Ever found yourself falling down a YouTube rabbit hole when you should be working? Or perhaps you’re a parent wanting to keep the wilder corners of the internet away from your children? Whatever your reason, knowing how to block websites on Chrome is a digital life skill that’s becoming more useful by the day. It’s like putting a digital lock on a door you’d rather not open.
For many of us in the UK, the internet is an essential tool for work, school, and staying connected. But it’s also full of distractions. From endless social media feeds to tempting shopping sites, it’s easy to lose hours of your day. Blocking websites isn’t about shutting yourself off from the world; it’s about taking back control of your time and creating a safer online space for your family.
Think of it this way: you wouldn’t let a stranger wander into your house, so why let unwanted websites into your digital home? This guide will walk you through everything you need to know, from simple, built-in tools to more powerful methods that work across all your devices. We’ll keep things straightforward, with no confusing jargon, so you can get it sorted in the time it takes to brew a decent cuppa.
Whether you’re trying to boost your productivity, protect your kids, or simply curate a more positive online experience, we’ve got you covered. Let’s get started.
Why Bother Blocking Websites in the First Place?
Before we dive into the “how,” let’s quickly cover the “why.” Understanding your motivation can help you choose the best method for your needs. Most people want to block websites for one of three main reasons.
1. Boosting Productivity and Banishing Distractions
This is a big one. The modern workplace—whether that’s an office or your kitchen table—is a battlefield for your attention. Social media, news sites, and online shopping are the biggest culprits, designed to keep you scrolling.
Imagine you’ve got a tight deadline. You open a new tab to look up one tiny piece of information, and suddenly, two hours have vanished. You’ve checked your Facebook, scrolled through Twitter (or X, as it’s now known), watched a few “just one more” TikToks, and maybe even bought a new pair of trainers you didn’t need. It happens to the best of us.
By blocking these distraction magnets during work hours, you create a focused environment. It’s like putting on noise-cancelling headphones for the internet. Many professionals and students find that blocking sites for set periods helps them get into a state of “deep work,” where they can concentrate fully and produce their best results. It’s a simple change that can make a massive difference to your output and reduce that end-of-day stress.
2. Protecting Children from Inappropriate Content
For parents, the internet can feel like the Wild West. While it’s an incredible resource for learning and fun, it also contains content that is simply not suitable for children. From adult themes and violent imagery to online scams and cyberbullying, the risks are real.
Blocking specific websites is a fundamental part of digital parenting. It allows you to create a “walled garden” where your children can explore the web safely. You can block known harmful sites, adult content, and even social media platforms until you feel your child is old enough to navigate them responsibly.
This isn’t about spying on your kids. It’s about setting sensible boundaries, just as you would in the real world. You wouldn’t let your eight-year-old wander around town on their own, and the same principle applies online. Combined with open conversations about internet safety, blocking websites gives you peace of mind and helps your children develop healthy digital habits.
3. Enhancing Digital Wellbeing and Security
Your online experience should be a positive one, but some websites can harm your mental health or your computer’s security.
- Mental Health: Constant exposure to negative news cycles, an endless stream of curated “perfect” lives on social media, or online forums filled with arguments can be draining. Sometimes, blocking these sources is a necessary step to protect your peace of mind.
- Security: Not all websites are safe. Some are designed to trick you into downloading malware (nasty software that can steal your data) or are part of phishing scams (where criminals try to get your passwords or bank details). Blocking known malicious sites is a proactive way to keep your personal information and your devices secure.
Ultimately, blocking websites is about empowerment. It’s about consciously deciding what you want to let into your digital life and what you want to keep out.
How to Block Websites on Chrome: The Desktop Guide (Windows & Mac)
Let’s start with the most common scenario: blocking websites on your laptop or desktop computer. Surprisingly, Google Chrome doesn’t have a simple, built-in “block this site” button. But don’t worry, there are several easy and effective ways to get the job done.
Method 1: Using a Browser Extension (The Easiest Way)
For most people, a browser extension is the perfect solution. Extensions are like little apps that you add to Chrome to give it new powers. The best part is that they are usually free and incredibly easy to set up.
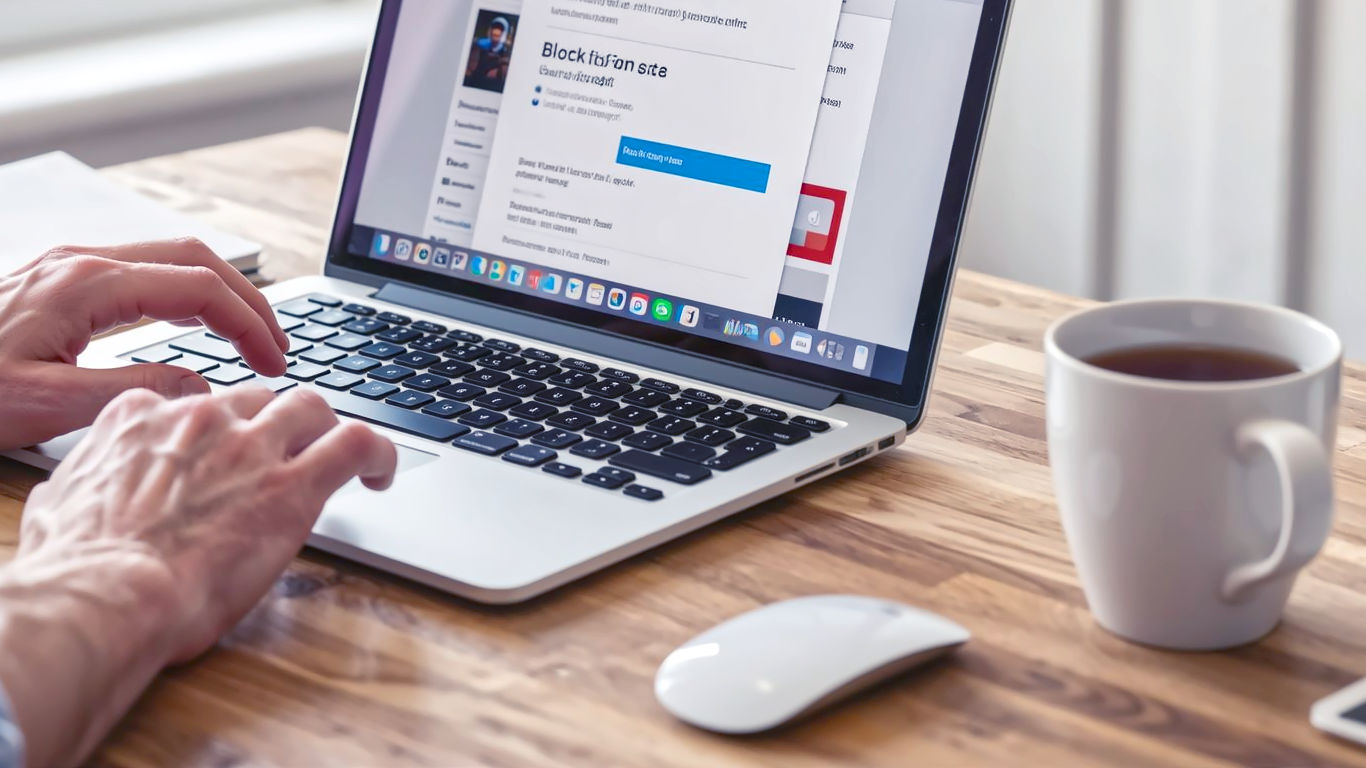
The most popular and highly-rated extension for this job is BlockSite. It’s reliable, flexible, and has been trusted by millions of people for years.
Step-by-Step Guide to Using BlockSite:
- Find and Install the Extension:
- Open Google Chrome on your computer.
- Go to the Chrome Web Store (you can just Google it).
- In the search bar, type “BlockSite” and press Enter.
- You’ll see it at the top of the results. Click on it, then click the blue “Add to Chrome” button.
- A little pop-up will ask for permission. Click “Add extension.”
- Pin the Extension for Easy Access:
- After it’s installed, you’ll see a new puzzle piece icon in the top right of your browser. Click it.
- Find BlockSite in the list and click the little pin icon next to it. This will keep the BlockSite shield icon visible on your toolbar, making it much easier to use.
- Block Your First Website:
- Navigate to the website you want to block (for example,
www.facebook.com). - Once the page has loaded, click the red BlockSite shield icon on your toolbar.
- A big red button will appear that says “Block this site.” Click it.
- That’s it! The site is now blocked. If you try to visit it, you’ll be greeted by a friendly (and slightly amusing) picture telling you the site is blocked.
- Navigate to the website you want to block (for example,
- Managing Your Block List:
- Want to see what you’ve blocked or unblock a site? Right-click the BlockSite icon and select “Options.”
- This takes you to the BlockSite dashboard. On the left-hand side, you’ll see a “Block Sites” menu. Here, you can manually type in websites to block or remove sites from your list by clicking the bin icon next to them.
Advanced BlockSite Features:
BlockSite isn’t just a simple on/off switch. It has some clever features that make it even more powerful.
- Schedule Blocking: This is perfect for productivity. You can set BlockSite to only block distracting websites during your work hours (e.g., Monday to Friday, 9 am to 5 pm). Outside of these times, you can access them freely. You’ll find this under the “Schedule” option in the dashboard.
- Focus Mode: This is like a productivity power-up. You can start a timer (say, for 25 minutes, like the Pomodoro Technique), and during that time, all your chosen distracting sites will be blocked. Once the timer is up, access is restored. It’s brilliant for getting short bursts of work done.
- Password Protection: If you’re using BlockSite to protect your children, this is essential. You can set a password that is required to change the settings or unblock a site. This stops clever kids from simply disabling the extension.
- Block by Keywords: You can block all websites that contain a certain word in their address (URL). For example, blocking the word “gaming” would block any site with “gaming” in its URL.
Why we recommend BlockSite: It’s the perfect blend of simplicity and power. For the average user in the UK, it’s the quickest and most effective way to start blocking websites on a desktop.
Method 2: Editing the Hosts File (The Tech-Savvy Way)
If you’re a bit more comfortable with technology and don’t want to rely on a third-party extension, you can block websites by editing something called the hosts file.
What is the hosts file? In simple terms, it’s a small text file on your computer that acts like a local address book for websites. Before your computer asks the wider internet where a website is, it checks this file first. By adding an entry here, you can trick your computer into thinking a website is located somewhere else—specifically, at a non-existent address.
This method is powerful because it blocks the website across all browsers on your computer, not just Chrome. It’s also completely free and doesn’t require installing anything.
A word of caution: Editing the hosts file is a bit like looking under the bonnet of your car. It’s safe if you follow the instructions carefully, but making a mistake could cause minor issues with your internet connection. Don’t worry, it’s easily reversible.
How to Edit the Hosts File on Windows:
- Open Notepad as an Administrator:
- Click the Start button and type “Notepad.”
- Right-click on the Notepad app in the search results and select “Run as administrator.” This is a crucial step; otherwise, you won’t be able to save your changes.
- Find the Hosts File:
- In Notepad, go to
File > Open. - Navigate to this folder path:
C:\Windows\System32\drivers\etc. - You might see an empty folder. In the bottom-right corner of the “Open” window, change the file type from “Text Documents (*.txt)” to “All Files.” The
hostsfile will now appear. - Select the
hostsfile and click “Open.”
- In Notepad, go to
- Block the Websites:
- Scroll to the very bottom of the file.
- To block a website, you need to add a new line. On this line, you’ll type the IP address
127.0.0.1, followed by a space, and then the website address. 127.0.0.1is a special address that just points back to your own computer (it’s also known as “localhost”).- For example, to block Facebook and Twitter, you would add these two lines at the end of the file:
127.0.0.1 [www.facebook.com](https://www.facebook.com) 127.0.0.1 [www.twitter.com](https://www.twitter.com) - It’s a good idea to add both the
www.version and the non-www.version to be thorough:127.0.0.1 [www.facebook.com](https://www.facebook.com) 127.0.0.1 facebook.com 127.0.0.1 [www.twitter.com](https://www.twitter.com) 127.0.0.1 twitter.com
- Save Your Changes:
- Go to
File > Save. - Close Notepad. You might need to restart Chrome or clear your browser cache for the changes to take effect immediately.
- Go to
How to Edit the Hosts File on a Mac:
The principle is the same on a Mac, but the process is a little different as it involves using the Terminal.
- Open Terminal:
- Go to
Applications > Utilitiesand open the Terminal app. It looks like a little black screen.
- Go to
- Open the Hosts File:
- Type the following command into the Terminal window and press Enter. This command opens the hosts file in a simple text editor called
nano.sudo nano /etc/hosts - It will ask for your Mac’s password. Type it in and press Enter. You won’t see the letters as you type—this is a normal security feature.
- Type the following command into the Terminal window and press Enter. This command opens the hosts file in a simple text editor called
- Block the Websites:
- Use the arrow keys to move the cursor to the bottom of the file.
- Just like on Windows, add a new line for each site you want to block, starting with
127.0.0.1.127.0.0.1 www.dailymail.co.uk 127.0.0.1 dailymail.co.uk
- Save Your Changes:
- Press
Control + O(the letter O, not the number zero) to write out (save) the file. - Press
Enterto confirm the file name. - Press
Control + Xto exit thenanoeditor.
- Press
- Flush the DNS Cache:
- To make sure the changes take effect immediately, you need to clear your Mac’s memory of website addresses. Type this command into the Terminal and press Enter:
sudo dscacheutil -flushcache
- To make sure the changes take effect immediately, you need to clear your Mac’s memory of website addresses. Type this command into the Terminal and press Enter:
Now, if you try to visit the blocked sites in any browser, you’ll get an error message saying the site can’t be reached. To unblock them, just repeat the steps and delete the lines you added.
How to Block Websites on Chrome: The Mobile Guide (Android & iPhone)
Blocking websites on your phone is just as important, if not more so. We carry these devices with us everywhere, and they can be a constant source of distraction. The methods here are a bit different from desktop, as you can’t use Chrome extensions on mobile.
Method 1: On Android Phones
Android gives you a few different ways to block websites, ranging from simple app-based solutions to using your phone’s built-in digital wellbeing tools.
Using the BlockSite App (The Easiest Way)
Yes, the same company that makes the brilliant Chrome extension also makes a fantastic app for Android. It works system-wide, meaning it can block websites in Chrome and other browsers, and can even block entire apps.
- Download the App: Go to the Google Play Store, search for “BlockSite,” and install it.
- Grant Permissions: When you first open the app, it will need you to grant it “Accessibility” permissions. This sounds scary, but it’s necessary for the app to see which website you’re trying to visit so it can block it. The app will guide you through this process—just follow the on-screen instructions.
- Block Websites: Tap the green “+” icon in the bottom right corner. You can then search for the website or app you want to block and add it to your block list.
- Set Schedules: Just like the desktop version, you can set schedules to block sites only at certain times of the day.
Using Your Phone’s Digital Wellbeing Settings
Most modern Android phones (like Samsung, Google Pixel, etc.) come with a built-in “Digital Wellbeing” or “Digital Balance” feature. While primarily designed to limit your screen time, you can also use it to block websites.
- Find the Settings: Go to
Settings > Digital Wellbeing and parental controls. - Go to Your Dashboard: Tap on the chart to go to your screen time dashboard.
- Set Timers for Websites: You’ll see a list of the websites you’ve visited. Find Chrome in the list of apps, and you might see individual websites listed below it. You can set a daily timer for these sites. For example, you could set a 1-minute timer for a distracting site. Once you’ve used up your minute for the day, you won’t be able to access it.
This method isn’t a “hard” block, but it’s a great way to make yourself more mindful of how much time you’re spending on certain sites.
Method 2: On an iPhone or iPad
Apple’s iOS has powerful, built-in website blocking tools located within its Screen Time settings. This is the best and most secure way to block sites on an iPhone, especially for kids.
Step-by-Step Guide to Using Screen Time:
- Open Screen Time: Go to
Settings > Screen Time. If you’ve never used it before, you’ll be prompted to turn it on. - Set a Screen Time Passcode: This is vital. If you don’t set a passcode, anyone can just change the settings back. Tap “Use Screen Time Passcode” and set a four-digit code. Important: If you’re setting this up for a child, make sure they don’t know the code!
- Go to Content & Privacy Restrictions: Tap on this option in the Screen Time menu. You’ll need to enter your passcode.
- Enable the Restrictions: Toggle the “Content & Privacy Restrictions” switch to on (green).
- Block the Websites:
- Tap on “Content Restrictions.”
- Tap on “Web Content.”
- You’ll see three options. Select “Limit Adult Websites.” This automatically blocks a huge list of known adult sites.
- Now, you can add your own sites to the block list. Under the “NEVER ALLOW” section, tap “Add Website” and type in the address of the site you want to block (e.g.,
www.tiktok.com). - Repeat this for every site you want to block.
The great thing about this method is that it’s baked into the iPhone’s operating system. It’s very secure, works across all browsers (not just Chrome), and can’t be easily bypassed. If you’re a parent in the UK looking to make your child’s iPhone safer, this is the definitive way to do it.
Blocking Websites on Your Entire Network: The Router Method
So far, we’ve looked at blocking websites on individual devices. But what if you want to block a site for every single device connected to your home Wi-Fi? For example, you might want to block adult websites on your kids’ laptops, tablets, phones, and even their games consoles, all in one go.
The most effective way to do this is at the router level. Your Wi-Fi router is the gateway to the internet for your whole home. By setting up blocks here, you create a filter that applies to everyone and everything on the network.
This method is more technical than the others, but it’s the most powerful, especially for household-wide parental controls.
How Router-Level Blocking Works
Most modern routers provided by UK internet service providers (like BT, Virgin Media, Sky, TalkTalk) have built-in parental control features. These allow you to create block lists. The exact steps will vary depending on your router’s make and model, but the general process is usually the same.
General Steps for Blocking Websites on a Router:
- Find Your Router’s IP Address: This is the address you type into your web browser to access your router’s settings. It’s usually a number like
192.168.1.1or192.168.0.1. You can often find it on a sticker on the back or bottom of your router itself. - Log In to Your Router:
- Open Chrome (or any browser) on a computer connected to your home network.
- Type your router’s IP address into the address bar and press Enter.
- You’ll be asked for a username and password. Again, these are often printed on a sticker on the router. If you’ve never changed them, the username is often “admin,” and the password might be “admin,” “password,” or a unique one printed on the router’s sticker.
- Find the Parental Controls or Website Filtering Section:
- Once you’re logged in, you’ll see a dashboard with lots of settings. You’re looking for a section called “Parental Controls,” “Access Control,” “Website Filtering,” or something similar. It might be under an “Advanced” or “Security” tab.
- Create a Block Rule:
- In this section, you should be able to add websites to a block list. You might be able to create different profiles for different devices on your network.
- Simply type in the addresses of the websites you want to block (e.g.,
youtube.com,roblox.com) and save the settings. - Some routers even allow you to set schedules, so you could block gaming websites during homework hours, for example.
Using a DNS Filtering Service (A More Advanced Router Method)
For even more powerful, customisable, and intelligent filtering, you can use a service like OpenDNS.
What is DNS? Think of the Domain Name System (DNS) as the phone book of the internet. When you type www.google.co.uk, your computer asks a DNS server to look up the real, numerical IP address for that site.
By changing your router’s DNS settings to use a service like OpenDNS, you can filter your entire network’s traffic through their servers. Their “FamilyShield” service, for example, is pre-configured to automatically block adult content across your whole network. It’s a “set it and forget it” solution.
Setting this up involves logging into your router (as described above) and changing the DNS server addresses to the ones provided by OpenDNS. This is a fantastic, free option for robust, household-wide protection.
A Summary of Methods: Which One is Right for You?
We’ve covered a lot of ground. Here’s a quick summary to help you choose the best method for your situation.
| Method | Best For | Pros | Cons |
|---|---|---|---|
| Browser Extension (BlockSite) | Individual users wanting to boost productivity on their desktop. | Very easy to use, flexible scheduling, password protection. | Only works in Chrome on that specific computer. Can be disabled. |
| Editing the Hosts File | Tech-savvy users who want a browser-agnostic block on one computer. | Free, powerful, works on all browsers, no installation needed. | Technical, can be tricky for beginners, easy to make a mistake. |
| Mobile App (BlockSite) | Android users needing a simple way to block sites and apps. | Easy to use, can block apps as well as websites. | Requires granting permissions, might impact battery life slightly. |
| iPhone Screen Time | Parents who want to block sites securely on their child’s iPhone/iPad. | Extremely secure, built-in to iOS, can’t be easily bypassed. | Only works on Apple devices. |
| Router Settings | Families wanting to block sites on every device on the home network. | Comprehensive, blocks sites on consoles and smart TVs, set and forget. | Can be technical to set up, requires access to router settings. |
The Future of Content Filtering
The way we block and filter content is constantly evolving. In the future, we can expect to see more intelligent, AI-driven tools that don’t just block a specific website address but can understand the content of a page in real-time.
Imagine a filter that can automatically block pages containing signs of cyberbullying, hate speech, or fake news, regardless of the website it’s on. These tools will offer more nuanced protection, moving beyond simple block lists to create a genuinely safer and more positive internet experience.
For now, though, the methods outlined in this guide provide powerful and effective ways to take control of your digital world. By choosing the right tool for your needs, you can create a more focused, safe, and intentional online environment for yourself and your family. It’s a small change that can have a big impact on your daily life.
Further Reading
For those who wish to delve deeper into online safety and digital wellbeing, here are some highly respected UK-based resources:
- NSPCC (National Society for the Prevention of Cruelty to Children): Offers a wealth of information for parents on keeping children safe online. https://www.nspcc.org.uk/keeping-children-safe/online-safety/
- Internet Matters: A not-for-profit organisation that provides comprehensive advice and resources for parents to navigate the digital world with their children. https://www.internetmatters.org/
- UK Safer Internet Centre: Provides guidance and resources for children, parents, and teachers to help make the internet a better place. https://saferinternet.org.uk/