From Sapling to Sideboard: The Great British Guide to Woodworking
Your complete guide to starting woodworking in the UK. From choosing your first saw to understanding British timbers, learn the satisfying craft of making with wood.
This post may contain affiliate links. If you make a purchase through these links, we may earn a commission at no additional cost to you.
Ever walked through a forest and marvelled at the sheer strength of an old oak tree? Or run your hand over a silky-smooth wooden table and wondered how it was made? For centuries, we Brits have had a love affair with wood. It’s in the timber frames of our oldest pubs, the hulls of the ships that sailed the world, and the furniture passed down through generations. Woodworking isn’t just a hobby; it’s a connection to our history, our landscape, and a deeply satisfying craft that anyone can learn.
Forget thinking you need a massive workshop and a bewildering array of expensive tools. At its heart, woodworking is simple: it’s about shaping wood into something useful or beautiful. Whether you dream of making a simple bird box for the garden or a handsome bookcase for your living room, the journey starts with a single piece of timber and a bit of curiosity. This guide will walk you through everything you need to know, from choosing your first saw to applying that final, gleaming coat of wax. It’s time to discover the quiet joy of making things with your own two hands.
The Soul of the Craft: Why We Love Woodworking
So, what’s the big deal with cutting up bits of wood? In our fast-paced, digital world, woodworking offers a welcome escape. It’s a chance to slow down, focus your mind, and create something real and tangible. There’s a special kind of magic in turning a rough plank into a polished, finished object.
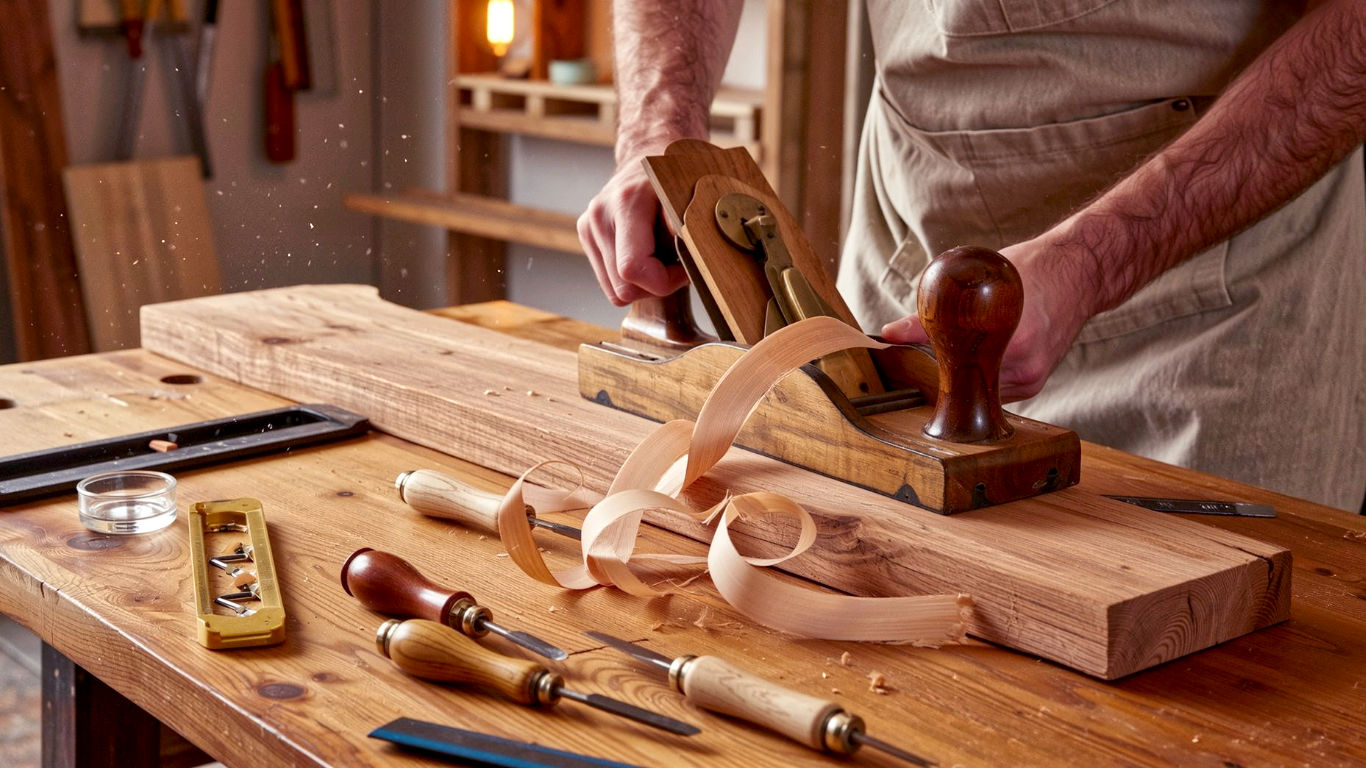
For many, it’s a powerful stress-buster. The rhythmic sound of a plane shaving wood or the focus needed to cut a perfect joint can be incredibly calming, almost like meditation. You’re not just staring at a screen; you’re engaging all your senses—the smell of freshly cut pine, the feel of different wood grains, the satisfaction of seeing your creation take shape.
It’s also incredibly practical. Need a new shelf? You can make one. Wobbly chair? You can fix it. Woodworking gives you the skills to repair and build things around your home, saving you money and giving you a huge sense of accomplishment. Plus, there’s nothing quite like the pride of telling a guest, “Oh, that coffee table? I made it myself.”
And let’s not forget, it’s a link to our past. From the master craftsmen who built our cathedrals to the everyday folk who whittled spoons by the fire, woodworking is woven into the fabric of British life. When you pick up a chisel, you’re joining a long and noble tradition.
A Quick Trip Through Woodworking History
Woodworking in Britain is a story as old as the island itself. Our ancient ancestors used flint tools to shape wood for shelters, tools, and boats. The Romans brought more advanced techniques and tools, but it was during the medieval period that British woodworking truly flourished.
Think of the magnificent hammer-beam roof of Westminster Hall in London, built in 1393. It’s a jaw-dropping feat of engineering and artistry, all done with hand tools. Guilds of carpenters and joiners were formed in cities like London and York, protecting the secrets of their craft and training the next generation.
The 18th century was the golden age of British furniture making. Craftsmen like Thomas Chippendale, George Hepplewhite, and Thomas Sheraton weren’t just carpenters; they were designers whose elegant styles are still copied today. They worked with exotic woods like mahogany, brought back by Britain’s trading ships, creating pieces that were both beautiful and functional.
The Industrial Revolution changed everything. Machines could now do the work of many hands, and factories began mass-producing furniture. But this didn’t kill the craft. In response to what they saw as shoddy, soulless factory goods, the Arts and Crafts Movement emerged in the late 19th century. Led by figures like William Morris, it celebrated handmade objects, simple forms, and the natural beauty of the wood itself. This movement championed the idea that even everyday objects should be well-made and beautiful, a principle that today’s woodworkers still hold dear.
Getting Started: Your First Steps into the Workshop
The thought of starting a new hobby can be daunting, but woodworking is surprisingly accessible. You don’t need to spend a fortune or have a dedicated workshop right away. A sturdy table, a corner of the garage, or even a patch of the garden on a sunny day is enough to begin.
The Essential Toolkit for Beginners
Walking into a tool shop can feel overwhelming. There are saws of every shape and size, countless chisels, and strange-looking planes. Don’t panic. You only need a few key items to get started. The golden rule is to buy the best tools you can afford. A good quality tool will be a joy to use, last a lifetime, and give you much better results than a cheap one.
Here’s a basic list to get you going:
1. Measuring and Marking
Accuracy is everything in woodworking. A mistake of a single millimetre can mean a wobbly table or a drawer that won’t close.
- Tape Measure: A good 5-metre retractable tape measure is essential for bigger measurements.
- Steel Rule: A 300mm (12-inch) steel rule is perfect for smaller, more precise markings.
- Combination Square: This is your best friend. It’s a ruler with a sliding head that lets you mark lines at perfect 90-degree and 45-degree angles. It’s vital for checking if your cuts are straight and your corners are square.
- Marking Knife: While a pencil works, a sharp marking knife (like a Stanley knife) is better. It scores a fine line into the wood, which gives your saw a perfect place to start and results in a cleaner cut.
- Marking Gauge: This tool is used to scribe a line parallel to an edge. It’s fantastic for marking out the thickness of joints.
2. Cutting the Wood
This is where the real action begins. For a beginner, you don’t need a workshop full of power saws. A couple of good handsaws will cover most tasks.
- Tenon Saw: This is a small, stiff-backed saw used for cutting joints. Its fine teeth leave a clean, smooth finish, making it ideal for precision work like cutting tenons for a mortise and tenon joint.
- Jack Plane (or a No. 5 Plane): A hand plane is used to flatten and smooth wood. The jack plane is a great all-rounder—not too big, not too small. Learning to use one is a fundamental woodworking skill. It’s incredibly satisfying to peel off a perfect, paper-thin shaving of wood.
- Coping Saw: This saw has a thin blade held in a frame, which allows you to cut curves. It’s perfect for cutting out shapes or removing the waste from dovetail joints.
3. Shaping and Joining
- Chisels: A set of good quality bevel-edge chisels is a must. You don’t need a massive set; start with a few common sizes like 6mm (1/4″), 12mm (1/2″), and 19mm (3/4″). You’ll use them for everything from tidying up joints to carving decorative details.
- Mallet: You’ll need a mallet to strike your chisels. A traditional wooden one (usually made from beech) is best, as a metal hammer will damage the chisel handles.
- Spokeshave: Think of this as a plane for curves. It’s used for shaping curved edges, like on a chair leg or an arched frame.
4. Holding and Assembling
- Workbench: A solid workbench is the heart of any workshop. If you don’t have one, a sturdy table will do for now, but a proper bench with a vice to hold your wood securely will make your life much easier. You can even build your own as an early project!
- Clamps: Woodworkers have a saying: you can never have too many clamps. They are essential for holding pieces together while the glue dries. Start with a few G-clamps or F-clamps in various sizes.
Understanding the Star of the Show: Wood
Wood isn’t just wood. It’s a natural material, and every species and every board is unique. Understanding its properties is key to becoming a good woodworker.
Softwoods vs. Hardwoods
This is the first big distinction you’ll come across. It’s a bit confusing, as the names don’t always refer to how hard the wood actually is.
- Softwoods come from coniferous trees (the ones with needles and cones), like pine, spruce, and cedar. They tend to grow faster, which makes them cheaper and more sustainable. Pine is a fantastic wood for beginners. It’s affordable, easy to work with, and widely available at timber merchants and DIY shops across the UK.
- Hardwoods come from deciduous trees (the ones that lose their leaves in autumn), like oak, ash, beech, and cherry. They are generally denser, more durable, and have a richer grain. Oak is a classic British hardwood, famous for its strength and beautiful grain. It’s more expensive and harder to work with than pine, but it’s perfect for projects that need to last, like a dining table. Beech is another great choice, with a fine, straight grain, often used for toys and kitchen utensils.
When you buy wood, you’ll see terms like “rough sawn” (timber straight from the sawmill, needing planing) or “PSE” (Planed Square Edge), which is ready to use. As a beginner, starting with PSE timber is much easier.
Reading the Grain
The lines and patterns you see in a piece of wood are called the grain. This is the direction the wood fibres grew in the tree. Working with the grain is crucial. Planing or chiselling against the grain will cause the fibres to tear out, leaving a rough, ugly surface. Always try to cut “downhill” along the grain.
You also need to think about how wood moves. Wood is like a sponge; it absorbs moisture from the air and swells, and it releases moisture and shrinks when the air is dry. This movement can cause joints to fail or flat panels to warp. Good woodworking is all about designing things in a way that allows the wood to move without breaking your project apart.
Your First Project: Building Confidence and Skill
The best way to learn is by doing. Don’t try to build a grandfather clock for your first project. Start with something simple that you can finish in a weekend. This will teach you the basics and, most importantly, give you a huge confidence boost.
Project Idea: A Simple Bookshelf
A small, sturdy bookshelf is a perfect first project. It involves measuring, cutting straight lines, and joining pieces together.
What you’ll need:
- A single pine board (e.g., 1.8m long, 19cm wide, and 1.8cm thick)
- A saw (a tenon saw is great for this)
- A combination square
- A pencil or marking knife
- Wood glue
- A few screws and a screwdriver
- Sandpaper
- A tin of wax or oil for finishing
The Steps:
- Plan and Measure: Decide how tall and wide you want your shelf. Let’s say we’ll make it 60cm wide with two sides that are 20cm tall. You’ll need two side pieces (20cm each) and two shelf pieces (60cm each).
- Mark Your Cuts: Use your combination square and marking knife to mark precise, straight lines on your pine board for each piece. Remember the woodworker’s mantra: measure twice, cut once.
- Cut the Pieces: Hold the wood securely (a vice is ideal). Use your saw to cut carefully along your marked lines. Try to stay just on the ‘waste’ side of the line, so you can sand back to the perfect dimension.
- Assemble with Glue and Screws: This shelf will be held together with a simple butt joint. Apply a thin layer of wood glue to the end of one of the shelf pieces and press it against the side piece, forming a right angle. Use your square to make sure it’s perfect. Drive a couple of screws through the side piece into the shelf to hold it tight while the glue dries. Repeat for the other joints.
- Sand and Finish: Once the glue is dry, sand the whole bookshelf smooth. Start with a medium-grit sandpaper (like 120-grit) and finish with a fine grit (like 240-grit) for a silky feel.
- Apply a Finish: Wipe away all the dust and apply a coat of wax or oil. This protects the wood and brings out the beauty of the grain.
Congratulations! You’ve just made your first piece of furniture. It might not be perfect, but it’s yours.
The Art of Joining Wood: An Introduction to Joinery
Simply gluing and screwing wood together works for basic projects, but the true art of woodworking lies in joinery. A well-made joint is not only incredibly strong but also beautiful in its own right. There are hundreds of different joints, but here are a few of the most fundamental ones.
The Mortise and Tenon Joint
This is one of the oldest and strongest joints in woodworking. It’s been used for thousands of years to make everything from house frames to chairs and tables.
- A mortise is a square or rectangular hole cut into one piece of wood.
- A tenon is a tongue cut on the end of another piece of wood, sized to fit perfectly into the mortise.
When glued together, the large surface area of the joint creates a powerful bond that can withstand all sorts of stress. Cutting a good mortise and tenon joint by hand takes practice, but it’s a core skill that will open up a world of project possibilities.
The Dovetail Joint
Instantly recognisable by its interlocking pins and tails, the dovetail joint is a hallmark of high-quality craftsmanship. You’ll often see it on the corners of drawers and boxes.
The shape of the pins and tails means the joint is mechanically strong—it’s very difficult to pull apart. While they look complicated, dovetails can be cut by hand with a saw and a chisel. Cutting your first set of dovetails is a rite of passage for any aspiring woodworker. There’s a huge sense of achievement when you finally tap the two pieces together and they fit like a glove.
The Half-Lap Joint
This is a simpler joint, perfect for making frames. You cut away half the thickness of the wood from each piece where they overlap. When you put them together, they sit flush with each other. It’s a straightforward and elegant way to join wood at a corner or in the middle of a frame.
Sharpening: The Most Important Skill You’ll Learn
You can have the most expensive tools in the world, but if they’re not sharp, they’re useless. A dull chisel will tear the wood, and a dull plane will be impossible to push. Learning to sharpen your own tools is not just a chore; it’s a fundamental part of the craft.
Most woodworkers use water stones or oil stones to sharpen their tools. These are blocks of abrasive material that, when used with water or oil as a lubricant, slowly grind a new, sharp edge onto the steel.
The process involves creating a flat ‘bevel’ on the edge of the tool at a precise angle (usually around 25-30 degrees) and then removing the tiny burr of metal that forms on the back. It takes a bit of practice to get the hang of it, but the difference it makes is incredible. A freshly sharpened plane will glide through the wood with a satisfying ‘shushing’ sound, leaving a surface so smooth it shines.
Safety in the Workshop: Respect the Tools
Woodworking is a safe and enjoyable hobby, but it’s important to remember that you’re working with sharp tools. A bit of common sense goes a long way.
- Always be mindful. Pay attention to what you’re doing, especially when you’re tired. Most accidents happen because of a momentary lapse in concentration.
- Keep your tools sharp. This might sound strange, but a sharp tool is much safer than a dull one. A dull tool requires more force to use, which means it’s more likely to slip and cause an injury.
- Wear appropriate protection. Safety glasses are a must to protect your eyes from flying chips. If you’re doing a lot of sawing or sanding, a dust mask is a good idea too, as inhaling fine wood dust can be bad for your lungs.
- Secure your work. Always clamp your wood down firmly before you start cutting or chiselling. Never try to hold a small piece of wood in one hand while working on it with the other.
The Future of Woodworking: Old Craft, New Tricks
While the core skills of woodworking have remained unchanged for centuries, technology is opening up exciting new possibilities. CNC machines can now carve intricate designs with computer-controlled precision, and 3D printers can be used to create custom jigs and tools.
There’s also a growing focus on sustainability. Modern woodworkers are more conscious than ever about where their timber comes from. In the UK, look for wood certified by the FSC (Forest Stewardship Council). This ensures that the timber is harvested from responsibly managed forests.
But despite the new tech, the heart of woodworking remains the same. It’s about the quiet pleasure of craftsmanship, the connection to a natural material, and the pride of creating something lasting and beautiful with your own hands. It’s a skill that will serve you for a lifetime, bringing a little bit of the forest’s calm and strength into your home and your life. So go on, pick up a saw and give it a go. You might just discover a passion you never knew you had.
Further Reading
For those ready to dive deeper, here are some highly respected resources in the woodworking world:
- Paul Sellers’ Website: A master craftsman who champions hand-tool woodworking. His free videos are an incredible resource for beginners.
- Woodland Trust: The UK’s largest woodland conservation charity. A great place to learn about British trees and sustainable forestry.
- Fine Woodworking: An American magazine, but widely regarded as one of the best in the world for its depth and quality.
- Your local timber merchant: Don’t be afraid to visit and ask questions. They are often a mine of information about different wood species and their uses.