3D Printing: Your Gateway to Endless Creativity?
Discover the revolutionary world of 3D printing. This comprehensive guide covers everything from its British roots to practical tips for turning your ideas into reality.

This post may contain affiliate links. If you make a purchase through these links, we may earn a commission at no additional cost to you.
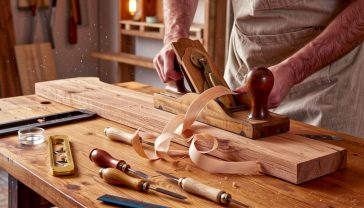
Ever held something in your hand and thought, “I wish this was slightly different”? Maybe you’ve imagined a phone stand perfectly angled for your desk, a custom-designed chess piece, or even a spare part for a gadget you can’t buy anymore. For years, making those ideas real meant complicated tools, expensive factories, or being a master craftsperson. Now, a quiet revolution is humming away in workshops, schools, and homes across Britain, and it’s changing everything. It’s called 3D printing, and it’s not just science fiction—it’s your personal factory, ready to build almost anything you can dream up.
Imagine a machine that works like a super-precise, robotic glue gun. Instead of ink, it uses materials like plastic, resin, or even metal, building objects layer by tiny layer from the ground up. That’s 3D printing in a nutshell. It’s a bit like watching a skyscraper being built in fast-forward, but on your tabletop. From a simple digital design on your computer, you can create a physical, three-dimensional object you can hold, use, and share. This isn’t just about making cheap plastic toys; it’s about unlocking a world of creativity, innovation, and problem-solving. It’s helping doctors create custom medical implants, engineers in the Midlands build lighter car parts, and designers in London prototype new products in hours instead of weeks. Ready to find out how you can turn your ideas into reality? Let’s dive in.
What on Earth is 3D Printing, Anyway?
At its heart, 3D printing is the process of building a three-dimensional object from a digital file. The proper name for it is additive manufacturing, which sounds a bit posh, but it gives you a big clue about how it works. Think about how a sculptor works: they start with a big block of marble and chip away at it until a statue appears. That’s subtractive manufacturing—you take stuff away. 3D printing is the exact opposite. It adds material, layer by wafer-thin layer, until the final object is complete.
A Simple Analogy: Building with LEGOs, Magically
Imagine you have a digital blueprint for a LEGO castle. Now, picture a magical robotic arm that reads this blueprint. It starts by placing the first layer of bricks on the baseplate, exactly where they need to go. Then, it moves up and places the second layer on top of the first, then the third, and so on. It doesn’t carve the castle out of a giant LEGO block; it builds it from nothing.
That’s precisely how a 3D printer works. It reads a digital file—your design—and slices it into hundreds or even thousands of horizontal layers. Then, it prints each layer one after another, fusing them together until your object slowly materialises in the real world. It’s a bit mesmerising to watch.
The Core Components: What’s Inside the Box?
While there are many types of 3D printers, most of the ones you’ll see in homes or schools share a few key parts:
- The Print Bed (or Build Plate): This is the flat surface where your object is built. It’s like the stage for your creation. Some are heated to help the plastic stick properly and stop it from warping.
- The Extruder (and Hot End): This is the business end of the printer. It’s the part that moves around, melting the plastic filament and squeezing it out through a tiny nozzle, a bit like icing a cake.
- The Filament: This is your “ink.” For most common printers, it’s a long spool of plastic wire (we’ll cover the different types later). The extruder pulls this in, melts it, and lays it down.
- The Frame and Motors: A sturdy frame holds everything together, while a set of precise electric motors drives the extruder and the print bed, moving them left, right, forward, back, up, and down to build your object with incredible accuracy.
It might sound complicated, but the process is surprisingly straightforward. You get a design, you send it to the printer, and you press ‘go’. A few hours later, your idea is a physical thing.
From Humble Beginnings to a Global Revolution: A Very British Story
You might think 3D printing is a brand-new invention, something dreamed up in a shiny Silicon Valley lab a few years ago. The truth is, its roots go back decades, and like many great inventions, it was a quiet, slow-burn revolution.

The 1980s: The Birth of an Idea
The story begins in the 1980s. While the rest of us were listening to Duran Duran and playing on our ZX Spectrums, a few clever inventors around the world were wrestling with a similar idea: what if you could print in three dimensions? The first patent for a method called stereolithography (SLA) was filed in 1984 by an American inventor named Chuck Hull. His machine used a UV laser to harden a liquid polymer (a type of resin) layer by layer. It was big, it was expensive, and it was slow, but it worked. The first-ever 3D-printed object was a small, simple black eyewash cup. Not exactly glamorous, but it was the start of everything.
At around the same time, another key technology was born: Fused Deposition Modelling (FDM). This is the “hot glue gun” method we talked about earlier, and it was patented by Scott Crump in 1989. This became the technology that would eventually bring 3D printing to the masses.
The 2000s: The RepRap Project – A British Breakthrough
For years, 3D printing remained the preserve of big companies with deep pockets. The machines cost hundreds of thousands of pounds and were used for creating prototypes in industries like automotive and aerospace. But then, something brilliant happened, right here in the UK.
In 2005, Dr. Adrian Bowyer at the University of Bath launched the RepRap Project. The name was short for “Replicating Rapid Prototyper,” and the goal was radical: to create an open-source 3D printer that could, as much as possible, print its own parts. The idea was to create a self-replicating machine, a bit like a mechanical plant, that could spread across the world, lowering the cost and making the technology accessible to everyone.
The first successful RepRap printer, named “Darwin,” was born in 2008. It was a clunky-looking thing, a tangle of threaded rods, wires, and printed plastic connectors. But it was a game-changer. Because the designs were open-source (meaning free for anyone to use, modify, and share), a global community of makers, hobbyists, and engineers started building their own, improving the designs, and sharing their innovations. This British-born project is arguably the single most important reason you can now buy a powerful 3D printer for a few hundred quid. It kick-started the home 3D printing boom.
Today: From Niche Hobby to Mainstream Tool
The seeds planted by the RepRap project have well and truly blossomed. Companies like Prusa Research (started by a RepRap enthusiast) and Creality took those open-source principles and created affordable, reliable machines that anyone could assemble and use.
Today, 3D printing is everywhere. It’s used by:
- NHS hospitals to create patient-specific surgical guides and anatomical models, helping surgeons practise complex operations.
- British manufacturers like Rolls-Royce and BAE Systems to prototype and even produce lightweight parts for jet engines and aircraft.
- Architects to build detailed models of new buildings, helping clients visualise a project long before a single brick is laid.
- Jewellery designers in Birmingham’s Jewellery Quarter to craft intricate wax models for casting.
- Teachers all over the country to bring lessons to life, whether it’s printing historical artefacts for a history class or cellular models for biology.
And, of course, it’s in the hands of thousands of hobbyists in sheds and spare rooms, inventing, creating, and repairing things in ways that were impossible just a decade ago.
The A-Z of 3D Printing: How Does It Actually Work?
So, you’ve got an idea. How do you get it from your brain into your hand? The journey involves three main steps: Modelling, Slicing, and Printing.
Step 1: Creating the Model – Your Digital Blueprint
Before you can print anything, you need a digital design. This is a 3D model file, which is essentially the set of instructions your printer will follow. You have a few options for getting one.
Design It Yourself with CAD Software
If you want to create something truly unique, you’ll need to design it yourself using Computer-Aided Design (CAD) software. This might sound intimidating, but there are amazing tools out there for all skill levels.
- For Absolute Beginners: Tools like Tinkercad are a fantastic starting point. It’s free, web-based, and works by letting you combine and subtract simple shapes (cubes, spheres, cylinders) to create more complex objects. It’s so intuitive that primary school kids can get the hang of it in an afternoon.
- For Hobbyists and Makers: Software like Fusion 360 is a huge step up, offering powerful tools for more organic and mechanical designs. It’s free for personal and hobbyist use and has a massive community online with tutorials for everything you can imagine.
- For the Pros: Professionals in engineering and design use high-end software like SolidWorks or AutoCAD, which offer mind-boggling levels of precision and features but come with a steep learning curve and price tag.
Download a Pre-made Design
The easiest way to get started is to download a model that someone else has already created. The 3D printing community is incredibly generous, and there are vast online libraries full of millions of free designs.
- Thingiverse: The original and one of the biggest. You can find everything here, from useful household gadgets to pop culture figurines.
- Printables (by Prusa): A fast-growing and well-organised site with a great community and a focus on quality, tested models.
- MyMiniFactory: This site has a mix of free and premium (paid) models, often curated for high quality and printability, especially for tabletop gaming miniatures.
Whether you design it or download it, you’ll end up with a file, usually in a format like .STL or .OBJ. This file describes the surface geometry of your object—its shape—but it doesn’t yet know how to be printed.
Step 2: Slicing – Turning a Model into a Recipe
Your 3D printer can’t just read an .STL file directly. It needs a more detailed set of instructions, a bit like a recipe that tells it exactly what to do at every single moment. This is where slicing software comes in.
The slicer takes your 3D model and, as the name suggests, “slices” it into hundreds or thousands of thin horizontal layers. For each layer, it generates the precise path the extruder needs to follow to draw it. It also works out all the crucial settings for the print.
This is where you get to play the role of the engineer. You can control:
- Layer Height: How thick is each layer? A smaller layer height (e.g., 0.1mm) gives a smoother, more detailed finish but takes much longer to print. A larger layer height (e.g., 0.3mm) is faster but the layers will be more visible.
- Infill: Does the object need to be solid plastic? That would take ages and use a lot of material. Instead, the slicer can create a partially hollow object with an internal support structure called infill. You can choose the infill pattern (grid, honeycomb, etc.) and density (e.g., 15% infill is a good balance of strength and speed for most objects).
- Supports: What if your model has parts that overhang, like the outstretched arms of a figure? You can’t print in mid-air! The slicer can automatically generate temporary, removable support structures that are printed underneath these overhangs to hold them up during the print. You just snap them off at the end.
- Temperatures and Speeds: You also set the temperature for the nozzle and the print bed (which depends on the material you’re using) and how fast the printer moves.
Once you’re happy with the settings, the slicer generates a new file, usually in a format called G-code. This is the final recipe. It’s a text file filled with thousands of lines of coordinates and commands, like “G1 X10 Y20 E5,” which tells the printer exactly where to move and how much plastic to push out. You save this G-code file to an SD card or send it to your printer over a network, and you’re ready for the magic to happen.
Step 3: Printing – Bringing Your Creation to Life
This is the fun part! You load your filament, make sure the print bed is level and clean, and start the print. The printer heats up, moves the extruder to its starting position, and begins its work. Layer by tiny layer, your digital design will start to take shape in the physical world.
Depending on the size and complexity of your object, and the settings you chose, a print could take anywhere from 30 minutes for a small keyring to several days for a huge, detailed model. It’s a process that teaches patience, but the reward of peeling your finished creation off the print bed is incredibly satisfying.
The Many Flavours of 3D Printing: More Than Just Plastic
When most people think of 3D printing, they picture the FDM method—the robotic glue gun. But that’s just one piece of the puzzle. There are several different technologies out there, each with its own strengths, weaknesses, and ideal uses.
Fused Deposition Modelling (FDM)
This is the undisputed king of home 3D printing. It’s affordable, versatile, and relatively simple to understand.

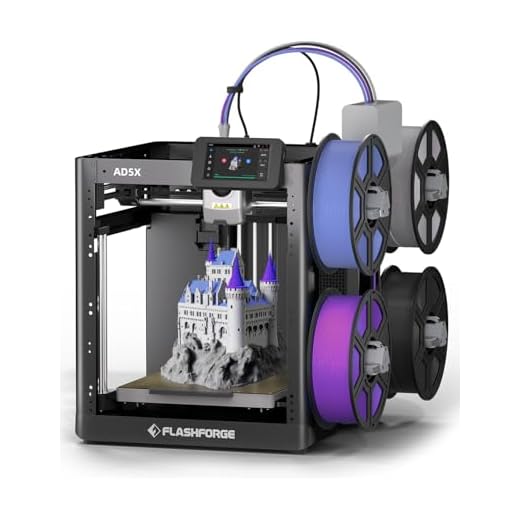


- How it Works: A spool of solid thermoplastic filament is fed into a hot extruder, which melts it and deposits it onto the build plate layer by layer.
- Materials: The range of materials is huge. PLA is the most common; it’s easy to print, biodegradable, and comes in every colour imaginable. PETG is stronger and more durable, great for mechanical parts. ABS (the stuff LEGOs are made of) is very tough but trickier to print. You can even get filaments infused with wood, metal powder, or carbon fibre.
- Best for: Hobbyists, schools, rapid prototyping, making functional parts, and general-purpose printing. It’s the workhorse of the 3D printing world.
- Pros: Cheap printers and materials, wide variety of materials, easy to use.
- Cons: Visible layer lines, less fine detail than other methods, can be slow.
Stereolithography (SLA) and Digital Light Processing (DLP)
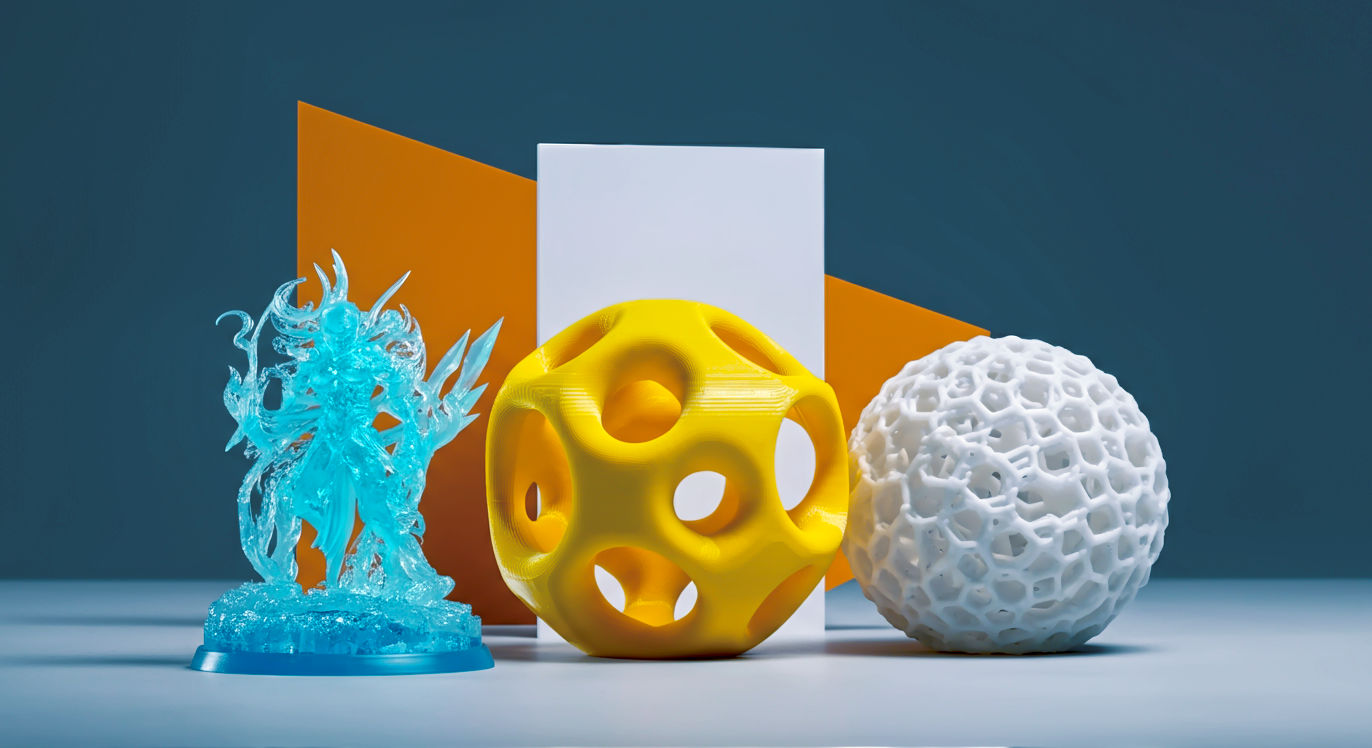
These are resin-based printing methods that offer jaw-dropping detail.
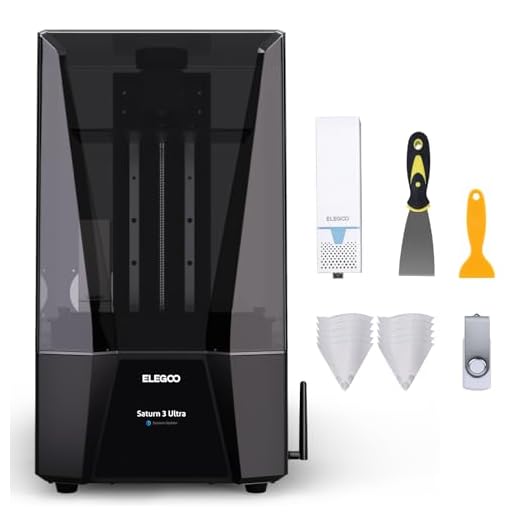


- How it Works: A build platform is lowered into a vat of liquid photopolymer resin. A light source (a UV laser for SLA, a digital screen for DLP) shines onto the resin, curing and hardening it in the shape of each layer as the platform slowly rises out of the vat.
- Materials: Various types of liquid resin with different properties (e.g., tough, flexible, castable for jewellery).
- Best for: Highly detailed miniatures for tabletop games like Warhammer, intricate jewellery models, dental and medical applications, and any object where a super-smooth surface finish is essential.
- Pros: Incredible detail and accuracy, smooth surfaces with no visible layers.
- Cons: Messy process (working with liquid resin and cleaning chemicals), materials are more expensive and smelly, printed parts need to be washed and cured in UV light after printing.
Selective Laser Sintering (SLS)
This is a powerful, industrial-grade technology used for creating strong, functional parts.
- How it Works: It uses a high-powered laser to fuse together small particles of polymer powder. A roller spreads a thin layer of powder over the print area, the laser sinters the shape of the layer, and then a new layer of powder is added. The unsintered powder acts as a natural support, so you can create incredibly complex, interlocking parts with no need for extra support structures.
- Materials: Typically nylon powders, which produce strong and durable parts.
- Best for: High-end prototyping, functional end-use parts, complex geometries that are impossible with other methods (like parts within parts), and small-batch manufacturing.
- Pros: Excellent mechanical properties, no need for supports, high accuracy.
- Cons: Very expensive machines and materials, requires a controlled environment. This is not a hobbyist technology… yet.
There are other methods too, like printing with metal powders or even biological cells, but FDM and SLA are the two you’re most likely to encounter and use yourself.
Unleashing Your Inner Maker: What Can You Actually Do With a 3D Printer?
This is the big question. A 3D printer is a tool, and like any tool, it’s only as useful as the person wielding it. But its versatility is what makes it so revolutionary.
Solving Everyday Problems Around the House
This is where a 3D printer truly shines for most people. It turns you from a consumer into a creator and a repairer.
- Repair, Don’t Replace: The plastic clip on your dishwasher basket broke? The battery cover for a remote control is lost? The knob on your oven has snapped? In the past, you might have had to buy a whole new appliance or spend hours searching for an overpriced spare part. Now, you can often find a design online or model it yourself in 15 minutes and print a replacement for pennies. This is a huge win for your wallet and the planet.
- Custom Organisation: Get your life in order with perfectly designed solutions. Print a holder for your collection of batteries, a cable tidy that fits your desk exactly, a rack for your spice jars, or drawer dividers designed for your specific tools.
- Upgrades and Hacks: Improve the things you already own. Print a better grip for a handheld tool, an adapter to mount your sat-nav on your bike, or a lens cap holder for your camera.
Fuelling Your Hobbies and Passions
Whatever you’re into, a 3D printer can probably make it better.
- Tabletop Gaming: This is a massive area. Print armies of incredibly detailed miniatures for Warhammer, Dungeons & Dragons, or any other wargame. Design and print your own custom terrain, scenery, and objective markers.
- Cosplay: Create screen-accurate helmets, armour, and props from your favourite films and video games. A 3D printer can produce the complex base shapes that you can then sand, paint, and finish to a professional standard.
- Gardening: Print custom seed-starting trays, plant labels, self-watering pots, or brackets to build a vertical garden on your balcony.
- Electronics and DIY: Design and print custom enclosures for your Raspberry Pi or Arduino projects. Create brackets, mounts, and jigs to help with woodworking or other DIY tasks.
Education and Creativity
For kids and adults alike, a 3D printer is an incredible learning tool. It brings abstract concepts to life. You can explain a complex molecule by printing a model of it. You can teach engineering principles by designing and printing a working gearbox. It fosters creativity, problem-solving skills, and a deeper understanding of how the world around us is made.
Starting a Small Business
The falling cost of the technology has opened the door for a new wave of “micro-manufacturing.” People across the UK are using their 3D printers to launch small businesses from their homes. They sell everything from unique cookie cutters and personalised wedding cake toppers on Etsy to specialised drone parts and custom engineering solutions for local businesses.
Getting Started: Your First Steps into the World of 3D Printing
Feeling inspired? Taking the plunge is easier and more affordable than you might think. Here’s a quick guide.

Choosing Your First Printer
For a beginner, an FDM printer is almost certainly the way to go. They are cheaper, safer, and much less messy than resin printers. The market is flooded with options, but a few things to look for are:
- A Good Community: Choose a brand that has a large, active community online (on Reddit, Facebook, etc.). This is an invaluable resource for troubleshooting and advice. Brands like Creality, Prusa, and Bambu Lab are hugely popular for a reason.
- Automatic Bed Levelling: This used to be a major headache. The print bed needs to be perfectly level for the first layer to stick properly. Many modern printers now have a feature that automates this process, saving you a world of frustration. It’s well worth paying a little extra for.
- Price: You don’t need to spend a fortune. A fantastic entry-level printer, like something from Creality’s Ender series, can be had for under £200. These often require a bit of assembly, which is a great way to learn how the machine works. If you have a bit more to spend (around £500-£700), printers from Bambu Lab offer incredible speed, quality, and ease of use right out of the box.
Essential Materials and Tools
Once you have your printer, you’ll need a few other bits and bobs:
- Filament: Start with PLA. It’s the easiest to print with and very forgiving. A 1kg spool costs around £15-£20 and will last you a surprisingly long time.
- A Slicer: Download a free slicer like UltiMaker Cura or PrusaSlicer. They are both incredibly powerful and have pre-made profiles for most popular printers.
- Basic Tools: You’ll want a pair of flush cutters or snips to trim filament and remove supports, and a scraper to help get prints off the bed. Most printers come with these.
- Patience: This is perhaps the most important tool! Your first few prints might fail. That’s okay. 3D printing is a hobby that involves tinkering and learning. Each failure is a lesson. Don’t be disheartened—the online communities are there to help you figure out what went wrong.
The Future is Being Printed: What’s Next?
3D printing has come a long way from that first little eyewash cup, but we’re still just scratching the surface of what’s possible. The technology is getting faster, more accessible, and more capable every year.
- Multi-Material and Colour Printing: We’re moving beyond single-colour objects. Systems like Bambu Lab’s AMS (Automatic Material System) already allow home users to print with multiple colours and materials in a single print job, and this will only become more common and affordable.
- AI Integration: Artificial intelligence is starting to play a role. AI could soon monitor your prints in real-time, spot potential failures before they happen, and automatically adjust settings for a perfect result every time. It will also make the design process easier, allowing you to generate complex models just by describing what you want.
- New Materials: The range of printable materials is exploding. We’re seeing advances in printing with flexible materials, high-strength composites, and even food. Imagine printing a custom-shaped chocolate or a piece of pasta designed for the perfect sauce-to-pasta ratio.
- Localised Manufacturing: Perhaps the biggest change will be to how we make and buy things. Instead of manufacturing products on the other side of the world and shipping them to the UK, what if you could just download a design file and print it at a local hub, or even at home? This could lead to a massive reduction in waste and carbon emissions, stronger local economies, and products that are perfectly customised to our needs. Companies like 3D Hubs (now part of Protolabs) pioneered this model, connecting people who need parts printed with local printer owners.
- Construction and Housing: On a much grander scale, companies are now using giant 3D printers to build houses out of concrete, layer by layer. This could dramatically speed up construction and lower costs, potentially offering a solution to housing shortages.
Is It For You? The Honest Truth About 3D Printing
So, is a 3D printer your gateway to endless creativity? Yes, but with a small catch. It’s not quite a magical “replicator” from Star Trek just yet. It’s a tool, and like any powerful tool, it requires a little bit of learning, a dash of patience, and a willingness to tinker.
There will be times when a print fails for a reason you can’t figure out. You’ll have to learn what “bed adhesion,” “stringing,” and “z-wobble” mean. But the journey is part of the fun. The feeling of seeing a problem, designing a solution, and then holding that solution in your hand a few hours later is genuinely empowering.
It’s a hobby that bridges the digital and physical worlds. It teaches design, engineering, and problem-solving. It empowers you to fix, to create, and to innovate. Whether you want to repair your home, build a miniature army, or prototype the next great British invention, a 3D printer can open up a world of possibilities. The factory of the future might just be sitting on your desk.
Further Reading & Resources
To continue your journey, here are some of the most respected websites and resources in the 3D printing community:
- All3DP: An excellent online magazine with printer reviews, project ideas, and troubleshooting guides.
- Printables: A fantastic model repository and community hub with a focus on quality.
- Thingiverse: The original and largest repository for 3D models.
- The RepRap Project: Learn about the history and the open-source movement that started it all.
- Thomas Sanladerer on YouTube: A highly respected voice in the community, with deep-dive technical videos and reviews.
- Maker’s Muse on YouTube: Great for project inspiration and understanding design principles for 3D printing.