Seed Starting Success: The Ultimate British Gardener’s Guide to Germination
Your complete guide to starting seeds in the UK. Learn how to choose compost, sow successfully, fix common problems, and get your garden growing from scratch.

This post may contain affiliate links. If you make a purchase through these links, we may earn a commission at no additional cost to you.
There’s a special kind of magic in gardening, a quiet thrill that you just can’t buy. It’s the feeling of seeing the first tiny green shoot push its way out of dark, damp compost. It’s the satisfaction of planting a flowerbed with blooms you’ve nurtured from the very beginning, or serving up a salad made with vegetables you’ve raised yourself. Starting plants from seed feels a bit like a superpower. It’s your chance to create life, to fill your patch—whether it’s a sprawling country garden, a neat suburban lawn, or a few pots on a city balcony—with colour, scent, and flavour.
For many, the idea seems daunting. It sounds like something for ‘proper’ gardeners with giant greenhouses and years of experience. But it isn’t. Honestly, it’s one of the most rewarding and accessible things you can do. It’s cheaper than buying nursery plants, gives you a massive choice of weird and wonderful varieties you’ll never find at the garden centre, and connects you to the rhythm of the seasons in a way that nothing else can.
This guide is your complete companion to getting it right. We’ll take you through everything, step-by-step, from choosing your pots to waving your sturdy young plants off into the great outdoors. Forget the complicated jargon and the confusing advice. Let’s get our hands dirty and start growing.
Part 1: Your Seed-Starting Toolkit – Getting the Gear Right
Before you even tear open a seed packet, getting your equipment sorted will make the whole process smoother and more successful. You don’t need a state-of-the-art laboratory, but a few key items are essential.

It Doesn’t Have to Cost the Earth
First things first: you don’t need to spend a fortune. While you can buy all sorts of fancy gadgets, the basics are simple and can often be found or repurposed from around the home. Gardening is about resourcefulness, so feel free to get creative. Your seeds won’t mind if their first home is a designer pot or a cleaned-out yoghurt pot.
Choosing Your Containers: Pots, Trays, and Recycled Options
Seedlings aren’t fussy, but they do need somewhere to live. The main thing is that your chosen container must have drainage holes at the bottom. Without them, water will sit in the compost, turning it into a soggy bog and rotting the delicate roots before they even get started.
- Seed Trays: These are shallow trays, perfect for sowing lots of seeds in one go, especially fine ones like lettuce or lobelia. You’ll need to move the seedlings into individual pots later on, a process we call ‘pricking out’.
- Modular Trays (or Cell Trays): These are trays divided into individual cells or plugs. They’re brilliant because each seedling gets its own little pocket of compost, which means less root disturbance when it’s time to move them to bigger pots. They’re ideal for slightly larger seeds like tomatoes or courgettes.
- Individual Pots: Small plastic or biodegradable pots (around 7-9cm) are great for seeds that don’t like having their roots disturbed, such as beans, peas, and squash. You generally sow one or two seeds per pot.
- Recycled Options: This is where you can save some money. Yoghurt pots, plastic mushroom trays, and the bottom half of plastic milk bottles all make fantastic seed pots—just remember to poke some holes in the bottom for drainage. Toilet roll tubes are another classic; you can plant them straight into the ground, where they’ll rot away.
The Right Stuff: Why Seed Compost Matters
It might seem like any old bag of compost will do, but using a dedicated seed and cutting compost is probably the single biggest favour you can do for your seeds.
Think of it this way: a fully grown plant is like an adult who needs big meals to keep going. A seedling is a baby that needs gentle, easily digestible food. Multipurpose compost is too coarse and nutrient-rich for seedlings. It’s like feeding a newborn a steak dinner.
Seed compost is different in three key ways:
- Fine Texture: It’s sieved to a fine consistency, so there are no big lumps to block tiny roots. This ensures good contact between the seed and the compost.
- Low Nutrients: Seeds come with their own packed lunch—a store of energy to get them through germination. Too many extra nutrients from the compost can actually scorch the delicate new roots.
- Sterile (or Close to It): It’s usually treated to remove fungal spores and weed seeds. This is crucial for preventing a common seedling disease called ‘damping off’, which we’ll cover later.
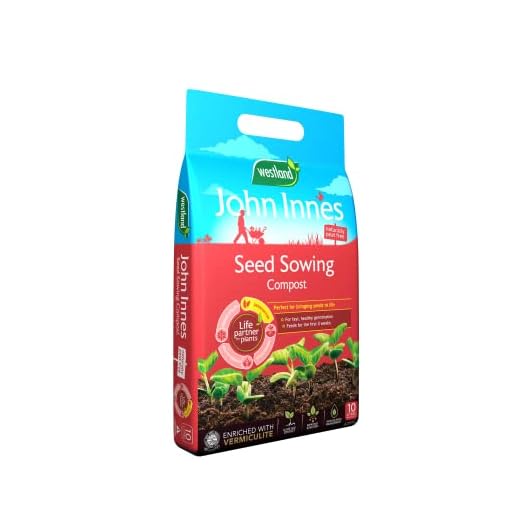
Westland John Innes Peat Free Seed Sowing Compost 10L
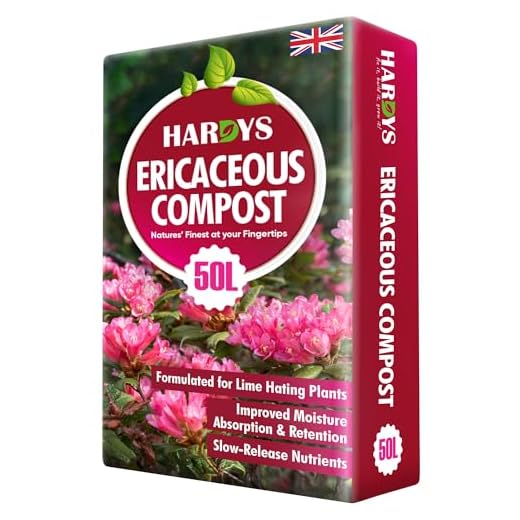
Hardys 60L Ericaceous Organic Compost – Formulated Plant Food Potting Soil for Seeds, New & Established Ericaceous Plants – Acidic Top Soil Outdoor and House…
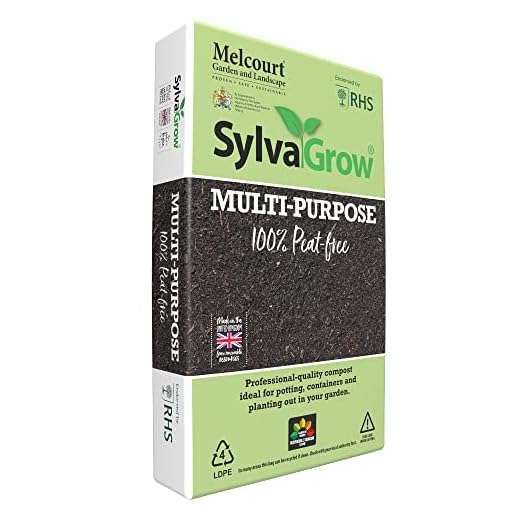
Sylvagrow Standard Multipurpose All Purpose Peat Free Compost Soil | 100% Peat Free Soil | Professional | Raising Seeds and Cuttings, Potting-on, Planting…
Rich Nutrient Special Mix 20 Litres Multi Purpose Compost Soil Indoor Seed Plants & Outdoor Hanging Baskets For Plant Beds, Growing, Potting

Gro-Sure Westland Seed & Cutting Compost Bale – 20L (
You can buy it in bags from any garden centre. It’s a non-negotiable part of the toolkit.
A Place to Grow: Light and Warmth Essentials
Seeds need two things to wake up from their slumber: warmth and moisture. Once they’ve sprouted, they need a third: light.
- Warmth: Most seeds need a consistent, gentle warmth to germinate. For many, a warm windowsill is perfectly adequate. An airing cupboard is a classic spot for getting things started, but you must check them every day and move them into the light the second you see a sprout. For heat-loving plants like chillies, aubergines, and tomatoes, a heated propagator can be a game-changer. This is basically a seed tray with a clear lid and a heated base that provides a constant, gentle warmth, dramatically improving germination rates.
- Light: As soon as your seeds have germinated, they need light—and lots of it. A bright, south-facing windowsill is the go-to spot for most gardeners. Make sure to turn your trays every day, otherwise, the seedlings will bend towards the light and grow all lopsided. If you don't have a bright windowsill or you’re getting serious about seed starting, grow lights can be a brilliant investment. These special LED lamps provide the perfect spectrum of light for plant growth, preventing the weak, spindly seedlings that can result from poor natural light.
Little Extras That Make a Big Difference
- Labels: Don’t think you’ll remember what you planted where. You won’t. You’ll end up with a tray of identical-looking green shoots and no idea if they’re your prize-winning tomatoes or a rampant weed. Use plastic or wooden lollipop-stick labels and a waterproof pen. Write the variety and the date you sowed them.
- Watering Can with a Fine Rose: A ‘rose’ is the sprinkler head on the end of the spout. A fine one delivers a gentle shower that won’t dislodge your seeds.
- A Plant Sprayer/Mister: This is even better for the initial watering, as it’s almost impossible to overdo it.
- A Dibber (or a Pencil): A dibber is a small, pointy stick used for making holes in compost. The back of a pencil or a chopstick works just as well.
Part 2: Decoding the Seed Packet – Your Instruction Manual
A seed packet is more than just a pretty picture. It’s a dense, information-packed instruction manual tailored to that specific plant. Learning to read it is like cracking a code that unlocks all its secrets.
What All Those Symbols Mean
Most packets use a standardised set of symbols to give you information at a glance. You’ll usually find a key somewhere on the packet, but they generally cover:
- Sun/Shade Requirements: A full sun symbol for plants that need lots of direct light, a half-and-half symbol for partial shade, and a full shade symbol for woodland dwellers.
- Plant Height and Spread: This tells you how big the plant will eventually get, which is crucial for planning where to put it in your garden.
- Flowering/Harvesting Time: This shows you which months you can expect to enjoy your flowers or crops.
- Indoor vs. Outdoor Sowing: It’ll indicate whether the seeds should be started indoors (under cover) or can be sown directly into the ground outside.
'Sow By' Dates: Do They Really Matter?
You’ll always see a ‘sow by’ or ‘packed in year’ date. This is a guide to the seeds' viability. Over time, the germination rate (the percentage of seeds that will successfully sprout) decreases. Fresh seeds are always best.
However, don’t throw away old packets! Many seeds last for years if stored in a cool, dark, dry place. You might find that only 50% of them sprout instead of 90%, so you can just sow a few more to make up for it. The exception is the parsnip, whose seeds are notoriously short-lived. It’s always best to buy fresh parsnip seed each year.
Key Information: Sowing Depth, Spacing, and Timings
This is the most important part of the packet. Look for a small grid or a block of text that tells you:
- When to Sow Indoors: This will be given as a range of months, for example, ‘February to April’. Starting earlier in the range usually means an earlier harvest, but you need to be confident you can provide enough light and warmth during those colder, darker months.
- When to Plant Out: The months when it’s safe to move your young plants outside.
- Sowing Depth: This is absolutely critical. A common mistake is to bury seeds too deep. The packet will say something like "Sow 1cm deep". A good rule of thumb is to plant a seed to a depth of about twice its own size. Tiny, dust-like seeds (like begonias or snapdragons) often need light to germinate and should just be pressed onto the surface of the compost and not covered at all.
- Spacing: This tells you how far apart to plant them in their final position in the garden. It might seem a bit abstract now, but it’s good to have in mind.
Part 3: The Main Event – Sowing Your Seeds Like a Pro
Right, you’ve got your gear and you’ve studied your seed packet. It’s time to sow. This is the fun bit. Put the radio on, make a cup of tea, and let’s get started.

Step 1: Prepare Your Compost
Your seed compost will probably be a bit dry and compacted in the bag. Tip some into a bucket or a large bowl and add a little water. Mix it with your hands until it’s evenly damp but not soaking wet. A good test is to grab a handful and squeeze it—it should hold its shape but not drip water. This pre-moistening step is important because it’s much harder to water compost evenly once it’s in the trays.
Step 2: Filling Your Pots and Trays
Loosely fill your chosen container with the damp compost. Don’t press it down too hard, as this will squeeze all the air out, and roots need air just as much as they need water. Gently tap the container on your workbench a couple of times to settle the compost. Scrape off the excess with a ruler or a flat piece of wood to get a nice, level surface. Finally, use a small block of wood or the bottom of another tray to gently firm the surface. You’re aiming for a smooth, firm, but not compacted, seedbed.
Step 3: Sowing the Seeds (The 'Not Too Deep' Rule)
How you sow depends on the size of the seed.
- For Medium to Large Seeds (e.g., Courgettes, Beans, Marigolds): You can place these individually. This is called ‘station sowing’. Make a small hole with your dibber or pencil to the depth recommended on the packet. Drop one or two seeds in each hole (sowing two is good insurance in case one doesn’t germinate). If both grow, you can snip out the weaker one later.
- For Smaller Seeds (e.g., Tomatoes, Lettuce, Stocks): These are best scattered thinly across the surface of a seed tray. This is called ‘broadcast sowing’. Try to give them a bit of space between each other to make them easier to separate later. A good tip is to mix very fine seed with a little dry sand, which helps you see where you’re sowing and spreads them out more evenly.
The Golden Rule: Don’t sow too thickly! It’s tempting to use up the whole packet, but overcrowded seedlings have to compete for light and resources. They grow weak and are more prone to disease. Less is definitely more.
Step 4: Covering and Labelling
Once your seeds are in place, they need to be covered. A light dusting (or ‘sieve’) of either more compost or a fine layer of vermiculite is ideal. Vermiculite is a natural mineral that helps retain moisture and reflects light, and it’s great for preventing algae from forming on the compost surface. Remember what the packet said about depth—don’t bury them! And if they need light to germinate, just press them gently into the surface and don’t cover them at all.
Now, before you do anything else, write your labels and stick them firmly in the pots or trays.
Step 5: The First Drink – How to Water Without Washing Away Your Work
Even though you pre-moistened the compost, a final watering is needed to settle everything in. A heavy-handed deluge from a watering can will wash all your carefully placed seeds into one corner. Instead:
- Use a Mister: Gently spray the surface until it’s evenly moist.
- Water from Below: This is the best method. Stand your seed trays or pots in a larger tray of water (an old washing-up bowl or a garden tray is perfect). Leave them for half an hour or so, and the compost will soak up the water from the bottom like a sponge. When you see the surface is dark and damp, take them out and let any excess water drain away.
Once watered, pop a clear plastic lid or a sheet of cling film over the top. This creates a mini-greenhouse environment, keeping the humidity high and the compost moist, which is perfect for germination.
Part 4: The Waiting Game – Germination and Early Growth
You’ve done your bit. Now it’s over to nature. Place your covered trays in their warm spot and be patient.
What's Actually Happening in There? The Science Bit, Made Simple
Inside every seed is a tiny baby plant (an embryo) and a food supply (the endosperm), all wrapped up in a protective coat. When you provide warmth and water, the seed coat softens and the embryo wakes up. It uses its packed lunch to send a root down into the compost and a shoot up towards the light. That first pair of leaves you see are called cotyledons, or ‘seed leaves’. They are part of the embryo and often look very generic. The next set of leaves that appear are the ‘true leaves’, and these will look like the leaves of the adult plant.
Patience is a Virtue: How Long Does It Take?
Germination times vary hugely. Some, like cress, can sprout in a day or two. Others, like parsley or celery, can take three weeks or more and will test your nerve. The seed packet will usually give you an estimated germination time. The key is to keep the compost consistently moist—never let it dry out completely, but never let it get waterlogged either.
The Big Three for Healthy Seedlings: Light, Water, and Warmth
The second you see the first hint of green, it’s time for action.
- Remove the Cover: Take off the plastic lid or cling film. This increases air circulation and helps prevent fungal diseases.
- Move to the Light: Immediately move the tray to your brightest spot—that south-facing windowsill or under your grow lights. This is the most crucial moment. Seedlings without enough light will grow long, pale, and spindly as they stretch desperately for the sun. This is known as being ‘leggy’.
- Keep Watering: Continue to water from below or with a fine spray, letting the surface of the compost dry out slightly between waterings.
Spotting the First True Leaves
After the initial seed leaves, you’ll see the first set of true leaves emerge. This is a milestone. It means the seedling has established its roots and is now photosynthesising—making its own food from sunlight. It’s a sign that your baby plant is growing up and will soon need more space.
Part 5: Troubleshooting – Tackling Common Seedling Problems
Sometimes, things go wrong. Don’t be disheartened—it happens to everyone. Learning to spot the signs and act quickly is what makes you a better gardener.

Help, My Seeds Didn't Sprout!
This is the most common frustration. There are a few likely culprits:
- Too Cold: The compost wasn’t warm enough to trigger germination.
- Too Wet: The seeds rotted in waterlogged compost before they could sprout.
- Too Dry: The compost dried out at a crucial moment, killing the embryo.
- Old Seed: The seed was no longer viable.
- Sown Too Deep: The seedling ran out of energy before it could reach the surface.
Check your watering, check the temperature, and consult the seed packet again. Sometimes you just have to chalk it up to experience and sow another batch.
'Leggy' Seedlings: The Telltale Sign of Not Enough Light
If your seedlings look like giraffes—long, pale, weak stems with tiny leaves on top—they are leggy. This is almost always caused by a combination of too much heat and not enough light. They shoot up, searching for a sun that isn’t there.
The Fix:
- More Light, Immediately: Get them into a brighter position or lower your grow lights so they are just a few inches above the seedlings.
- Less Heat: If they're on a heated propagator, turn it off now they’ve germinated.
- Gentle Breeze: A small fan directed at them for an hour a day, or just gently brushing your hand over them, can help strengthen the stems.
- Burying the Stem: For some plants, like tomatoes, you can rescue leggy seedlings. When you pot them on, you can bury the long stem right up to the first set of leaves, and new roots will grow from it.
The Dreaded 'Damping Off': How to Prevent a Fungal Fiasco
Damping off is a fungal disease that is the bane of the seed-sower's life. It strikes without warning. One day you have a tray of healthy seedlings; the next, they have collapsed at the base, looking like they’ve been pinched. It’s caused by fungi that thrive in cool, damp, stagnant conditions.
Prevention is the only cure:
- Use Sterile Seed Compost: Don’t use garden soil or old compost.
- Cleanliness is Key: Always use clean pots and trays. Wash them in hot, soapy water before you start.
- Don't Overcrowd: Sow seeds thinly to allow good air circulation.
- Water Carefully: Water from below and avoid getting the leaves wet.
- Remove Covers Promptly: Take lids off as soon as germination occurs.
If you see damping off, immediately remove the affected seedlings and the surrounding compost to stop it from spreading.
Pesky Pests: Fungus Gnats and Other Unwanted Guests
The most common pest you might encounter indoors are fungus gnats. They look like tiny black flies buzzing around your seedlings. The adults are harmless, but their larvae live in the top layer of compost and feed on seedling roots. They thrive in overly wet conditions. Letting the compost surface dry out between waterings is usually enough to deter them.
Part 6: Growing Up – Pricking Out and Potting On
As your seedlings grow their first true leaves, their first home will start to get a bit crowded. It’s time to move them into their own individual pots, giving them the space they need to develop a strong root system.
What is 'Pricking Out' and Why Do We Do It?
Pricking out is the delicate process of separating seedlings that were sown together in a single tray and transplanting them into their own pots. It gives each plant room to grow without competing for light, water, and nutrients.
A Step-by-Step Guide to Moving Your Baby Plants
The best time to prick out is when the seedlings have their first set of true leaves and are large enough to handle.
- Prepare: Fill your small pots (around 9cm) with multipurpose compost this time, as the plants are bigger and need more food. Water the pots and make a hole in the centre of each with your dibber or pencil.
- Water the Seedlings: Give the seed tray a good water about an hour beforehand. This makes the compost and roots slide out more easily.
- Handle with Care: The golden rule of handling seedlings is to never, ever touch the stem. It’s incredibly fragile and easily crushed. Always handle them by a leaf (preferably a seed leaf, as it doesn’t matter so much if it gets damaged).
- Loosen the Roots: Use a dibber, a pencil, or an old cutlery knife to gently loosen the compost around a clump of seedlings. Lift the whole clump out.
- Separate: Gently tease the individual seedlings apart, trying to keep as much of the root system intact as possible.
- Replant: Lower a seedling into the hole you made in its new pot. The aim is to get the seed leaves just sitting on the surface of the compost.
- Firm In: Use your dibber to gently push the compost around the roots, making sure there are no air pockets.
- Water In: Water them gently to settle the compost. Keep them out of direct sunlight for a day or two to recover from the shock of the move.
Potting On: Giving Your Plants Room to Grow
As your plant grows, it will eventually fill its 9cm pot with roots. You might see roots starting to poke out of the drainage holes. This is the sign it needs ‘potting on’—moving into a slightly larger pot. The process is the same, just on a bigger scale. You only need to move up one pot size at a time; putting a small plant in a massive pot can lead to the compost staying wet for too long and the roots rotting.
Part 7: The Final Hurdle – Hardening Off for the Great Outdoors
Your plants are now sturdy, healthy, and looking like they’re ready to take on the world. But plants that have been cosseted indoors on a warm windowsill are in for a shock if you just plonk them straight out into the garden. They need to be acclimatised to the harsher conditions outside—wind, rain, and fluctuating temperatures. This process is called hardening off.

Toughening Up Your Plants: What is Hardening Off?
Hardening off is the process of gradually exposing your plants to outdoor conditions over a week or two. This toughens up their leaves, strengthens their stems, and prepares their root systems for life in the garden. Skipping this step can result in stunted growth, scorched leaves, or even kill your precious plants.
The Two-Week Rule: A Simple Hardening Off Schedule
This process is a bit of a faff, but it’s absolutely worth it.
- Days 1-3: On a mild day, place your plants outside in a sheltered, shady spot for just a couple of hours. Then bring them back in.
- Days 4-6: Increase their time outside to 4-5 hours, introducing them to a little bit of gentle morning sun. Still bring them in at night.
- Days 7-10: Leave them out for most of the day in a sunnier spot (unless it’s scorching hot). They should still be brought in at night, especially if a frost is forecast.
- Days 11-14: Leave them out all day and all night, unless the weather is particularly foul. A cold frame or a temporary fleece cover can be a great help at this stage.
After about two weeks, they should be fully acclimatised and ready for their final planting positions.
Planting Out: The Grand Finale
Choose a mild, overcast day to plant out. Water your plants well an hour before you start. Dig a hole slightly larger than the pot, gently remove the plant, and place it in the hole so the top of its root ball is level with the soil surface. Fill in around it, firm the soil gently with your hands, and give it a thorough watering.
Stand back and admire your work. You did it. From a tiny, dry speck of dust, you have nurtured a living, breathing plant that is now ready to thrive in your garden.
Part 8: A British Sowing Calendar – What to Plant and When
Timing is everything in our variable British climate. Here is a rough guide to get you started. Always check your seed packet for specific advice.
Late Winter (January-February)
This is for the keen and well-prepared. You’ll need a heated propagator or a very warm, bright windowsill.
- Vegetables: Onions, leeks (from seed), broad beans (for an early crop), chillies, aubergines, sweet peppers. These all need a long growing season.
- Flowers: Geraniums (pelargoniums), begonias, antirrhinums (snapdragons), and delphiniums.
Early Spring (March-April)
Things really get going now. A greenhouse, cold frame, or sunny windowsill is perfect.
- Vegetables: Tomatoes, brassicas (cabbages, broccoli, cauliflower, kale), celery, celeriac, lettuces, peas.
- Flowers: Hardy annuals like cornflowers, cosmos, nigella, and calendula. Half-hardy annuals like marigolds and zinnias can be started towards the end of April.
Late Spring (May)
This is the time for tender plants that hate the cold.
- Vegetables: Courgettes, pumpkins, squash, French beans, runner beans, sweetcorn. These germinate quickly and grow fast, so don’t be tempted to start them too early.
- Flowers: Nasturtiums, sunflowers, and other tender annuals.
Summer and Autumn Sowing
Gardening doesn’t stop in June!
- Direct Sowing: In summer, you can sow fast-growing crops like lettuces, radishes, and carrots directly into the ground for a continuous supply.
- Autumn Sowing: Hardy annuals like cornflowers and ammi majus can be sown in late August/September for bigger, earlier flowers next year. You can also sow spring onions and winter lettuces for a winter harvest.
Conclusion: Your Garden, Grown by You
Growing plants from seed is a journey. There will be triumphs and there will be the occasional tray that just doesn’t work out. But every single time a seed sprouts, it feels like a small miracle. It’s a process that teaches patience, observation, and a deep appreciation for the quiet, determined power of nature.
You don’t need to be an expert. You just need a pot, some compost, a packet of seeds, and a little bit of hope. Follow the steps, learn from your mistakes, and enjoy the profound satisfaction of looking out at your garden and knowing that you made it happen. Happy sowing.
Further Reading:


