My Journey into the Heart of Woodcraft: A Tale of Sawdust, Sweat, and Satisfaction
Ever thought about getting into woodworking? Follow a personal journey from a wobbly bookshelf to the satisfaction of building with wood. A UK beginner’s guide.
This post may contain affiliate links. If you make a purchase through these links, we may earn a commission at no additional cost to you.
It all started with a wobbly bookshelf. Not a grand, antique thing from a dusty old manor, but a cheap, flat-pack disaster I’d cobbled together during a weekend. Every time I reached for a book, the whole thing shuddered, threatening to spill its guts all over my living room floor. One afternoon, after a particularly dramatic wobble, I thought, “There has to be a better way. I wonder if I could… build one myself?”
That simple thought was the tiny seed from which a forest of passion grew. I didn’t know it then, but I was about to step into the world of woodcraft. It’s a world that smells of freshly cut pine and old varnish, a world filled with the satisfying rasp of a hand plane and the gentle hum of a saw. It’s a journey that has taken me from a complete novice, terrified of splinters, to someone who can look at a piece of timber and see not just a plank, but a table, a toy, a treasure.
This isn’t a story about becoming a master craftsman overnight. Far from it. It’s a tale of wonky cuts, countless mistakes, and a fair bit of head-scratching. But it’s also about the immense pride of creating something useful and beautiful with your own two hands. If you’ve ever looked at a piece of wooden furniture and felt a flicker of curiosity, then come with me. Let’s talk about sawdust, sweat, and the deep, quiet satisfaction of woodcraft.
The Spark: Why Bother with Woodwork in a Flat-Pack World?
We live in an age of instant everything. Need a new coffee table? Click, and it’s at your door tomorrow. While there’s nothing wrong with convenience, something gets lost along the way. We lose the connection to the things we own. They become temporary, disposable.
Woodworking is the antidote to that. It’s slow. It’s deliberate. It forces you to think, to plan, and to solve problems. When you build something yourself, you know its story. You remember the tricky joint that took three attempts to get right, or the moment you applied the first coat of oil and the grain of the wood sprang to life.
For me, the appeal was threefold:
- Self-reliance: I wanted to fix and build things for my own home. I was tired of relying on flimsy products that weren’t built to last.
- Creativity: It’s a way to bring ideas to life. You can design something that fits your space and your style perfectly, something that’s completely unique.
- Mindfulness: When you’re focused on measuring twice and cutting once, the worries of the day just fade away. The workshop becomes a sanctuary, a place where the only thing that matters is the task at hand. It’s incredibly calming.
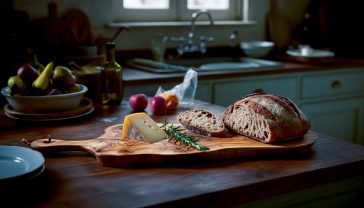
Think of it like baking your own bread instead of buying a sliced loaf. Both will feed you, but one fills your home with a wonderful smell and gives you a warm, crusty loaf you created yourself. Woodworking is the same—it’s just a lot less edible.
My First Steps: Gearing Up Without Breaking the Bank
When I first decided to give woodworking a go, I felt a bit overwhelmed. I watched videos of people with workshops bigger than my entire flat, filled with enormous, noisy machines. It was intimidating. I thought I’d need to remortgage the house just to buy the tools.
But here’s the secret: you don’t need all that stuff to get started.
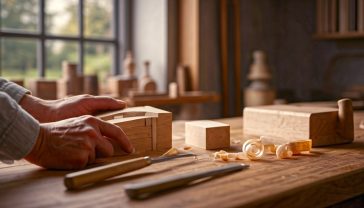
In fact, starting with a few good-quality hand tools is the best way to learn. It teaches you how wood behaves. You feel the grain, you learn how to make a straight cut, and you develop a respect for the material. My first workshop was a corner of the garden shed, and my tool collection was tiny.
The Absolute Must-Have Starter Tools
If you’re just starting out, this is the kit I wish someone had told me to buy. Forget the fancy gadgets for now. These are the trusty essentials that will get you through your first few projects.
- A Good Quality Saw: I started with a tenon saw. It’s great for making straight cuts for joints. It has a rigid spine along the top that keeps the blade from bending. Paired with a simple mitre box, it helps you cut perfect 45 and 90-degree angles.
- A Tape Measure and a Combination Square: Woodworking is all about accuracy. Measure twice, cut once isn’t just a saying; it’s the golden rule. A good tape measure is essential. A combination square is your best friend for marking straight lines and checking if your corners are truly square (90 degrees).
- Chisels: You don’t need a massive set. A couple of good-quality bevel-edge chisels (say, a 12mm and a 25mm) will do for most beginner tasks, like clearing out waste from a joint. You’ll also need a mallet (a wooden one is best) to tap them with.
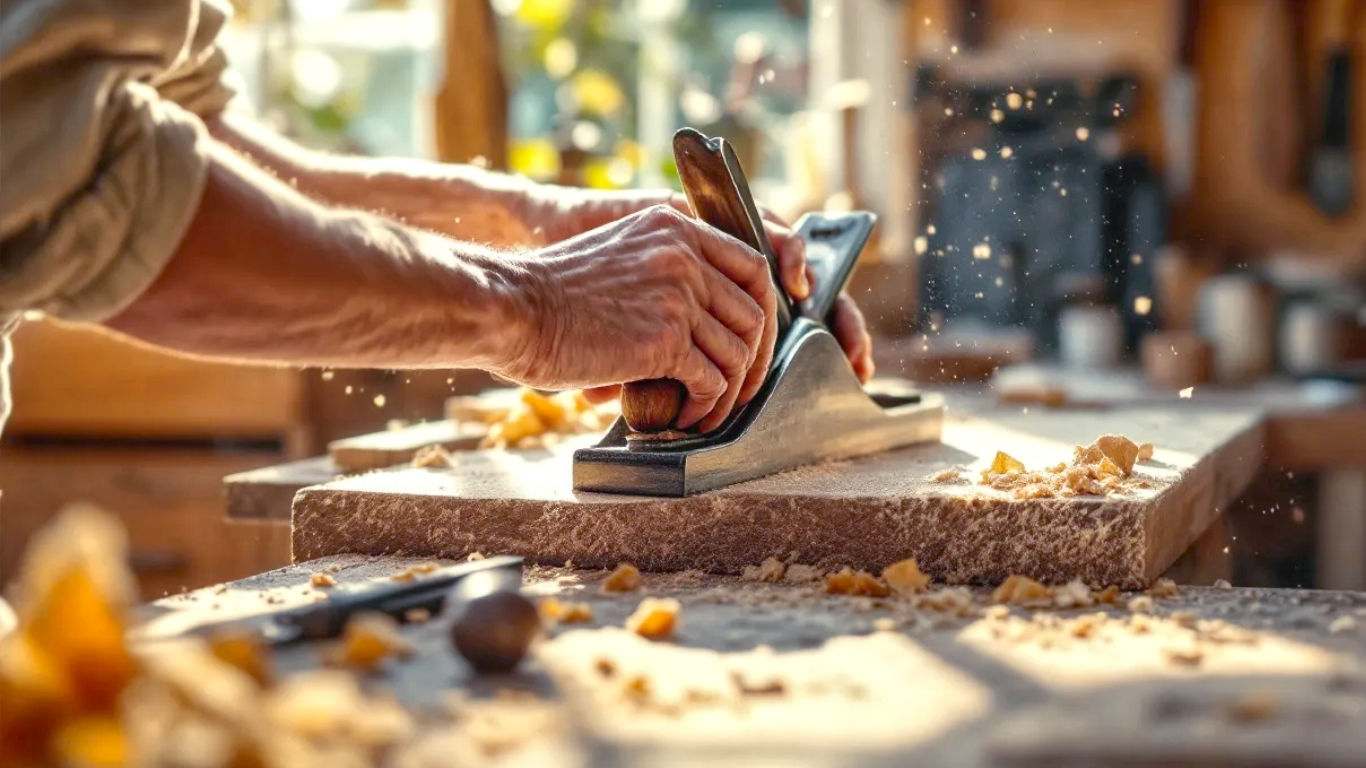
- A Hand Plane: A block plane is a small, versatile plane that’s perfect for tidying up edges and trimming small bits of wood. Holding it in one hand and shaving off a paper-thin curl of wood is one of the most satisfying feelings in all of woodwork.
- Clamps: You can never have enough clamps. Seriously. They are like an extra pair of hands, holding your work steady while you saw, or keeping a joint tightly glued together. Start with a couple of F-clamps or sash clamps.
- Sandpaper: To get a smooth, lovely finish, you’ll need sandpaper in various ‘grits’ (that’s how coarse it is). Start with a lower number like 80-grit for rough shaping, and work your way up to a higher number like 180 or 240-grit for a silky-smooth surface.
- Safety Gear: This isn’t optional. Safety glasses are a must to protect your eyes from sawdust and chips. A good dust mask is also vital, as breathing in fine wood dust is bad for your lungs.
My first tool purchase was a saw, a square, and a pencil from B&Q. It felt momentous. I was officially a woodworker.
Understanding the Star of the Show: A Beginner’s Guide to Wood
Before my journey began, I thought wood was just… wood. Brown stuff that comes from trees. I quickly learned that saying that to a woodworker is like telling a chef that all cheese tastes the same. Different woods have completely different personalities. They vary in colour, weight, hardness, and how they behave when you try to cut them.
For a beginner in the UK, it’s best to start with something that’s affordable and easy to work with.
Great Starter Woods
- Pine (often sold as ‘Redwood’ or ‘Whitewood’): This is the go-to beginner wood. It’s a softwood, which means it comes from a coniferous tree (the ones with needles and cones). It’s cheap, widely available from DIY shops, and easy to cut and shape. It’s perfect for practising your skills. My first wobbly bookshelf was meant to be pine. The second, much better one, definitely was.
- Poplar (Tulipwood): This is a hardwood, but it’s one of the softer ones. It’s often pale and can have green streaks. It’s lovely to work with, takes paint well, and is a good step up from pine without being too expensive.
- Oak: The king of British hardwoods. English Oak is strong, durable, and beautiful, with a lovely golden-brown colour. It’s a bit more expensive and harder to work with your hands, so maybe save this for when you’re a bit more confident. But building something from solid oak feels like you’re creating a future heirloom.
Where to Buy Wood
You might be tempted to head straight for the big DIY stores. They’re great for pine and other basic materials. But for a wider selection and better quality timber, seek out a local timber merchant.
Walking into one for the first time can be a bit daunting. It’s usually a big, dusty warehouse stacked high with timber. But don’t be shy! The people who work there are often incredibly knowledgeable. Tell them you’re a beginner and what you’re planning to make. They can help you choose the right wood for your project and your budget. They can even cut the big boards down to a more manageable size for you.
The First Project: From Plank to Something Real
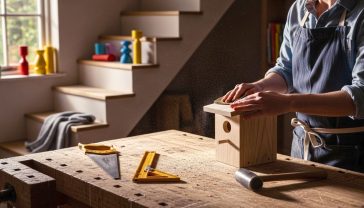
Theory is great, but woodcraft is learned by doing. My first project was a simple box. It sounds boring, but a box teaches you the absolute fundamentals: measuring, cutting straight, and joining corners.
My first box was a mess. The lid didn’t fit, the corners weren’t quite square, and there was a noticeable gap in one of the joints that I sneakily filled with wood filler. But it was my messy box. I’d made it from a plain old plank. It felt like magic.
If you’re wondering where to start, here are a few classic beginner projects:
- A Chopping Board: A great way to practise finishing. You can glue a few different coloured strips of wood together to make a pattern.
- A Simple Stool or Step: This will teach you how to make strong joints that can take weight.
- A Bird Box: A fun project that also helps the local wildlife. The RSPB website has great, simple plans.
- A Bookshelf: My old nemesis. Start small, maybe a single shelf held up by two simple brackets.
The key is to start simple. Don’t try to build a four-poster bed on your first weekend. Success with a small project will give you the confidence to tackle something bigger next time.
The Art of Joinery: Sticking Wood Together
This is where the real craft comes in. Joinery is the technique of connecting two pieces of wood. You could just use screws, and sometimes that’s the right answer. But for strong, beautiful furniture, you’ll want to learn some traditional joinery.
It’s a huge topic, but here are two basic joints that are perfect for beginners.
1. The Butt Joint
This is the simplest joint of all. You just ‘butt’ one piece of wood up against another and secure it with glue and screws or nails. It’s not very strong, but it’s fine for things like simple boxes or frames that won’t be under much stress.
2. The Half-Lap Joint
This is a big step up in strength and neatness. You cut away half the thickness from the end of each piece of wood you want to join. When they overlap, they sit perfectly flush.
Here’s how I made my first one:
- Marking Out: I used my combination square to carefully mark the area I needed to cut out on both pieces of wood. The width of the cutout had to be exactly the width of the other piece of wood.
- Cutting: I used my tenon saw to make several cuts down to my marked line within the waste area. This makes it easier to remove the wood.
- Chiselling: With the wood clamped firmly to my bench, I used a sharp chisel and a mallet to carefully tap out the waste wood between the saw cuts.
- Fitting: The moment of truth! I checked the fit. It was a bit tight, so I used the chisel to pare away tiny slithers of wood until the two pieces slotted together snugly.
When I successfully made my first clean half-lap joint, I felt like a genius. It was a small victory, but it was a crucial one. It showed me that with care and patience, I could shape wood precisely.
The Finishing Touches: Bringing the Wood to Life
You’ve cut, you’ve joined, you’ve sanded. Your project is built. You might think you’re done, but you’re about to get to one of the most magical parts: applying a finish.
A finish does two things: it protects the wood from dirt, moisture, and scratches, and it enhances its beauty, making the grain pop and giving it a lovely feel.
There are lots of options, but here are three simple, beginner-friendly finishes.
- Wax: A simple beeswax polish is easy to apply with a soft cloth. It gives a lovely, soft sheen and a natural feel. It’s not the most durable finish, but it’s great for decorative items.
- Oil: Finishes like Danish oil or Tung oil are brilliant. You wipe them on, let them soak into the wood, and then wipe off the excess. They give the wood a rich, warm glow and offer good protection. They’re a favourite among woodworkers for a reason.
- Varnish: This forms a hard, protective film on the surface of the wood. It’s very durable, making it great for things that will see a lot of wear, like tabletops. Modern water-based varnishes are easy to apply and clean up, and they don’t have the strong smell of the old oil-based ones.
My first time applying Danish oil to my little pine box was a revelation. The plain, pale wood suddenly came alive with colour and pattern. It transformed from a simple construction into a finished object, something to be proud of. Never skip the finish. It’s the difference between a project that looks ‘homemade’ and one that looks handmade.
Lessons Learned in Sawdust
My journey into woodcraft hasn’t just taught me how to build things. It’s taught me some valuable life lessons, too.
- Patience is a Virtue: You can’t rush wood. If you try, you’ll make mistakes. Learning to slow down and enjoy the process is half the battle.
- Embrace Imperfection: Your first projects will not be perfect. They will have flaws. And that’s okay. Those flaws are part of the story. They are reminders of what you learned along the way. My wonky box is more precious to me than any perfectly-made item I could buy.
- Problem-Solving is a Skill: Woodworking is a constant series of small problems. How do I make this cut? How do I fix this mistake? How do I make this joint stronger? You learn to think critically and creatively.
- The Joy of Making: In a world where most of us spend our days tapping on keyboards, there is a deep, primal satisfaction in creating a physical object. To be able to say, “I made that,” is a powerful thing.
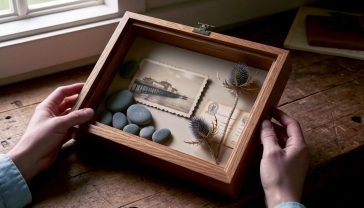
From that wobbly bookshelf to the small workshop I have today, every project has been a new adventure. I’ve built tables, toys for my nephew, shelves, and picture frames. Some have been successes, some have been… learning experiences. But every single one has been rewarding.
If you’re feeling that little spark of curiosity, I urge you to nurture it. You don’t need a huge space or a fortune’s worth of tools. You just need a saw, a square, a piece of wood, and a little bit of patience. Start small, be kind to yourself when you make mistakes, and celebrate your small victories.
You’ll be amazed at what you can create. And I promise you, the satisfaction you feel when you stand back and look at something you’ve built with your own two hands is worth every speck of sawdust.
Further Reading & Resources
For those ready to start their own journey, here are some fantastic UK-based resources that I found incredibly helpful:
- Paul Sellers’ YouTube: A master craftsman who is passionate about teaching traditional hand-tool woodworking. His videos are calm, clear, and inspiring.
- The English Woodworker: A great resource for learning about hand tools and techniques, run by Richard Maguire.
- Woodland Heritage: A wonderful charity dedicated to the proper management of British woodlands. Their website is a great place to learn about different British timbers.