The Great British Car Clean: Your Guide to a Flawless Finish
Your complete guide to car care. From choosing the right car cleaning kit to mastering the techniques for a perfect, showroom-worthy shine, we cover it all for UK drivers.
This post may contain affiliate links. If you make a purchase through these links, we may earn a commission at no additional cost to you.
There’s a unique satisfaction that comes from stepping back and admiring your car, gleaming on the drive as if it’s just rolled out of the showroom. It’s a quiet British ritual for many; a Sunday morning spent with buckets and cloths, transforming a road-weary motor into a source of pride. But achieving that perfect, swirl-free shine isn’t about luck or spending a fortune at a valet service. It’s about knowledge.
It’s about knowing why you should never, ever reach for the washing-up liquid, and why two buckets are always better than one.
Welcome to the ultimate guide to car care. Forget everything you thought you knew about washing the car. We’re going to strip it all back and build your understanding from the ground up. Whether you’re a complete beginner wondering what all the fuss is about, or a seasoned enthusiast looking to perfect your technique, this is for you. We’ll guide you through assembling the perfect car cleaning kit, mastering the step-by-step process for a flawless finish, and avoiding the common pitfalls that leave paintwork looking dull and scratched.
By the end of this guide, you won’t just know how to clean your car. You’ll know how to care for it, protect it, and achieve a professional-level finish, every single time. So, grab a brew, and let’s get started.
Why Bother? The Real Reasons to Keep Your Car Spotless
Before we dive into the nitty-gritty of shampoos and microfibres, let’s talk about the ‘why’. A regular, proper clean is about so much more than just looking good. It’s one of the most important parts of car maintenance.
1. Protecting Your Investment Your car is likely one of the most expensive things you own. Every day, its paintwork is under attack from road grime, salt, bird droppings, tree sap, and UV rays from the sun. These contaminants don’t just sit on the surface; they can eat into the protective clear coat and damage the paint underneath, leading to rust and fading. A regular wash removes these harmful deposits. A well-cared-for car with pristine paintwork will always have a higher resale value than a neglected one.
2. Safety First, Shine Second This is the bit people often forget. A clean car is a safer car. Mucky windows, mirrors, and lights drastically reduce your visibility, especially in the rain or at night. A dirty number plate can even land you with a fine. Keeping these areas sparkling isn’t just for looks; it’s a fundamental part of road safety.
3. The Feel-Good Factor Let’s be honest, it just feels better. Sliding into a clean, fresh-smelling interior and driving a car that gleams in the sun is a simple pleasure. It’s about taking pride in your property and enjoying the fruits of your labour. A bit of effort on the driveway can completely change how you feel about your car.
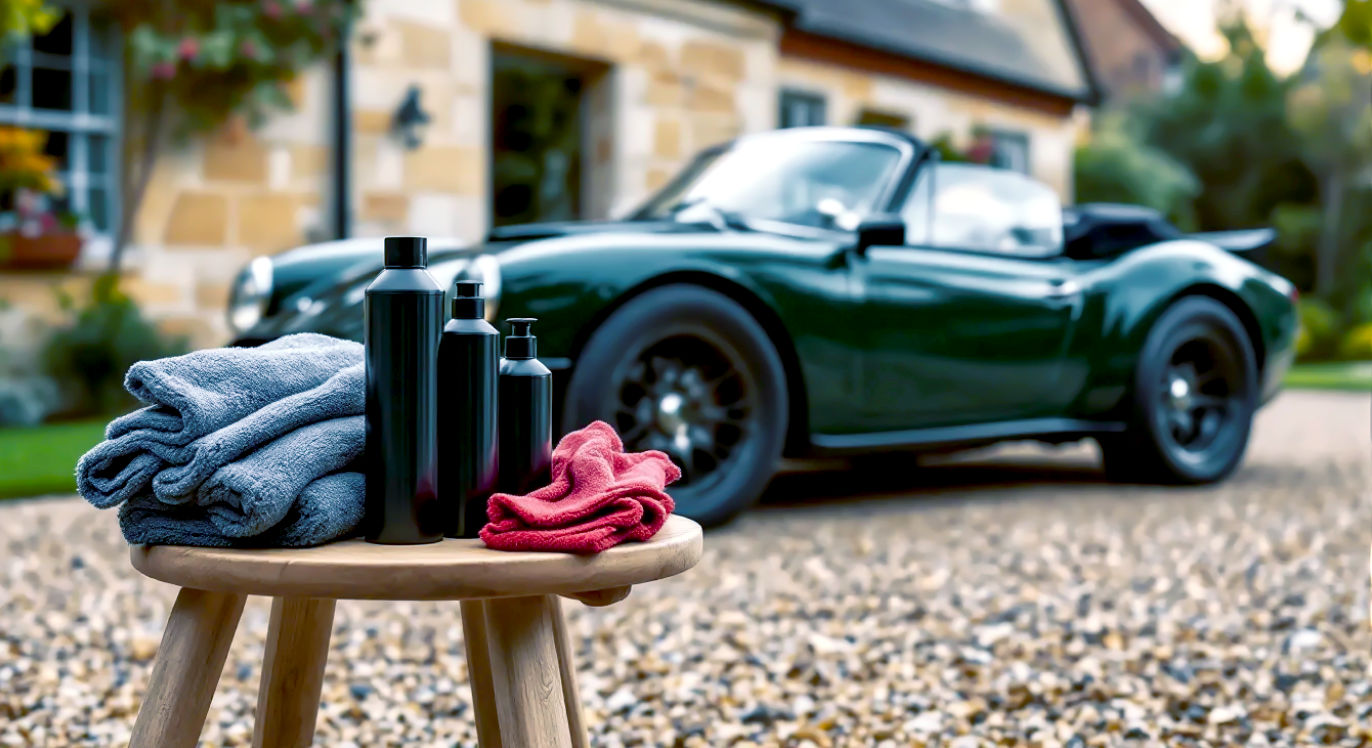
Assembling Your Arsenal: The Anatomy of a Perfect Car Cleaning Kit
Walking into a car parts shop or browsing online can be overwhelming. There are thousands of products all promising a mirror finish. The truth is, you don’t need everything. You just need the right things. Let’s break it down into the essentials, the upgrades, and the pro-level gear.
The Absolute Essentials (The ‘Must-Haves’)
If you buy nothing else, get these items. This is the foundation of good car care and the key to avoiding scratches.
- Two Buckets: This is non-negotiable. One bucket is for your soapy water (the ‘wash’ bucket), and the other is for clean water to rinse your wash mitt in (the ‘rinse’ bucket). This is the core of the two-bucket method, which we’ll cover in detail later.
- Grit Guards: These are simple plastic grilles that sit at the bottom of your buckets. When you rinse your mitt, any dirt and grit fall through the grille and are trapped at the bottom, so you can’t pick them back up and rub them all over your paint. An inexpensive but genius invention.
- A Quality Wash Mitt: Please, step away from the yellow sponge. Sponges trap grit on their flat surface, effectively turning them into a piece of sandpaper that you then rub across your car. A deep-pile microfibre or lambswool wash mitt is what you need. Its long fibres pull dirt and grit away from the paint, holding them safely within the mitt until you rinse it.
- pH-Neutral Car Shampoo: This is crucial. Never use washing-up liquid or household detergents. They are designed to strip grease and grime aggressively, which means they will also strip off any wax or protective coatings on your car, leaving the paintwork exposed. A good, pH-neutral car shampoo is formulated to clean effectively while being gentle on your car’s finish.
- A Dedicated Drying Towel: An old bath towel or a chamois leather just won’t cut it. They can be abrasive and leave streaks. What you want is a large, plush, super-absorbent microfibre drying towel. These can soak up huge amounts of water, making drying quick, easy, and safe for your paint.
- Acid-Free Wheel Cleaner: Your wheels live in the muckiest part of the car, getting baked with hot brake dust, which is incredibly corrosive. A dedicated wheel cleaner is needed to break this down. Always choose an acid-free (or pH-neutral) formula to avoid damaging the finish on your alloys.
- Wheel Brushes: You’ll need a couple of brushes to get into all the nooks and crannies of your wheels. A large, soft-bristled brush for the faces and a thinner, ‘bottle brush’ style one for getting between the spokes and into the barrel are ideal.
The Next Level (The ‘Should-Haves’)
Once you’ve got the basics covered, these items will elevate your car cleaning game significantly.
- Snow Foam or Pre-Wash: This is a product you spray all over the car before you even touch it with a mitt. It clings to the surface and starts to dissolve and lift the heavy dirt and grime, which you then rinse off. This means there’s far less grit on the car for the main contact wash, massively reducing the risk of scratches.
- A Selection of Microfibre Cloths: You can never have too many. They are the workhorse of car detailing. You’ll need separate ones for different jobs: applying products, buffing off polish, cleaning glass, and wiping down the interior. They are soft, absorbent, and won’t leave lint behind.
- A Dedicated Glass Cleaner: Household glass cleaner (like Windolene) often contains ammonia, which can damage the tint on car windows and harm interior plastics. A proper automotive glass cleaner is formulated to be safe on these surfaces and will leave a streak-free finish.
- Interior Cleaner & Protectant: An all-purpose cleaner (APC) is great for wiping down dashboards, door cards, and plastics. Many also contain UV protectants to stop your dashboard from fading or cracking in the sun.
- Tyre Dressing: This is the finishing touch. A good tyre dressing gives your tyres a rich, dark, satin or gloss finish that makes the whole car look smarter. It’s like polishing your shoes before you leave the house.
The Pro-Level Gear (For the True Enthusiast)
If you get bitten by the detailing bug, this is the kind of gear you’ll start looking at.
- Clay Bar: After washing, your paintwork might still feel slightly rough to the touch. This is bonded contamination (like tree sap, industrial fallout) that washing won’t remove. A clay bar, when glided over a lubricated surface, gently pulls these contaminants out, leaving the paint feeling as smooth as glass.
- Polish and Applicators: Polish is a mild abrasive that removes a microscopic layer of the clear coat to get rid of fine scratches, swirl marks, and oxidation, restoring the depth and gloss of your paint. It can be applied by hand with a foam applicator pad or by a machine polisher.
- Wax, Sealant, or Ceramic Coating: This is your layer of protection. After washing (and polishing), you apply one of these to seal the paintwork.
- Wax: Traditional and offers a warm, deep glow. Lasts a few months.
- Sealant: A synthetic polymer that offers longer-lasting, more durable protection (typically 4-6 months) and a sharp, reflective shine.
- Ceramic Coating: The king of protection. A liquid polymer that chemically bonds with your car’s paint, creating a hard, sacrificial layer that can last for years. It offers incredible water-beading, dirt repellency, and scratch resistance.
- Pressure Washer: While you can get great results with a hosepipe, a pressure washer is brilliant for rinsing and is essential if you want to use a snow foam lance to create that thick, satisfying foam.
The Main Event: A Step-by-Step Guide to a Flawless Finish
Right, you’ve got your kit assembled. Now it’s time for action. Follow this process, in this exact order, for the best and safest results.
Before You Begin: Setting the Stage
- Find the right spot: Never wash your car in direct sunlight or when the bodywork is hot. The heat will cause the water and cleaning products to evaporate too quickly, leaving ugly water spots and streaks that can be difficult to remove. An overcast day or a shady spot is perfect.
- Get organised: Lay out your buckets, chemicals, and tools so everything is within easy reach. Connect your hose or pressure washer.
- Dress for the job: You’re going to get wet. Wear clothes and shoes you don’t mind getting splashed.
Step 1: The Wheels – Tackle the Toughest Job First
Why first? Wheels are usually the dirtiest part of the car. If you wash them last, you risk splashing dirty water and brake dust all over your lovely clean paintwork. Get them out of the way first.
- Rinse: Give the wheel a thorough rinse with your hose or pressure washer to knock off any loose dirt.
- Spray: Liberally spray your acid-free wheel cleaner onto the wheel, making sure to cover the face, spokes, and inside the barrel. Let it dwell for the time recommended on the bottle (usually a minute or two). Some cleaners change colour as they react with brake dust, which is very satisfying to watch.
- Agitate: Use your brushes to get to work. Use the larger brush for the face of the wheel and the thinner one to get between the spokes and clean the inner rim. Don’t forget the tyre walls!
- Rinse Again: Rinse the wheel thoroughly, making sure to wash away all the cleaner and dislodged grime. Repeat for all four wheels.
Step 2: The Pre-Wash – Banishing the Grit Before You Touch the Paint
Why is this so important? Most scratches and swirl marks are caused during the contact wash. Tiny particles of grit are dragged across the paint by your wash mitt. The goal of the pre-wash is to remove as much of this grit as possible before you make contact.
- Apply: If using snow foam with a pressure washer, cover the entire car from top to bottom in a thick layer of foam. If using a pump sprayer with a citrus pre-wash, apply it to the lower, dirtier sections of the car.
- Dwell: Let the product sit and do its work for 5-10 minutes. You’ll see it start to drip down, pulling the dirt with it. Don’t let it dry on the surface.
- Rinse: Thoroughly rinse the entire car from top to bottom, washing away the pre-wash solution and all the loosened dirt. You’ll be amazed at how much cleaner the car looks already.
Step 3: The Contact Wash – The Famous Two-Bucket Method
Now for the main wash. This is where your technique really matters.
- Prepare your buckets: Fill both buckets with water. Add the correct amount of car shampoo to your ‘wash’ bucket and swish it around to create suds. Place a grit guard in the bottom of each bucket.
- Dunk and Wash: Dunk your clean wash mitt into the soapy ‘wash’ bucket.
- Start at the top: Begin washing the car from the roof down. The lower parts of the car are the dirtiest, so you want to clean them last to avoid transferring that grime to the cleaner panels.
- Wash in straight lines: Don’t wash in circles! This is what creates those ugly, web-like swirl marks in the paint. Wash in gentle, straight-line motions (forwards and backwards or side-to-side). Let the mitt glide over the surface; you don’t need to scrub.
- Rinse the mitt often: After washing a small section (e.g., half the roof, one door), it’s time to rinse the mitt. First, dunk it in your ‘rinse’ bucket of plain water and rub it against the grit guard to release all the dirt.
- Reload with soap: Once the mitt is clean, dunk it back into the soapy ‘wash’ bucket to pick up fresh suds, and then move on to the next section of the car.
- Repeat: Continue this process – wash a panel, rinse the mitt, reload with soap – until the entire car is clean.
- Final Rinse: Give the car a final, thorough rinse from top to bottom to wash away all the suds.
Step 4: Drying – The Secret to a Streak-Free Shine
This step is just as important as the wash. Letting the car air-dry will leave mineral deposits on the paint, creating water spots.
- Lay and Drag: Take your large, plush microfibre drying towel. Lay it flat across a panel, like the roof or bonnet.
- Gentle pull: Gently pat it down or slowly drag it towards you. The towel will soak up the water like magic. There’s no need to rub or apply pressure.
- Wring and Repeat: Wring out the towel when it becomes saturated and continue until the whole car, including the glass and door shuts, is dry.
Step 5: Protection – Sealing the Deal with Wax or Sealant
Your car is now spotlessly clean. The final step is to protect that finish. Applying a layer of wax or sealant makes your car look glossier, keeps it cleaner for longer, and protects the paint from the elements.
- Apply Sparingly: Apply a small, pea-sized amount of your chosen wax or sealant to a foam applicator pad.
- Thin to Win: Gently apply it to the paintwork in a thin, even layer. You can use straight lines or small overlapping circles. A thin coat is more effective and easier to remove than a thick one.
- Wait for it to haze: Let the product cure or ‘haze over’ as per the instructions on the bottle. This usually takes 5-20 minutes. You can test it with a finger swipe – if it comes away clean, it’s ready.
- Buff Off: Using a clean, plush microfibre cloth, gently buff off the residue to reveal a stunning, slick shine. Flip the cloth regularly to a clean side.
Don’t Forget the Inside: Tackling the Interior
A clean exterior is only half the job. A fresh, tidy interior makes a car a much nicer place to be.
Step 1: Declutter and Hoover
Start by taking everything out: floor mats, rubbish, loose change, that old coffee cup. This makes the job much easier. Then, give the interior a thorough hoovering. Start with the floor mats outside the car. Inside, use different attachments to get into all the tight spots – down the sides of the seats, in the door pockets, and across the dashboard.
Step 2: Wiping Down Surfaces
Spray a little interior cleaner onto a microfibre cloth (not directly onto the dashboard, to avoid overspray on the windscreen) and wipe down all the hard surfaces: the dashboard, centre console, door cards, and steering wheel. This removes dust and leaves a fresh, non-greasy finish.
Step 3: Cleaning Upholstery and Carpets
For fabric seats and carpets, a dedicated upholstery cleaner can be used to tackle any stains or grubby marks. For leather seats, use a specific leather cleaner followed by a leather conditioner to keep it soft and prevent it from cracking.
Step 4: Sparkling Glass, Inside and Out
The final interior touch is to clean the glass. Take two clean microfibre cloths. Lightly mist one with your automotive glass cleaner and wipe the inside of the window. Immediately follow up with the second, dry cloth to buff it to a crystal-clear, streak-free finish. Don’t forget the rear-view mirror!
Common Car Cleaning Blunders (And How to Avoid Them)
We’ve all been there or seen someone do it. Here are the cardinal sins of car washing.
- Using washing-up liquid: As we’ve said, this is the number one mistake. It strips all protection and dries out plastic trim. Only ever use proper car shampoo.
- Washing in direct sunlight: This leads to dried-on soap and water spots that are a nightmare to remove. Always find some shade.
- Using a single bucket and a sponge: The express lane to a car covered in swirl marks. The two-bucket method with a wash mitt is the only way.
- Dropping your wash mitt (and using it anyway): If you drop your mitt on the ground, it is now full of grit. Stop. Do not put it back on the paint. Rinse it out thoroughly, or better yet, switch to a spare one.
- Neglecting the door shuts: Open the doors and the boot. These areas get filthy and are often missed. Give them a wipe down as part of your wash routine.
Your Car Cleaning Calendar: A Seasonal Guide
Your car needs different care depending on the time of year in the UK.
- Spring: This is the time for a deep clean. After a winter of being battered by salt and grime, your car needs a thorough wash, decontamination (perhaps with a clay bar), and a fresh coat of wax or sealant to prepare for summer.
- Summer: The main enemies are bug splatters, bird droppings, and tree sap, all of which are acidic and can damage your paintwork if left to bake on in the sun. Clean them off as soon as you spot them. A good layer of wax will make this much easier.
- Autumn: As the weather turns, focus on protection. Give the car a thorough clean and apply a durable sealant to get the paintwork ready for the harsh conditions ahead. Top up your screenwash.
- Winter: This is a battle against road salt. Salt is incredibly corrosive and will cause rust. Try to rinse the lower half and undercarriage of your car as regularly as you can, even if you don’t have time for a full wash, to keep the salt at bay.
Conclusion: The Drive to Perfection
Cleaning your car properly is a skill, but it’s one that anyone can learn. It’s a process that rewards patience and attention to detail. By investing in a basic but high-quality kit and mastering the fundamental techniques like the two-bucket method, you can protect your investment, enhance your car’s appearance, and enjoy the immense satisfaction of a job well done.
That gleaming finish is no longer a secret of the professionals. The power to achieve it is right there on your driveway, waiting in your buckets. You now have the knowledge. The drive to perfection is yours.
Further Reading
For more tips, product reviews, and community advice, check out these highly respected resources:
- Detailing World UK: The UK’s largest online community for car care and detailing enthusiasts. An incredible resource for advice from amateurs and professionals alike.
- Autoglym: A renowned British manufacturer of car care products. Their website and blog contain a wealth of guides and tutorials.
- Clean Your Car: A major UK-based online retailer for detailing products, offering a huge range of brands and helpful product guides.