A Beginner’s Guide to Woodcraft: From Sapling to Splendid Creation
Discover the joy of woodcraft with our ultimate UK beginner’s guide. We cover everything from choosing timber to finishing your first handmade project.
This post may contain affiliate links. If you make a purchase through these links, we may earn a commission at no additional cost to you.
There’s a special kind of magic in turning a simple piece of wood into something beautiful and useful. In a world of screens and endless digital noise, the simple, honest act of making something with your own hands feels more important than ever. It’s a chance to slow down, focus, and create something real – something you can touch, use, and be proud of. This isn’t just about building a bookshelf; it’s about building a connection to a skill that’s as old as Britain itself.
Think of it as an antidote to the modern rush. Woodcraft is a quiet rebellion, a return to the simple satisfaction our grandparents knew well. It’s the spirit of “make do and mend” brought to life in your garden shed or the corner of your spare room.
Whether you dream of making a simple chopping board, a toy for your kids, or just want to learn a new skill, you’ve come to the right place. This guide is your friendly companion on a journey into the wonderful world of wood. We’ll walk you through everything, from choosing your first chisel to applying the final coat of wax on your very first project. So, grab a cuppa, get comfortable, and let’s begin.
What Exactly is Woodcraft? More Than Just Sawdust
You might hear the words “woodworking” and “woodcraft” used interchangeably, and that’s perfectly fine. But for many, there’s a subtle difference. Woodworking can mean anything from assembling a flat-pack wardrobe to using massive machines to build a kitchen. It’s a very broad church.
Woodcraft, on the other hand, often suggests something a little more personal and hands-on. It’s about the craft – the skill, the knowledge, and the intimate understanding of the material. It usually places a bigger emphasis on using hand tools, celebrating the quiet efficiency of a sharp plane over the roar of a power sander. It’s a philosophy rooted in the idea of working with the wood, not just forcing it into shape. You learn to read its grain, respect its strengths, and coax it into becoming the object you imagine. It’s a conversation between you and the timber.
This approach has deep roots in movements like the Arts and Crafts, which championed the beauty and honesty of handmade objects over mass-produced goods. Woodcraft is about embracing that same spirit.
Why Bother with Woodcraft? The Rewards Beyond the Workbench
So, why should you trade your free time for a bit of wood and a few tools? The rewards are huge, and they go far beyond just having a new spice rack.
- It’s Good for Your Head: In our always-on world, focusing on a physical task is incredibly therapeutic. The repetitive motion of sanding or the careful concentration needed for a saw cut can be almost meditative. When you’re at your workbench, the day’s worries seem to melt away. It’s just you, the wood, and the task at hand.
- Unleash Your Inner Creator: There is an immense and deeply human satisfaction in making something from scratch. Taking a rough plank of wood and transforming it into a smooth, functional, and beautiful object gives you a sense of pride that clicking “add to basket” can never match.
- It’s Green! In an age of throwaway culture, woodcraft is a stand for sustainability. You’re creating items that are built to last, often from a renewable resource. You can even use reclaimed wood—giving old floorboards or pallets a new lease of life—which is both eco-friendly and adds tonnes of character to your projects.
- Skills for Life: Learning the basics of woodcraft empowers you. That wobbly chair leg? You’ll know how to fix it. Need a shelf for that awkward alcove? You can build one that fits perfectly. These are practical, useful skills that will serve you for a lifetime.
A Stroll Through British Woodcraft History
When you pick up a chisel, you’re connecting with a chain of artisans stretching back thousands of years on this island. Wood has shaped Britain, from the simple boats our ancestors fished in to the grand halls of our castles.
Our ancient ancestors were master woodcrafters, building everything from homes to tools and weapons from the forests that covered the land. Fast forward to the medieval period, and you can still see the breathtaking skill of their descendants in the timber-framed buildings that line the streets of cities like York and Chester, or in the incredibly detailed choir stalls of our great cathedrals.
This was the Age of Oak. Our native oak was the king of timbers. It built the ships of the Royal Navy that ruled the waves and the sturdy furniture that filled the nation’s homes. It’s a wood that’s woven into our national identity. The 17th-century carver Grinling Gibbons became a superstar for his impossibly delicate carvings in limewood, decorating palaces and stately homes with cascades of wooden flowers and fruit that still leave us speechless today.
Then came the Industrial Revolution, and machines began to replace hands. In response, visionaries like William Morris launched the Arts and Crafts Movement in the late 19th century. They rebelled against what they saw as soulless, factory-made goods, and argued for a return to the honesty and beauty of handmade items. It was a powerful reminder that the skill of the human hand holds a special value.
Today, we’re living through another craft revival. TV shows like The Repair Shop have reminded us of the beauty of well-made things and the incredible skill it takes to create and restore them. More than ever, people are seeking the satisfaction that comes from logging off and making something real.
Getting to Know Your Timber: A Beginner’s Guide to Wood
Before you can make anything, you need to understand your main material. Wood isn’t just “wood”; every species has its own personality, its own strengths, and its own quirks.
Softwoods vs. Hardwoods: It’s Not About Squishiness
This is the first big distinction you’ll come across, and the names are a bit misleading. It’s not really about how hard or soft the wood feels.
- Simplified Explanation: The difference is biological. Hardwoods come from deciduous trees – the ones that lose their leaves in autumn, like oak, ash, and beech. Softwoods come from coniferous trees – evergreens with needles and cones, like pine and spruce.
- Common Softwoods for Beginners: A great place to start is with pine. It’s widely available in DIY shops (often just called “deal” or whitewood), it’s affordable, and it’s relatively easy to work with. It’s perfect for practicing your skills and for projects like simple shelves or a bird box.
- Approachable Hardwoods: When you’re ready to step up, don’t jump straight to expensive oak. Try something like Poplar (sometimes called Tulipwood). It’s a hardwood but it’s quite soft and easy to work, with a subtle grain, making it great for painted projects. Beech is another excellent choice; it’s strong, stable, and lovely to work with, perfect for things like chopping boards.
Reading the Grain
The lines and patterns you see in a piece of wood are its grain. Think of it as the wood’s internal roadmap, showing how the tree grew. Understanding the grain is one of the most important skills in woodcraft. It affects the wood’s strength, how you should work it, and its final appearance.
The golden rule is to try and work with the grain. A good analogy is stroking a cat: if you go with the direction of the fur, it’s smooth and happy. If you go against it, the fur stands on end. It’s the same with planing wood. Plane with the grain and you’ll get beautiful, silky shavings. Plane against it, and you’ll tear the wood fibres, leaving a rough surface.
Where to Buy Wood in the UK
- DIY Shops (B&Q, Wickes, Homebase): These are great for convenience. You can pick up small pieces of pine and sometimes basic hardwoods. It’s a good place to start, but the selection can be limited.
- Timber Merchants: This is where the pros go. A dedicated timber merchant will have a huge variety of woods and the staff will be incredibly knowledgeable. Don’t be intimidated! Just tell them you’re a beginner and what you’re planning to make, and they will be happy to help.
- Reclaimed Wood: For a sustainable and characterful option, look for architectural salvage yards or even check online marketplaces. Old floorboards, dismantled furniture, or even pallets (make sure they are stamped ‘HT’ for heat-treated, not ‘MB’ for chemically treated) can be a fantastic source of free or cheap material.
- Sustainable Sourcing: Look for the FSC (Forest Stewardship Council) or PEFC (Programme for the Endorsement of Forest Certification) logos. This tells you the wood has come from a responsibly managed forest, which is incredibly important.
Your First Toolkit: The Essential Hand Tools for Woodcraft
Walking into a tool shop can be overwhelming. The walls are covered in shiny things, all promising to be essential. The truth is, you don’t need much to get started. It’s far better to buy a few, good-quality tools than a massive kit full of cheap ones that will only frustrate you.
A great approach is to look for good second-hand tools. Old British-made tools from brands like Stanley, Record, or Marples are often superb quality. With a bit of a clean-up and sharpening, they’ll serve you better than many brand-new alternatives.
The Unmissable Five
If you only buy five things to start with, make them these. This small set will allow you to complete a huge range of simple projects.
- Measuring and Marking Tools: Accuracy starts here. You’ll need a combination square (for marking 90 and 45-degree angles), a marking knife, and a marking gauge. Why a knife and not a pencil? A knife slices the wood fibres, creating a precise line that your saw or chisel can sit in perfectly. A pencil line has thickness, which is where inaccuracies creep in.
- A Trusty Saw: The best first saw is a tenon saw. It has a rigid spine of brass or steel along the top, which keeps the blade straight. It’s designed for making accurate straight cuts, which is exactly what you need for cutting joints.
- A Set of Chisels: You don’t need a dozen. A set of three good bevel-edge chisels will cover most jobs. Good sizes to start with are 6mm (1/4″), 12mm (1/2″), and 19mm (3/4″). They are used for everything from tidying up joints to shaping wood.
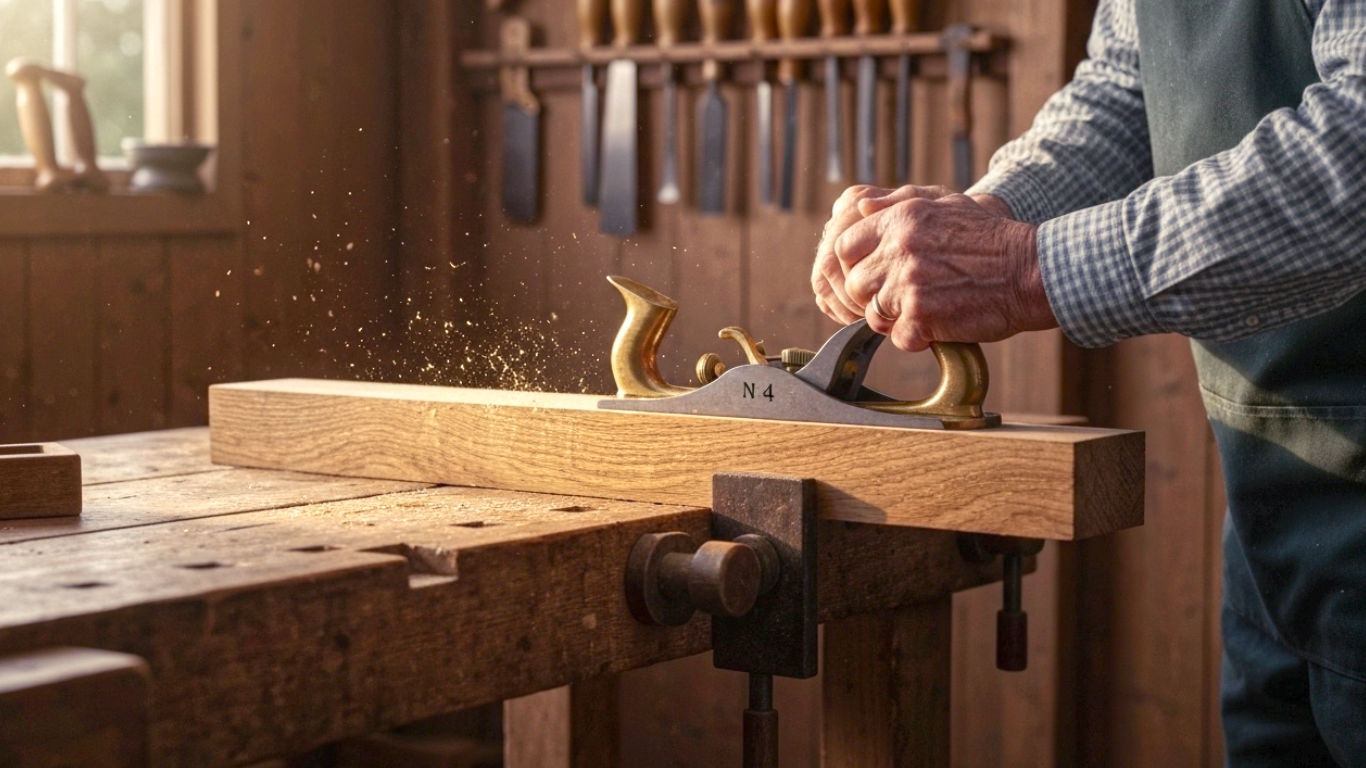
- A Versatile Plane: A hand plane is used to make wood flat, smooth, and square. A No. 4 smoothing plane is the classic all-rounder. If that feels a bit big, a smaller block plane is incredibly useful for tidying up edges and other small jobs.
- Sharpening Gear: This is the most important item on the list. A dull tool is a dangerous and useless tool. A blunt chisel will tear wood instead of cutting it, and you’ll have to use excessive force, which is when accidents happen. A simple combination waterstone (with a coarse and a fine side) or a diamond plate is all you need to get started. Learning to sharpen is a fundamental skill, and it’s deeply satisfying.
Tools to Add Later
Once you’ve got the basics down, you might want to add a coping saw for cutting curves, a hand drill for making holes, and most importantly, some clamps to hold your work securely. You can never have too many clamps!
Creating Your Workspace: The British Shed (or Corner)
You don’t need a palatial workshop. The humble British garden shed is the spiritual home of many a crafter. A corner of a garage, a utility room, or even a sturdy table on a balcony can work just fine.
- The Workbench: The single most important thing in your workspace is a solid surface to work on. It doesn’t have to be a fancy cabinetmaker’s bench. A sturdy old table or a simple bench you build yourself from some chunky timber will do the job. The key is that it must not wobble. You need a stable base to saw and chisel against.
- Light and Order: Good lighting is essential so you can see your marking lines clearly. A tidy space is a safe space. Try to put your tools away after you use them so you always know where they are.
- Safety First, Always: This is the one area where you must not compromise.
- Get some safety glasses. Wear them. Always. Wood chips can fly anywhere, and your eyesight is priceless.
- Sharp tools are safe tools. We’ve said it before, but it’s worth repeating. A sharp blade cuts predictably with minimal pressure. A dull one needs forcing, and that’s when it can slip.
- Use common sense. Work when you’re alert, not when you’re tired or distracted. Think through each operation before you start cutting.
The ABCs of Woodcraft: Mastering the Core Skills
Now for the fun part: actually cutting some wood! These fundamental skills are the building blocks of everything you will ever make. Practice them on scrap wood until you feel confident.
Measure Twice, Cut Once: The Art of Marking Out
This old saying is the woodworker’s mantra. Accuracy is everything. Use your combination square to ensure your lines are perfectly square to the edge of the board. Press the stock firmly against the wood. Use your marking knife and score a line. This gives your saw a perfect groove to start in.
Making the Cut: How to Saw in a Straight Line
Getting a straight cut with a hand saw is a knack, but it’s one you’ll pick up quickly.
- Hold the wood securely (a vice is best, but clamps will do).
- Use the knuckle of your thumb to guide the saw blade to your marked line.
- Draw the saw backwards a few times to create a small groove (a kerf).
- Use long, smooth strokes, letting the weight of the saw do the work. Don’t force it.
- Watch your line. If you start to wander off it, gently twist the saw to guide it back.
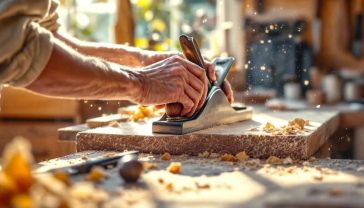
The Magic of the Plane: Creating Smooth, Flat Surfaces
There is nothing in woodworking more satisfying than peeling off a perfect, translucent shaving with a well-tuned hand plane. It’s quieter than a sander and leaves a surface that’s glassy smooth. The key is setting the blade depth. You want it to be peeking out just a tiny fraction of a millimetre. Your goal is to take off whisper-thin shavings, not chunky strips.
Taming the Chisel: For Paring, Shaping, and Chopping
A sharp chisel is a wonderfully versatile tool. There are two main ways to use it:
- Paring: This is where you use hand and body pressure alone to shave off thin slices of wood. It’s for fine-tuning joints and delicate shaping. Always keep both hands behind the cutting edge.
- Chopping: This is for removing larger amounts of waste wood, for example when cutting a joint. You strike the end of the chisel with a wooden mallet (never a metal hammer, as it will damage the handle).
Joining It All Up: Your First Foray into Joinery
Joinery is simply the craft of connecting two pieces of wood. It can get incredibly complex, but the basics are very straightforward. For a beginner, the goal is a joint that is reasonably strong and looks neat.
The Butt Joint
This is the simplest joint of all. You just butt one piece of wood up against another and fix it with glue and screws or nails. It’s not very strong on its own, as you are gluing the weak end grain, but it’s fine for simple boxes or frames where it won’t be under a lot of stress.
The Half-Lap Joint
This is a fantastic first “proper” joint to learn. You cut away half the thickness from the end of each piece of wood so they overlap and sit flush with each other. This creates a large surface area for glue, making it much stronger than a butt joint. Cutting one is a great exercise that brings together your marking, sawing, and chiselling skills.
Let’s Make Something! Three Brilliant Beginner Projects
The best way to learn is by doing. Choose a simple project and just have a go. Don’t worry about perfection; focus on the process.
Project 1: The Simple Chopping Board
This is a perfect first project because it involves no complicated joinery. You just need one nice piece of hardwood (like beech). The challenge is to use your hand plane to make it perfectly flat and your saw to make the ends square. Then you’ll spend time sanding it super-smooth before applying a food-safe finish, like mineral oil.
Project 2: A Sturdy Set of Bookends
This is a great way to practice your joinery. You can make a simple L-shape using a half-lap joint. It’s a small, manageable project that will teach you a huge amount about cutting accurately.
Project 3: The Classic Bird Box
A British garden isn’t complete without a bird box! This is a slightly more involved project, requiring you to cut several pieces and join them accurately (usually with butt joints and screws). It’s incredibly rewarding, and you’ll get to enjoy watching your handiwork being used by the local wildlife. You can find countless free plans online – the RSPB has some excellent ones.
The Finishing Line: Making Your Work Shine
The final finish protects the wood and makes it look its best. Don’t rush this stage!
The Power of Sanding
Sanding smooths the wood and prepares it for a finish. The key is to work through the grits of sandpaper. Start with a medium grit (like 120), then move to a finer grit (180), and finally a very fine grit (240). Always sand with the grain, not across it, to avoid leaving scratches.
Choosing a Finish
For a beginner, it’s best to stick with simple, easy-to-apply finishes.
- Wax: A simple beeswax polish gives a lovely soft, natural sheen and feels great to the touch. It’s easy to apply and repair.
- Oil: Finishes like Danish oil or Tung oil are also very easy. You simply wipe them on with a cloth, let them soak in, and then wipe off the excess. They penetrate the wood and really make the grain “pop” with colour and depth.
Common Stumbles and How to Get Back Up
Everyone makes mistakes. It’s part of the learning process. Here are a few common frustrations and how to deal with them.
- “My saw cuts are wonky.” This is usually down to trying to force the saw. Relax your grip, use your whole arm, and let the tool do the work.
- “I keep splitting the wood with my chisel.” You’re probably trying to take off too much wood at once. Take smaller bites. Also, make sure your chisel is razor-sharp.
- “My joints have gaps.” Welcome to the club! Nobody’s first joints are perfect. A little gap is a sign of a handmade object. Don’t despair. Focus on being more accurate with your marking and cutting next time.
Finding Your Tribe: The UK Woodcraft Community
One of the best things about woodcraft is the community. It’s full of friendly, knowledgeable people who are happy to share their skills.
- Courses and Workshops: Check your local college for evening classes, or look for independent craft schools. A weekend course can be a brilliant way to kick-start your journey.
- Men’s Sheds: The Men’s Sheds Association is a fantastic UK-wide movement. They are community spaces where people (not just men!) can come together to work on projects, share skills, and have a chat over a cup of tea. They are incredibly welcoming to beginners.
- Online Resources: The internet is a goldmine. YouTube channels from experts like Paul Sellers offer world-class tuition for free. There are also brilliant UK-based forums and Instagram communities where you can ask questions and share your work.
The Future is Handmade
Learning woodcraft is more than just a hobby. It’s a set of timeless skills that connect you to the past and equip you for the future. The things you make won’t be perfect at first, and that’s okay. They will be yours. They will have a story. They will be a testament to your patience, your effort, and your growing skill.
In a world that often feels disposable, you will have created something real, something solid, something that will last. So find a piece of wood, pick up a tool, and have a go. The journey is just as rewarding as the destination.
Further Reading & Resources
For those eager to continue their journey, these resources are highly respected within the UK craft community:
- Paul Sellers’ Website: A master woodworker who champions hand-tool methods. His free videos are an unparalleled resource for beginners.
- The Royal Society for the Protection of Birds (RSPB): Offers excellent, simple plans for building bird boxes and other wildlife habitats for your garden.
- The UK Men’s Sheds Association: Find a local “Shed” to share skills and tools in a friendly, communal environment.
- Woodland Trust: An excellent resource for learning about native British trees and woods.