Master the Art of Composting: Your Beginner’s Guide to Turning Waste into Plant Food
Turn your kitchen scraps and garden cuttings into ‘black gold’. Our definitive UK guide covers everything from choosing a bin to harvesting your first batch of rich compost.

This post may contain affiliate links. If you make a purchase through these links, we may earn a commission at no additional cost to you.
Let’s be honest. That feeling when you’ve just emptied the kitchen bin, only to find it’s already half-full again with potato peelings and tea bags, is a familiar one. In a world where we’re all trying to do our bit, the sheer amount of waste we produce can feel a bit dispiriting. But what if you could cut your household rubbish by up to a third, and in the process, create something truly amazing for your garden?
Welcome to the world of composting.
It’s not some mystical art reserved for green-fingered gurus with sprawling allotments. It’s not a smelly, complicated chore that attracts an army of pests. Composting is simply nature’s own recycling programme, and it’s happening right at the bottom of your garden. It’s the quiet, magical process of turning everyday scraps—from apple cores and grass cuttings to the cardboard tube from the loo roll—into a rich, dark, crumbly treasure known as compost.
This crumbly brown stuff, often called ‘black gold’ by gardeners, is one of the best things you can give your plants. It’s a superfood for your soil, packed with nutrients that help flowers bloom brighter, veggies taste better, and lawns look greener.
This guide is your friendly companion to getting started. We’ll walk you through everything, step-by-step. We’ll bust the myths, answer the awkward questions (yes, we’ll talk about smells and rats), and show you that composting is one of the easiest, most rewarding things you can do. It’s a small change that makes a huge difference, for your garden and for the planet. So, let’s get stuck in and turn your waste into wonder.
What is Composting, Really? Nature’s Own Recycling Scheme
A Simple Definition: Breaking It Down
At its heart, composting is the natural process of decomposition, but managed and sped up by you. Think about a walk in the woods. You see fallen leaves, twigs, and logs slowly rotting on the forest floor. Over time, they break down and become part of the rich, dark soil that new trees and plants grow in. That’s nature composting.
When you create a compost heap or fill a compost bin, you’re basically making a perfect, five-star hotel for all the tiny organisms that do this breaking-down work. You’re giving them a balanced diet of materials, the right amount of air and water, and a cosy home to get to work in. In return, they transform your waste into a brilliant, free soil improver.
The Tiny Team Doing All the Hard Work: Meet the Microbes
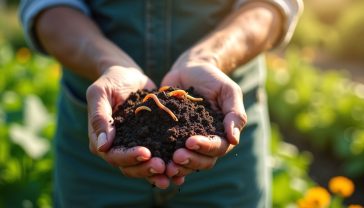
Your compost bin is secretly a bustling metropolis of microscopic life. You can’t see them, but millions of bacteria, fungi, and other tiny organisms are the real heroes of this story. They are the workforce, munching their way through your scraps.
But they’re not alone. As the process gets going, larger helpers move in. Earthworms, woodlice, and millipedes all play a part, chewing and tunnelling through the material, mixing it all up and helping to break it down further. It’s a living ecosystem, a beautiful example of nature’s teamwork. Your job is simply to be the manager, making sure they have everything they need to thrive.
Why Bother? The Amazing Benefits for Your Garden and the Planet
You might be thinking, “This sounds nice, but is it worth the effort?” The answer is a massive yes.
For your garden:
For the planet:
A Brief History of Muck and Magic: Composting Through the Ages
Composting isn’t a new-fangled eco-trend. Humans have understood the value of returning organic matter to the soil for thousands of years. From ancient civilisations in Mesopotamia who knew that rotting manure improved crop yields, to the Romans who documented different composting techniques, the principle has always been the same: don’t waste your waste.
In Britain, the practice was central to agriculture for centuries. But it was during the Second World War that home composting really entered the national consciousness. The ‘Dig for Victory’ campaign urged every citizen to turn their lawns and flowerbeds into vegetable patches to feed the nation. With resources scarce, creating compost from household scraps to fertilise these plots became a patriotic duty. Adverts from the time showed families diligently layering their heaps, understanding that their garden’s health was vital for the war effort.
After the war, with the rise of chemical fertilisers and weekly bin collections, home composting fell out of fashion for a while. But today, as we face new environmental challenges, this old wisdom has come roaring back. The spirit of ‘Dig for Victory’ is alive and well in gardens and allotments across the country, as we once again recognise the simple, powerful magic of turning scraps into soil.
The Two-Ingredient Recipe for Perfect Compost: Browns and Greens
This is the most important part of the composting puzzle, but don’t worry, it’s incredibly simple. To make good compost, you need a mix of two types of materials: ‘Greens’ and ‘Browns’. Getting this balance right is the secret to a happy, healthy, and smell-free compost bin.
Think of it like making a cake. You need the right ingredients in the right proportions. Too much of one thing and it won’t work properly.
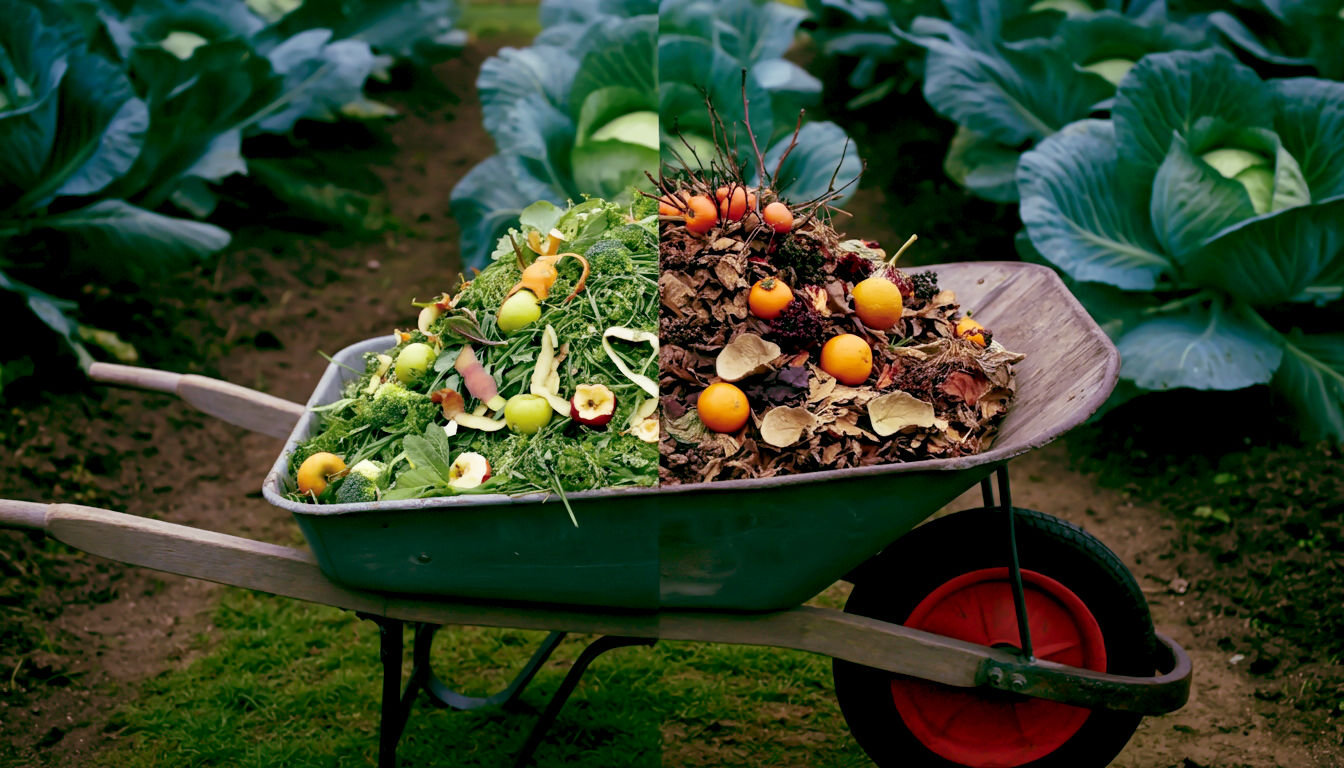
What Are ‘Greens’? The Nitrogen-Rich Powerhouse
‘Greens’ are fresh, moist materials that are rich in nitrogen. They are the fuel for your compost pile, providing the protein that the microorganisms need to multiply and get to work quickly. They tend to rot down fast and can get a bit smelly if you add too many at once.
Your main ‘Green’ ingredients include:
What Are ‘Browns’? The Carbon-Rich Foundation
‘Browns’ are dry, woody materials that are rich in carbon. They are the structure of your compost pile, providing the slow-release energy for the microbes. They are essential for creating air pockets, which stops the heap from becoming a sludgy mess and allows the good, aerobic (oxygen-loving) bacteria to breathe.
Your main ‘Brown’ ingredients include:
Getting the Balance Right: The ‘Lasagne’ Method
The golden rule is to aim for a mix of roughly half ‘Greens’ and half ‘Browns’ by volume. Don’t get too scientific about it; a rough estimate is fine. The easiest way to achieve this is by layering.
Think of it like making a lasagne. Every time you add a layer of wet, green material from your kitchen caddy (the ‘sauce’), cover it with a layer of dry, brown material (the ‘pasta sheets’). It’s a great idea to keep a bag or pile of browns (like torn-up cardboard or autumn leaves) next to your compost bin, so it’s always on hand.
This layering technique ensures a good mix, prevents smells, and stops fruit flies from taking an interest in your peelings.
Choosing Your Composting Style: Which Method is Right for You?
There isn’t one single way to compost. The best method for you depends on how much space you have, what kind of waste you produce, and how much time you want to spend on it.
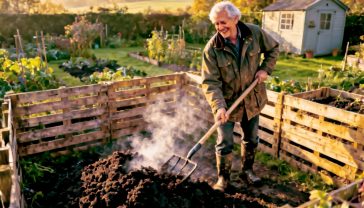
The Classic Compost Heap or Bin: Slow and Steady (Cold Composting)
This is the most common and easiest method for anyone with a garden. You simply add your materials to a bin or a heap in the corner of your garden and let nature take its course.
- How it works: Decomposition happens slowly, over about a year or so. It’s managed by fungi, worms, and other creatures as well as microbes.
- Best for: People who want a low-maintenance system and aren’t in a rush for compost. It’s perfect for garden waste and uncooked kitchen scraps.
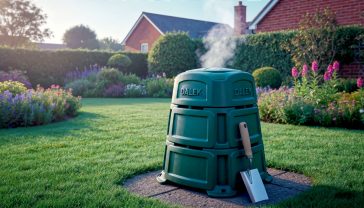
- What you need: A compost bin. You can buy a plastic ‘Dalek’ style bin (often subsidised by local councils), build a simple one from old wooden pallets, or even just start a free-standing heap.
The Great British Compost Showdown: Heap vs. Bin – Which Is Best?
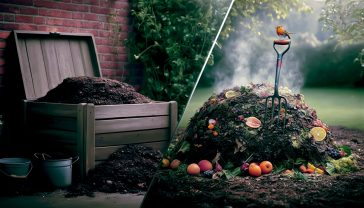
The Speedy Method: Turning Up the Heat (Hot Composting)
Hot composting is a more active, faster process that produces compost in as little as one to three months. It gets hot enough to kill off weed seeds and pathogens.
- How it works: You need to build up a large pile (at least 1 cubic metre) in one go with the right balance of greens and browns. The intense microbial activity generates heat, with the core of the pile reaching 55-65°C. You then need to turn the pile regularly (e.g., once a week) to keep it aerated.
- Best for: Gardeners with a lot of material available at once (e.g., after a big garden clear-up) who want compost quickly. It requires more effort but delivers fast results.
- What you need: A larger, often insulated, bin or a three-bay pallet system to make turning easier.
The Guide to Hot Composting: Get Rich, Crumbly Compost in Record Time
The Urban Solution: A Wormery for Your Balcony (Vermicomposting)
No garden? No problem. A wormery is a brilliant, self-contained system that uses special tiger worms to munch through your kitchen scraps.
- How it works: A wormery is usually a stack of trays. You add kitchen waste to the top tray, and the worms eat it, producing a fantastic, nutrient-rich solid compost called ‘worm castings’. They also produce a liquid fertiliser (‘worm tea’) that you can collect from a tap at the bottom.
- Best for: People in flats, or with very small gardens or balconies. They are perfect for dealing with kitchen waste but can’t handle large volumes of garden waste.
- What you need: A purpose-built wormery kit, which comes with the worms and bedding to get you started.

The Guide to Vermicomposting in the UK: Turning Kitchen Scraps into Garden Gold
The Kitchen Crusader: The Bokashi Bin Explained
The Bokashi system isn’t technically composting; it’s a fermentation process that originates from Japan. It’s a great addition to a traditional compost bin.
- How it works: You put all your food waste (including cooked food, meat, fish, and dairy) into a small, airtight kitchen bin. Each time you add a layer, you sprinkle on a special ‘Bokashi bran’ which is full of effective microorganisms. Once the bin is full, you seal it for two weeks to let it ferment. The resulting ‘pickled’ waste can then be safely buried in your garden soil or added to a normal compost bin where it will break down very quickly. It also produces a nutrient-rich liquid you can drain off and use as a plant feed.
- Best for: Anyone who wants to deal with 100% of their food waste at home. It’s an indoor system, so it’s perfect for any home, and it’s a great way to pre-treat difficult items before they go in the main compost bin.
- What you need: A Bokashi bin kit, which includes the airtight bin and a supply of the bran.
Your Step-by-Step Guide to Starting a Compost Bin in the UK
Ready to get started with a traditional cold compost bin? Here’s your simple, five-step plan.
Step 1: Choosing the Perfect Spot
Where you put your bin can make a difference. Find a spot that is:
- On bare soil or grass if possible. This allows worms and other beneficial creatures to get in from below and helps with drainage. If you have to put it on a hard surface like a patio, add a layer of soil or cardboard at the bottom first.
- Reasonably sunny but not in direct, baking sun. A bit of warmth helps speed things up, but you don’t want it to dry out completely in a heatwave. A spot with partial shade is often ideal.
- Accessible. You need to be able to get to it easily with a wheelbarrow to add materials and to get the finished compost out. Don’t hide it at the very end of the garden where it becomes a chore to use.
Step 2: Picking Your Bin (Daleks, Pallets, and Tumblers)
- Plastic Bins (e.g., ‘Dalek’ bins): These are great for beginners. They are neat, have a lid to keep rain out and heat in, and a hatch at the bottom for harvesting the compost. Many councils offer them at a reduced price.
- Wooden Bins: These are often larger and blend into the garden nicely. They are ideal if you have a lot of garden waste. You can build your own easily using old wooden pallets.
- Tumblers: These are barrels on a frame that you can rotate. They make mixing and aerating the compost very easy, but they can be expensive and often have a smaller capacity.
5 Crucial Things to Consider When Buying a Compost Bin
Step 3: Laying the Foundation
To get your compost bin off to a good start, begin with a solid foundation at the bottom. This helps with drainage and aeration. Create a 4-6 inch layer of coarse, woody material. This could be twigs, small branches, or even broken-up cardboard. This creates crucial air channels at the base of the bin.
Step 4: Adding Your Layers
Now you can start adding your waste. Remember the lasagne method! Start with a layer of ‘Greens’ on top of your woody base. This could be a batch of grass clippings or the contents of your kitchen caddy. Then cover it with a layer of ‘Browns’, like torn-up egg boxes or scrunched-up newspaper. Keep layering like this every time you add new material.
Step 5: Tending to Your Compost (Watering and Turning)
Your compost pile needs to be about as damp as a wrung-out sponge.
- Watering: In long, dry spells, your compost might need a drink. If it looks dry when you add new material, give it a quick water with a watering can. If it has a lid, this will be less of an issue.
- Turning (Aerating): With a cold compost system, you don’t strictly have to turn it, but doing so will speed things up a lot. Every month or two, use a garden fork to mix the contents, bringing the material from the outside into the hotter centre. This gets oxygen into the pile, which keeps the aerobic microbes happy and working fast.
The Golden Rules: What You Can and Absolutely Cannot Compost
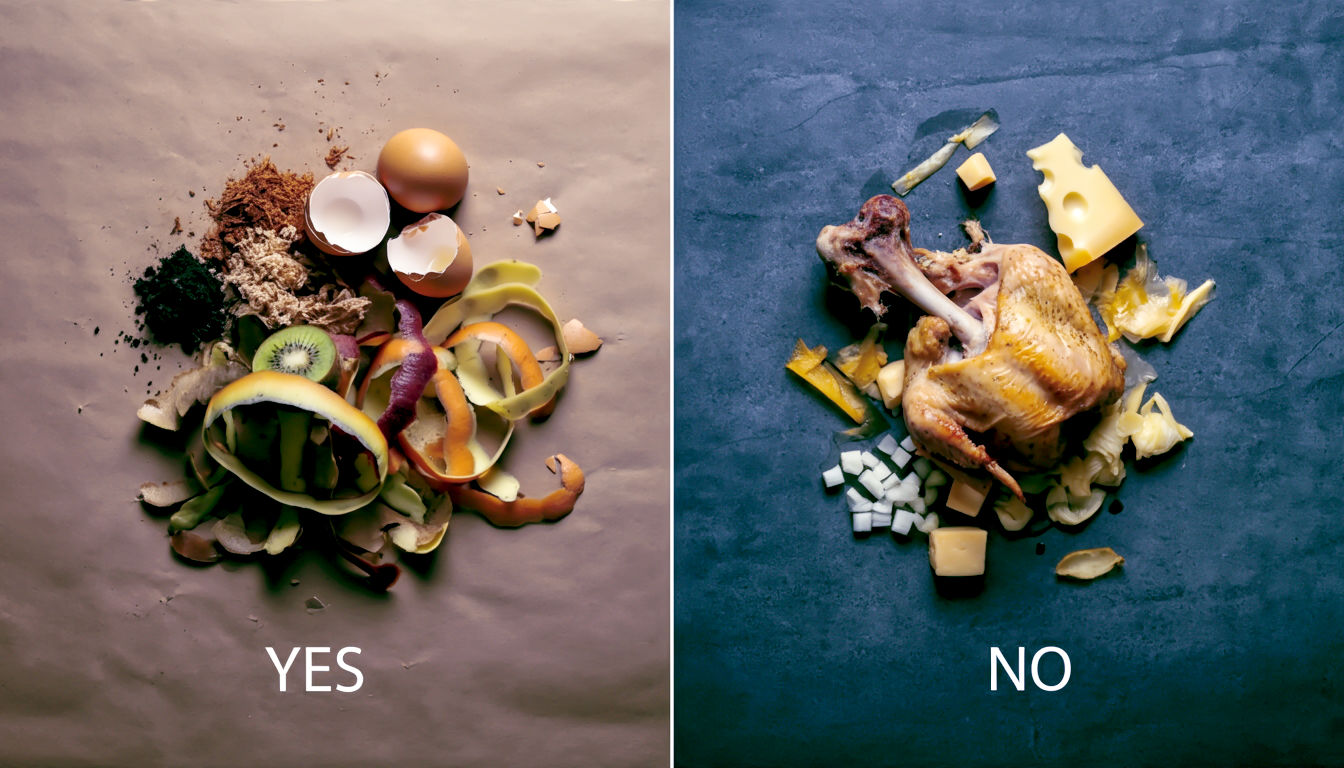
Getting this right is key to avoiding problems. Pin this list on your fridge!
The ‘Yes’ List: A Comprehensive A-Z Guide
The ‘No-Go’ Zone: What to Keep Out of Your Bin and Why
(Note: These apply to standard cold compost bins. Bokashi systems can handle most of them.)
Help! My Compost is… A Troubleshooting Guide for Common Problems
Don’t panic if things don’t seem perfect. Every composter runs into a hiccup now and then. Here’s how to fix the most common issues.
“…Smelly and Slimy.” (Too Wet)
This is the number one problem, and it’s almost always caused by too many ‘Greens’. A slimy, smelly pile means there isn’t enough air, and the wrong kind of (anaerobic) bacteria have taken over.
- The Fix: Add lots more ‘Browns’! Tip in plenty of torn-up cardboard, shredded paper, or dry leaves. Give the whole thing a good mix with a garden fork to introduce air and soak up the excess moisture. In future, make sure you add a layer of browns every time you add greens.
“…Dry and Doing Nothing.” (Too Dry)
If your pile is dry and dusty, the microbes won’t have enough water to work their magic, and the whole process will grind to a halt.
- The Fix: Use a watering can to add some water, then give it a good mix with a fork to distribute the moisture evenly. It should feel damp, not soggy. Adding more fresh ‘Greens’ like vegetable peelings will also help.
“…Attracting Rats or Flies.” (Pest Control)
The occasional fly is normal, but an infestation, or signs of rats, means something is wrong.
- Rats: Rats are usually attracted by the wrong kind of food. Make absolutely sure you are not adding any cooked food, meat, or dairy. A well-managed, properly balanced compost bin should not be interesting to them. If you do have a problem, make sure your bin is secure, and you could place chicken wire under the base to stop them from burrowing in.
- Fruit Flies: These are attracted to exposed kitchen waste.
- The Fix: Simply cover any fresh kitchen scraps you add with a layer of ‘Browns’ or some grass cuttings. This simple step will solve the problem almost instantly.
“…Full of Big Lumps.” (Improving Breakdown)
If you find whole potatoes or tough cabbage stalks when you harvest your compost, it just means they needed more help to break down.
- The Fix: Chop or break up tougher items into smaller pieces before you add them to the bin. The smaller the pieces, the faster they will decompose.
The Big Harvest: How to Know When It’s Ready and How to Use It
After months of patience, the moment of truth arrives. How do you know when your creation is ready to be used?
Signs of Ready Compost: The Look, Feel, and Smell Test
You’re looking for a material that is:
- Dark brown and crumbly, like rich fruit cake.
- Uniform in texture, with very few recognisable bits of the original ingredients left (though you might find the odd tough twig or eggshell).
- Smells sweet and earthy, like a woodland floor after rain. It should not smell sour, rotten, or like ammonia.
Depending on your method, this can take anywhere from a few months to over a year. The material at the bottom of the bin will be ready first.
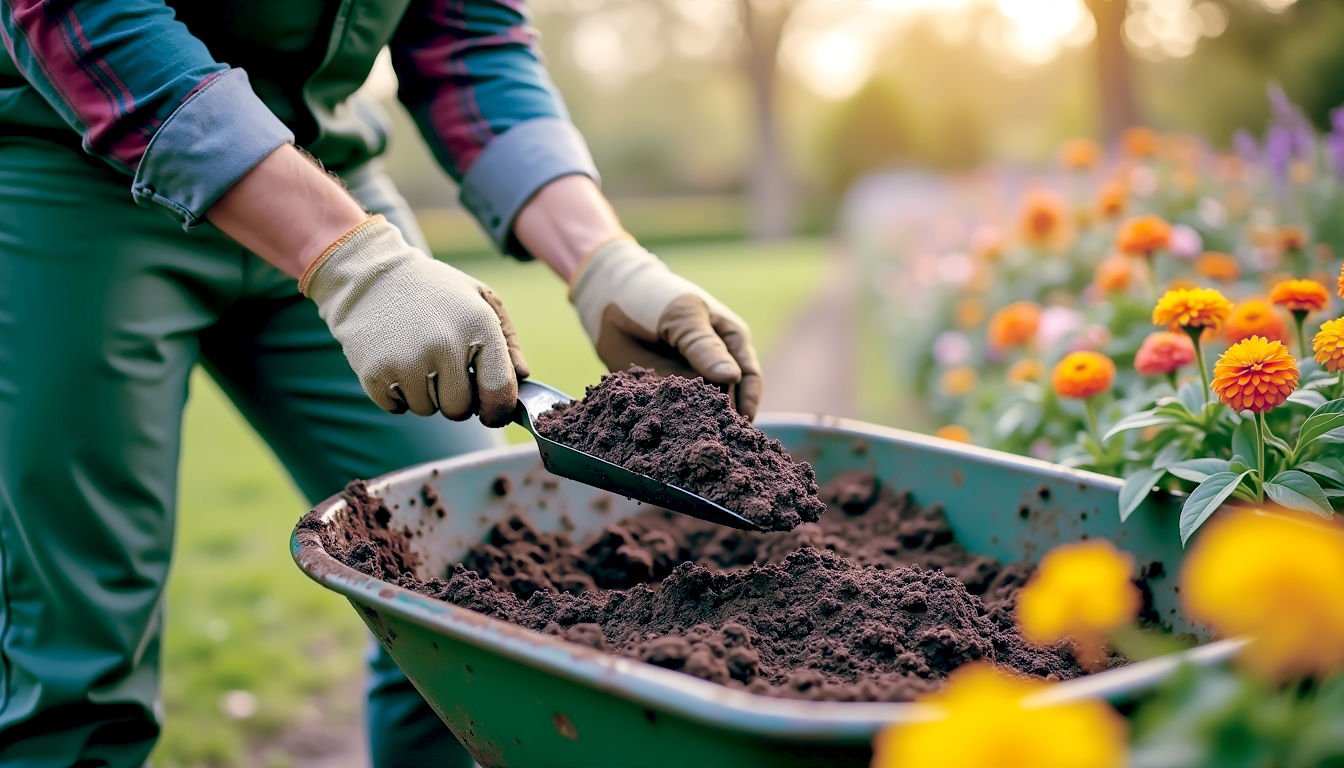
How to Get the Good Stuff Out
Most plastic bins have a little hatch at the bottom. You can open this and scoop out the ready compost. With a wooden bin or open heap, you’ll need to use a spade or fork to dig out the finished material from the bottom of the pile.
Don’t worry if some of it isn’t fully broken down. You can simply sieve it through a coarse garden sieve or a piece of chicken wire stretched over your wheelbarrow. The fine, crumbly stuff is your finished compost, ready to use. Anything that’s left in the sieve can be thrown back into the bin to continue breaking down.
Top Ways to Use Your ‘Black Gold’ in the Garden
Finished compost is incredibly versatile. Here are just a few ways to use it:
- As a Soil Improver: Dig a 2-3 inch layer into your vegetable beds or flower borders before planting. This will improve the soil structure and give your new plants a fantastic start.
- As a Mulch: Spread a thick layer (2-3 inches) on the surface of the soil around your shrubs, trees, and perennial plants. This acts like a blanket, suppressing weeds, holding in moisture, and slowly feeding your plants as worms draw it down into the soil.
- In Potting Mixes: Create your own superb, peat-free potting mix by mixing equal parts compost, leaf mould (if you have it), and sharp sand or perlite. It’s perfect for potting up plants.
- As a Lawn Feed: Sieve it to get a very fine material and scatter it lightly over your lawn in spring. Rake it in gently and water it. It’s a great natural alternative to chemical lawn feeds.
The Future is Fertile: Composting and Our Planet
Home composting is a small act with a big impact. Every household that composts is taking direct action to reduce waste, cut greenhouse gas emissions, and improve their local environment.
Across the UK, the movement is growing. Community composting schemes are popping up, where neighbours can bring their waste to a central point. Many councils are now offering separate food waste collections, which are taken to be composted or processed on an industrial scale. This all contributes to a ‘circular economy’, where the nutrients from our waste are returned to the soil to grow more food, rather than being lost in a landfill.
By starting a compost bin, you’re not just making fertiliser. You’re becoming part of a solution. You’re closing a loop, participating in a natural cycle as old as life itself, and playing your part in creating a healthier, more sustainable future.
Conclusion: Start Small, Make a Big Difference
We’ve covered a lot of ground, from the science of microbes to the practicalities of dealing with a slimy bin. But the key message is simple: you can do this.
Don’t aim for perfection from day one. Just start. Get a bin, put it in a corner, and start adding your scraps. Add some cardboard. See what happens. You’ll learn as you go, and soon it will become a simple, satisfying part of your daily routine.
The quiet magic happening at the bottom of your garden is waiting. It’s the magic of turning waste into life, of feeding your soil so it can feed your plants. It’s the rewarding feeling of knowing you’re doing something good for your little patch of the world, and for the planet we all share. Go on, give it a go.
Further Reading:
- Royal Horticultural Society (RHS): https://www.rhs.org.uk/advice/profile?pid=444
- Garden Organic: https://www.gardenorganic.org.uk/composting
- Recycle Now: https://www.recyclenow.com/reduce-waste/compositing