The Ultimate Beginner’s Guide: 6 Essential Photography Techniques to Transform Your Snaps
Ready to take properly good photos? This ultimate guide breaks down 6 essential photography techniques every beginner in the UK should know. Go from novice to confident photographer.

This post may contain affiliate links. If you make a purchase through these links, we may earn a commission at no additional cost to you.
We’ve all been there. You’re standing in front of something magnificent—a fiery sunset over the Cornish coast, the ancient stones of a ruined abbey, or just your kids finally playing nicely for once. You whip out your camera, convinced you’re about to capture a masterpiece. You press the button. And… it’s a bit rubbish. The sky is a flat white, the subject is a bit blurry, and the whole thing feels as flat as a pancake. It’s a photo, sure, but it doesn’t capture the feeling of being there.
If that sounds familiar, don’t worry. The gap between the photo you took and the photo you wanted to take isn’t about owning a camera that costs more than a small car. It’s about understanding a few simple, powerful ideas. It’s about learning to see the world like a photographer.
This guide is your first step. We’re going to ditch the confusing ‘Auto’ mode for good and learn six essential techniques that are the bedrock of great photography. Think of it not as a boring technical manual, but as learning a new language—the language of light, lines, and moments. By the end, you’ll have the confidence to take control of your camera and start creating images that truly tell a story. So, grab your camera, a cup of tea, and let’s get started.
Technique 1: Master the ‘Exposure Triangle’ and Ditch Auto Mode for Good
Right, let’s tackle the big one first. The ‘Exposure Triangle’ sounds intimidating, like something you’d need a protractor for, but the idea is actually very simple. It’s the key to telling your camera exactly how you want your picture to look.
What on earth is exposure?
In photography, exposure is simply how much light hits your camera’s sensor. It’s what makes your photo bright or dark.
Imagine you’re filling a bucket with water from a tap. To get the right amount of water (light), you can control three things:
- How wide you open the tap (Aperture)
- How long you leave the tap running (Shutter Speed)
- The pressure of the water (ISO)
If you get the balance right, your bucket fills perfectly. This is a well-exposed photo. If you let in too much light, the bucket overflows—your photo is overexposed, looking washed out and bright white. If you don’t let in enough, the bucket is half-empty—your photo is underexposed, looking dark and gloomy.
Your job as a photographer is to balance these three controls to get the perfect exposure every single time. Let’s meet the three amigos properly.
The Three Amigos: Aperture, Shutter Speed, and ISO
Aperture (The ‘How Wide’)
- Simplified Explanation: Think of your camera’s aperture as the pupil of its eye. It’s an opening inside the lens that can get wider or smaller to let in more or less light. We measure aperture in f-stops (e.g., f/1.8, f/4, f/16). Here’s the tricky bit you need to remember: a low f-number (like f/1.8) means a wide opening, letting in lots of light. A high f-number (like f/16) means a tiny opening, letting in very little light. It feels backwards, but you’ll get used to it.
- Detailed Explanation: Aperture does more than just control brightness. It has a massive creative effect on something called depth of field, which we’ll cover in Technique 4. For now, just know that a wide aperture (low f-number) creates that professional-looking blurry background, which is brilliant for portraits. A narrow aperture (high f-number) keeps everything from the foreground to the background sharp, which is what you want for a sweeping landscape shot.
- Practical Tip: Next time you’re taking a photo of a friend or your dog in the garden, try setting your camera to its lowest f-number (widest aperture). You’ll see them pop into focus while the messy shed and the neighbour’s fence blur away beautifully.
Shutter Speed (The ‘How Long’)
- Simplified Explanation: If the aperture is the pupil, the shutter is the eyelid. Shutter speed is the length of time that eyelid stays open, letting light hit the sensor. We measure it in seconds or, more often, fractions of a second (e.g., 1/1000s, 1/60s, 1s).
- Detailed Explanation: Shutter speed is all about capturing movement. A fast shutter speed (like 1/1000s) freezes a moment in time. It’s perfect for capturing a footballer mid-kick, a bird in flight, or a splash in a puddle. A slow shutter speed (like 1 second or longer) does the opposite—it blurs anything that moves. This can be used creatively to make waterfalls in the Brecon Beacons look silky and ethereal or to capture the trails of car lights zipping through London at night. The big danger with slow shutter speeds is camera shake. If you move the camera even a tiny bit while the shutter is open, your whole photo will be a blurry mess. As a rule of thumb, for handheld shots, try to keep your shutter speed at 1/60th of a second or faster. Anything slower, and you’ll need a tripod.
- Practical Tip: Head to a busy street. Try using a fast shutter speed (1/500s or faster) to freeze the people and cars perfectly. Then, if you have a tripod, try a very slow shutter speed (a few seconds) at dusk to blur the traffic into beautiful streaks of light.
ISO (The ‘How Sensitive’)
- Simplified Explanation: ISO (pronounced ‘eye-so’) is a measure of how sensitive your camera’s sensor is to light. It’s like putting digital sunglasses on your camera. On a bright, sunny day at the beach, you don’t need much sensitivity, so you’d use a low ISO (like 100 or 200). If you’re trying to take a photo inside a dimly lit pub or an old cathedral, you need the sensor to be much more sensitive, so you’d use a high ISO (like 1600, 3200, or even higher).
- Detailed Explanation: So why not just crank the ISO up all the time? There’s a catch. The higher the ISO, the more you introduce something called digital noise (or grain) into your picture. At low ISOs, your image will be clean and smooth. At very high ISOs, it will start to look speckled and blotchy, a bit like a poor-quality photocopy. Modern cameras are getting incredibly good at handling high ISOs, but the rule is always the same: keep your ISO as low as you can for the available light.
- Practical Tip: The next time you’re indoors without a flash, try taking a photo. It’ll probably be dark and blurry. Now, increase your ISO until you can get a fast enough shutter speed (like 1/60s) to get a sharp, bright photo. You’ll see the magic of ISO at work.
Putting It All Together: The Balancing Act
These three settings work together constantly. If you change one, you have to adjust another to keep the same exposure.
- Want a blurry background? You’ll open your aperture wide (low f-number). This lets in more light, so you’ll need to compensate with a faster shutter speed or lower ISO.
- Want to freeze fast action? You’ll use a fast shutter speed. This lets in less light, so you’ll need to open your aperture or increase your ISO.
It sounds complicated, but your camera has clever semi-automatic modes like Aperture Priority (A or Av) and Shutter Priority (S or Tv) to help. In Aperture Priority, you choose the aperture you want (for creative control of that blurry background), and the camera automatically picks the right shutter speed. It’s a brilliant stepping stone away from full Auto mode.
Technique 2: The Rule of Thirds – The Secret to Pleasing Pictures
Now that we’ve got the technical stuff out of the way, let’s talk about what you actually put in your picture and where you put it. The easiest and most powerful compositional trick in the book is the Rule of Thirds.
Ditching the Bullseye
Beginners have a natural tendency to put their subject right in the dead centre of the frame. It makes sense—it’s the important bit, after all. But this ‘bullseye’ approach often leads to photos that feel static, balanced, and a little bit… boring.
The Rule of Thirds fixes this instantly.
- Simplified Explanation: Imagine drawing a noughts-and-crosses grid over your camera screen, dividing it into nine equal squares. The rule suggests that you should place the most important elements of your scene either along these lines or at the points where they intersect.
- Detailed Explanation: Placing a subject off-centre creates a more dynamic and visually interesting image. It gives the subject ‘breathing room’ and encourages the viewer’s eye to move around the frame, exploring the whole scene rather than just staring at the middle. For example, if you’re taking a picture of a person looking to the right, you’d place them on the left vertical line, giving them space to ‘look into’ within the frame. If you’re shooting a landscape, placing the horizon on the bottom third line will emphasise a vast, dramatic sky. Placing it on the top third line will draw attention to an interesting foreground.
- Practical Tip: Nearly every digital camera and smartphone has an option to display a 3×3 grid on the screen. Turn it on! It’s the easiest way to start practising. The next time you’re photographing anything—a person, a lighthouse, a dog—consciously place it on one of the intersection points instead of in the centre. You’ll be amazed at the difference it makes.
When to Break the Rule
Of course, it’s called the Rule of Thirds, but it’s really more of a guideline. Once you understand why it works, you’ll know when to break it. If you’re photographing something very symmetrical, like a perfect reflection in a Scottish loch or the front of a grand Georgian building in Bath, placing it dead centre can be incredibly powerful and effective. The key is to make the choice deliberately, not by accident.
Technique 3: Use Leading Lines to Guide the Viewer’s Eye
Great photos don’t just show you something; they lead you on a journey. One of the most effective ways to do this is by using leading lines.
What are Leading Lines?
- Simplified Explanation: A leading line is any line in your photograph that leads the viewer’s eye from one part of the image to another, usually towards the main subject. These lines are everywhere once you start looking for them: roads, paths, railway tracks, fences, rivers, or even the edge of a shadow.
- Detailed Explanation: Our eyes are naturally drawn to lines. By composing your photo so that a line starts near the bottom of the frame and travels inwards, you create a powerful sense of depth and perspective. It pulls the viewer into the scene and makes a two-dimensional image feel three-dimensional. The best leading lines don’t just point aimlessly; they lead to a ‘reward’—a subject of interest like a building, a person, or a distant mountain. Different types of lines create different feelings.
- Straight lines (like a pier or a road) feel direct and fast.
- Curving lines (like a winding country lane or a river) feel more gentle, graceful, and meandering.
- Diagonal lines create a sense of energy and movement.
- Practical Tip: Go for a walk specifically to find leading lines. You could follow a coastal path in Pembrokeshire, use the yellow lines on a road, trace the curve of a dry-stone wall in the Yorkshire Dales, or use the structure of a bridge like the Clifton Suspension Bridge. Position yourself so the line enters from a corner and try to place your main subject at the end of it. It’s a simple technique that adds a huge amount of narrative punch to your photos.
Technique 4: Play with Depth of Field for That ‘Pro’ Look
Remember when we talked about aperture and its magical side-effect? That side-effect is called depth of field (often shortened to DoF), and mastering it is a sure-fire way to make your photos look more professional and intentional.
Shallow vs. Deep: What’s the Difference?
Depth of field refers to how much of your image is in acceptably sharp focus, from front to back.
- Simplified Explanation: A shallow depth of field is when only a very thin slice of your picture is sharp, and everything in front and behind it is blurry. This is the effect you see in professional portraits where the person is crystal clear, but the background melts away into a beautiful, soft wash of colour. A deep depth of field is the opposite: everything in the scene, from the flowers at your feet to the mountains miles away, is sharp and in focus. This is what you typically want for a grand landscape photo.
- Detailed Explanation: As we learned in Technique 1, aperture is your main control here. A wide aperture (low f-number like f/1.8) gives you a shallow DoF. A narrow aperture (high f-number like f/16) gives you a deep DoF. But two other factors also have a big impact:
- Focal Length: Telephoto (zoomed in) lenses naturally produce a shallower depth of field than wide-angle lenses.
- Distance: The closer you are to your subject, the shallower the depth of field will be.
How to Get That Blurry Background (Shallow DOF)
To get that classic portrait look, you need to combine these three factors. Here’s your recipe:
- Set your camera to Aperture Priority (A/Av) mode.
- Choose your widest aperture (the lowest f-number your lens can do).
- Get as close to your subject as you can.
- If possible, use a lens with a bit of zoom.
- Make sure the background is as far away from your subject as possible.
- Practical Tip: Find a single flower in a field or a mushroom in the woods. Get down low and close to it. Use the recipe above and watch as the flower stands out in perfect focus against a beautifully blurred background.
How to Get Everything Sharp (Deep DOF)
For those epic landscape shots where you want every last detail to be crisp:
- Set your camera to Aperture Priority (A/Av) mode.
- Choose a narrow aperture (a high f-number, like f/11 or f/16).
- Remember that a narrow aperture lets in less light, so your shutter speed will be slower. You’ll probably need a tripod to avoid camera shake, especially if the light is low.
- Practical Tip: Head to a viewpoint overlooking a city or a wide valley, like Arthur’s Seat in Edinburgh. Put your camera on a tripod, set your aperture to f/11, and take a shot. Zoom in on the photo afterwards and marvel at how everything, from the nearby rocks to the distant buildings, is perfectly sharp.
Technique 5: Frame Your Shot for Extra Punch
This is one of the most fun and creative compositional techniques. It involves using elements within the scene itself to create a frame within your frame.
More Than Just a Pretty Border
- Simplified Explanation: Instead of just pointing your camera directly at your subject, look for things you can shoot through. This could be anything: a doorway, an archway, a window, overhanging tree branches, a gap in a fence, or even a crowd of people.
- Detailed Explanation: Why does this work so well? Firstly, it adds a sense of depth. Having elements in the foreground gives the illusion that the viewer is looking into a three-dimensional scene. Secondly, it adds context. Shooting a person through a cosy pub window tells a different story than shooting them in an open field. Thirdly, and most importantly, it draws the eye. A frame naturally directs the viewer’s attention straight to the main subject, making the composition stronger and more focused.
Finding Frames in the Wild
Frames are absolutely everywhere once you start looking. Our country is full of them: think of the ancient stone windows in Fountains Abbey, the arches of a Victorian railway viaduct, or the gnarly, twisted branches of an old oak tree in the New Forest.
- Practical Tip: The next time you’re out with your camera, give yourself a challenge: don’t take a single photo without shooting through something. It will force you to move around and see your surroundings differently. You might crouch down to shoot through some long grass, or press your lens against a gap in a hedge. It forces you to be creative and the results are often wonderfully surprising.
Technique 6: It’s All About the Light
We’ve saved the most important technique for last. You can master every setting on your camera and learn every compositional rule, but if the light is bad, your photos will be bad. It’s that simple. The word ‘photography’ literally means ‘drawing with light’. Light is your paint. Learning to find and use good light is the single biggest thing you can do to improve your photos.
Meet the ‘Golden Hour’ and ‘Blue Hour’
The time of day you shoot has a colossal impact on your images.
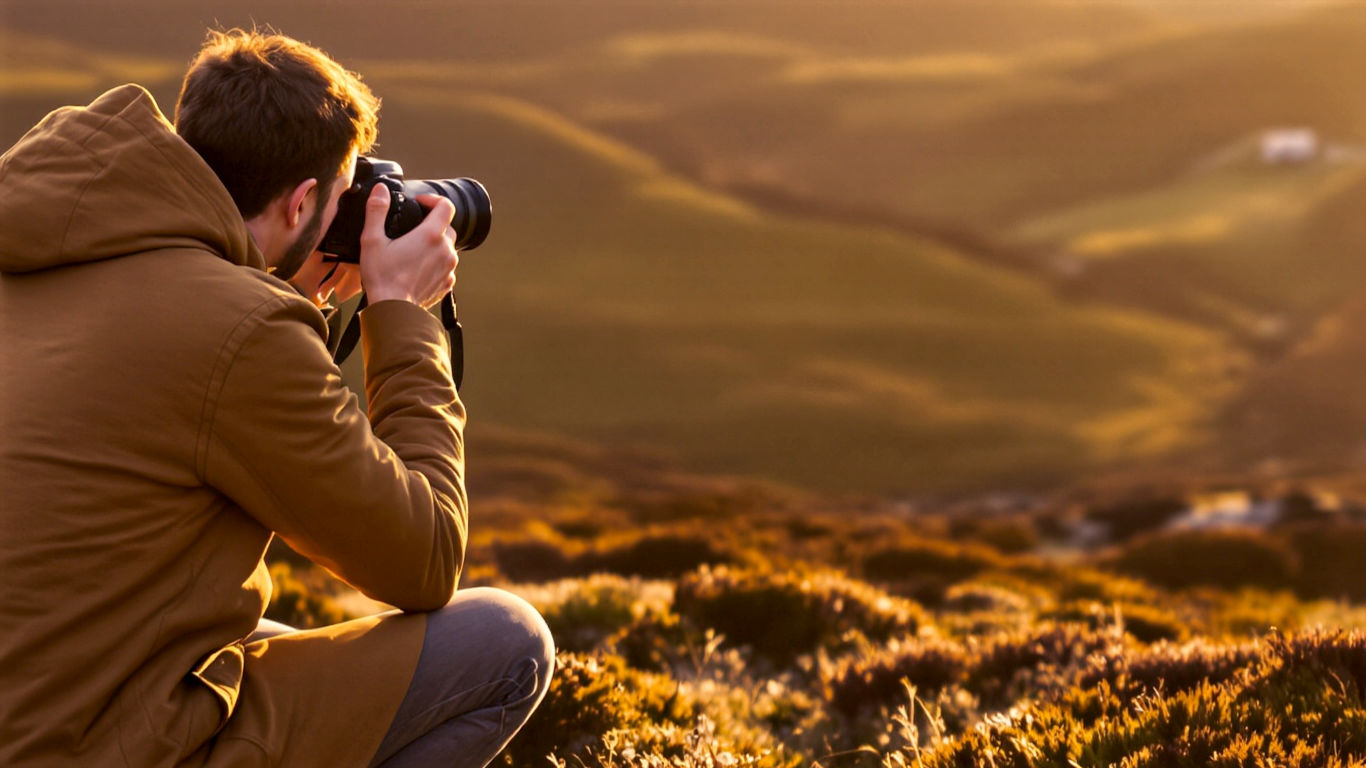
- The Golden Hour: This is the magical period of roughly one hour after sunrise and one hour before sunset. During this time, the sun is low in the sky, and its light is soft, warm, and golden. It creates long, beautiful shadows that add depth and texture to landscapes. It’s incredibly flattering for portraits, making skin glow. If you can only shoot at one time of day, make it the golden hour.
- The Blue Hour: This is the period just before the sun rises and just after it sets, when the sun is below the horizon but still lighting up the sky. The light is soft, diffused, and has a deep blue or purple hue. It’s a fantastic, moody time for shooting cityscapes, as the cool blue of the sky contrasts beautifully with the warm yellow glow of the streetlights and building windows.
Hard Light vs. Soft Light
The quality of light is just as important as its colour.
- Hard Light: This is the light you get in the middle of a clear, sunny day. The sun is high and direct, creating dark, sharp-edged shadows and high contrast. It’s generally unflattering for photos of people, as it creates harsh shadows under their eyes and noses. However, it can be brilliant for bold, graphic architectural photos or for creating dramatic black and white images.
- Soft Light: Think of a classic overcast British day. The clouds act like a giant lampshade or ‘softbox’ in the sky, scattering the sun’s light and making it soft, even, and diffused. This is a photographer’s secret weapon! It creates very gentle shadows and is incredibly flattering for portraits. So next time it’s grey and cloudy, don’t put your camera away—get out and take some photos of people!
Practical Tip: Start Chasing the Light
Start paying attention to light, even when you don’t have your camera. Notice how the long shadows of the late afternoon make everything look more interesting. Notice the soft, even light on a cloudy day. Use an app on your phone to check the sunrise and sunset times, and make a plan to go out with your camera during the golden hour. It will utterly transform your photography.
Putting It All Together: Your First Masterpiece
Right, you’ve learned the theory. Now it’s time to put it all into practice. All these techniques work together, like ingredients in a recipe. A great photo might use leading lines to guide you to a subject that is placed according to the rule of thirds, shot with a shallow depth of field during the golden hour.
Here’s a small project for you:
- Pick a location: Your local park, a nearby bit of countryside, or even just your garden.
- Pick a time: Go during the golden hour.
- Find your shot: Look for leading lines (a path, a fence) and a frame (some overhanging branches).
- Compose: Place your subject (a tree, a person, a dog) on a rule of thirds intersection.
- Set your camera: Use Aperture Priority mode to create a shallow depth of field to make your subject stand out.
- Check your exposure: Keep your ISO low and make sure your shutter speed is fast enough to hold steady. Then, take the shot.
Conclusion: The Journey Has Just Begun
We’ve covered a lot, from the technical nuts and bolts of the exposure triangle to the creative art of composition and light. These six techniques are your foundation. They are the building blocks you’ll use to create every photo you take from now on.
The most important thing now is to get out and practise. Don’t be afraid to take bad photos—everyone does. Every mistake is a lesson. Start to see the world in terms of light, lines, and frames. The more you shoot, the more these techniques will become second nature. You’ll stop thinking about them and start feeling them. And that’s when the real fun begins. You’re no longer just a happy snapper; you’re a photographer. Now go and show the world how you see it.
Further Reading:


